

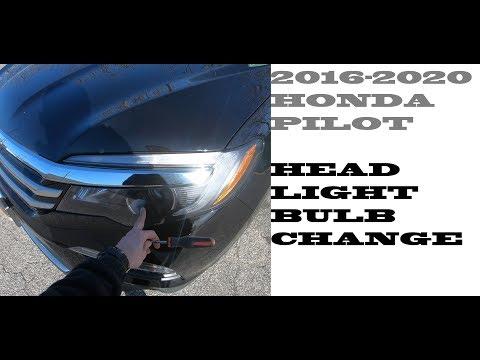







How to Replace the LED Headlight Assembly on a 2016-2022 Honda Pilot
Step-by-step guide with bumper removal, tools, parts, torque specs, and safety tips for 2016, 2017, 2018, 2019, 2020, 2021, 2022
How to Replace the LED Headlight Assembly on a 2016-2022 Honda Pilot
Step-by-step guide with bumper removal, tools, parts, torque specs, and safety tips for 2016, 2017, 2018, 2019, 2020, 2021, 2022


🔧 Pilot - Headlight Assembly Replacement
Your Pilot Elite uses LED headlight assemblies, so the main low/high beam LED is not replaced like a normal bulb. If the headlight LED has failed, the lens is damaged, or moisture is inside the housing, the correct repair is replacing the complete headlight assembly.
Difficulty Level: Intermediate | Estimated Time: 2-3 hours
⚠️ Safety & Precautions
- ⚠️ Park on level ground and let the front of your Pilot cool before working near the radiator area.
- ⚠️ Disconnect the negative battery cable before unplugging headlight connectors to prevent electrical shorts.
- ⚠️ Support the bumper cover while removing it so it does not scratch paint or pull wiring.
- ⚠️ Do not touch LED electrical terminals with wet hands or metal tools.
- ⚠️ Your Pilot has front parking sensors and camera/driver-assist equipment in the front bumper area. Do not pull the bumper cover away hard.
🔧 Required Tools
You'll need the following tools for this repair:
- 10mm socket
- Ratchet handle
- 6-inch socket extension
- Phillips #2 screwdriver
- Flat-blade screwdriver
- Plastic trim removal tool set
- Clip removal pliers
- Torque wrench inch-pound range
- Painter’s tape 1-inch
- Microfiber towel
- Safety glasses
- Nitrile gloves
🔩 Required Parts
HowToo sells all the parts you need for this repair:
- LED headlight assembly - Qty: 1
- Front bumper push clips - Qty: As needed
- Fender liner push clips - Qty: As needed
📋 Before You Begin
- 🚗 Park your Pilot on level ground with the transmission in Park and the parking brake set.
- 🔋 Disconnect the negative battery cable using a 10mm socket. A negative cable is the black battery cable marked with a minus symbol.
- 🧼 Apply 1-inch painter’s tape along the fender edges and bumper edges near the headlight to protect the paint.
- 🧰 A push clip is a plastic fastener with a center pin. Lift the center first, then remove the clip body.
- 💡 Replace the headlight assembly with the same side and same LED type. Driver and passenger assemblies are different.
🔨 Step-by-Step Instructions
Follow these steps in order:
Step 1: Disconnect the Battery
- Use a 10mm socket and ratchet handle to loosen the negative battery terminal nut.
- Lift the negative cable off the battery post and move it aside so it cannot spring back.
- Tip: Black cable means negative.
Step 2: Protect the Painted Edges
- Use 1-inch painter’s tape around the bumper-to-fender seam and the headlight edge.
- Place a microfiber towel nearby to rest small parts on without scratching them.
Step 3: Remove Upper Radiator Cover Clips
- Open the hood.
- Use a flat-blade screwdriver or plastic trim removal tool to lift the centers of the plastic push clips on the upper radiator cover.
- Use clip removal pliers to remove the clips.
- Lift the upper plastic cover out and set it aside.
Step 4: Remove Upper Bumper Fasteners
- Use a 10mm socket, 6-inch socket extension, and ratchet handle to remove the upper bumper bolts along the front edge.
- Use a plastic trim removal tool to remove any remaining upper bumper push clips.
- Keep the bolts and clips grouped so they go back in the same locations.
Step 5: Loosen the Front Fender Liners
- Turn the steering wheel away from the side you are working on for more room.
- Use a Phillips #2 screwdriver to remove the screws at the front edge of the wheel opening.
- Use a clip removal pliers or plastic trim removal tool to remove the fender liner push clips.
- Pull the front of the fender liner back gently.
Step 6: Remove Lower Bumper Fasteners
- Use a Phillips #2 screwdriver to remove the lower splash shield screws under the front bumper.
- Use a 10mm socket and ratchet handle to remove any lower bumper bolts.
- Use clip removal pliers to remove lower push clips.
- Tip: Take photos before removing clips.
Step 7: Release the Bumper Cover Sides
- Start at the wheel opening on the side of the headlight being replaced.
- Use your hands and a plastic trim removal tool to gently release the bumper cover from the side retaining tabs.
- Pull straight outward at the bumper corner. Do not pry upward hard.
- Repeat the other side only as much as needed to move the bumper cover forward.
Step 8: Move the Bumper Cover Forward
- With a helper if available, slide the bumper cover forward a few inches.
- Use a flat-blade screwdriver only if needed to release connector locks gently.
- Unplug fog/parking sensor/front bumper wiring connectors if they prevent access.
- Do not let the bumper hang by wiring.
Step 9: Remove the Headlight Assembly Bolts
- Use a 10mm socket, 6-inch socket extension, and ratchet handle to remove the headlight mounting bolts.
- Look for bolts along the top, inner side, and lower/front mounting points of the headlight.
- Support the headlight with one hand while removing the final bolt.
Step 10: Unplug and Remove the Headlight
- Slide the headlight forward carefully.
- Press the locking tabs on the electrical connectors and unplug them by hand.
- If a connector is tight, use a flat-blade screwdriver to gently lift the lock tab only.
- Remove the headlight assembly from your Pilot.
Step 11: Install the New Headlight Assembly
- Connect the wiring plugs to the new headlight by hand until each connector clicks.
- Position the new headlight into the body opening.
- Start all mounting bolts by hand first to avoid cross-threading.
- Use a 10mm socket, 6-inch socket extension, and torque wrench inch-pound range to tighten the headlight bolts to Torque to 8 Nm (71 in-lbs).
Step 12: Test the Headlight Before Reassembly
- Reconnect the negative battery cable temporarily using a 10mm socket.
- Turn the headlights on and check low beam, high beam, daytime running light, turn signal, and marker light operation.
- Turn the lights off and disconnect the negative battery cable again using a 10mm socket.
- Tip: Test now before bumper installation.
Step 13: Reinstall the Bumper Cover
- Reconnect any bumper wiring connectors by hand until they click.
- Align the bumper cover with the fender tabs and press the sides in by hand until seated.
- Use a 10mm socket and ratchet handle to reinstall the upper and lower bumper bolts.
- Use a torque wrench inch-pound range to tighten small bumper bolts to Torque to 5 Nm (44 in-lbs).
- Reinstall push clips by hand. Push the clip body in first, then push the center pin flush.
Step 14: Reinstall Fender Liners and Upper Cover
- Use a Phillips #2 screwdriver to reinstall the wheel opening screws.
- Use clip removal pliers or your fingers to reinstall any fender liner push clips.
- Place the upper radiator cover back into position.
- Install the upper cover clips by hand.
Step 15: Reconnect the Battery
- Use a 10mm socket and ratchet handle to tighten the negative battery cable.
- Tighten the terminal snugly. Do not over-tighten it.
✅ After Repair
- ✅ Turn on the headlights and confirm all functions work on both sides.
- ✅ Check that the bumper cover gaps are even at the fenders, grille, and headlight edges.
- ✅ Verify parking sensors and front camera/driver-assist warnings are not showing on the dash.
- ✅ Park 25 feet from a flat wall at night and confirm the beam pattern is level and not aimed too high.
- ✅ If the beam is clearly misaligned, headlight aim adjustment should be performed using proper aiming equipment.
💰 DIY vs Shop Cost
Shop Cost: $900-$1,800+ (parts + labor)
DIY Cost: $550-$1,300+ (parts only)
You Save: $250-$500 by doing it yourself!
Shop labor rates vary but typically run $100-$150/hour. This repair takes a shop approximately 2-3 hours.
🎯 Ready to get started?
HowToo makes it easy: same-day/2-day shipping on every part, plus all the tools and specialty tools you need! Check out the parts and tools sections below to add everything to your cart.