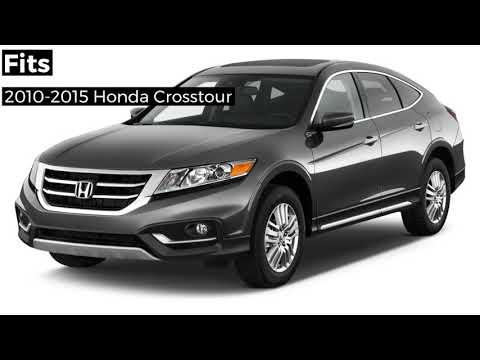







How to Replace the Third Brake Light (High-Mount Stop Lamp) on a 2014 Honda Crosstour
Step-by-step liftgate trim removal, required tools/parts, wiring tips, and 9 Nm (80 in-lbs) torque spec for 2012, 2013, 2014, 2015
How to Replace the Third Brake Light (High-Mount Stop Lamp) on a 2014 Honda Crosstour
Step-by-step liftgate trim removal, required tools/parts, wiring tips, and 9 Nm (80 in-lbs) torque spec for 2012, 2013, 2014, 2015


🔧 Crosstour - Rear Third Brake Light Replacement
Your Crosstour’s “rear third light” is the high-mount stop lamp (the extra brake light up high). Replacing it usually means removing a small interior liftgate trim panel, unplugging the lamp, and swapping the lamp assembly or bulbs (depending on what’s installed).
Difficulty Level: Beginner | Estimated Time: 0.5-1.0 hours
⚠️ Safety & Precautions
- ⚠️ Let the liftgate stay fully open and stable before working underneath it.
- ⚠️ Use plastic trim tools to avoid cracking interior panels and clips.
- ⚠️ If you disconnect the battery, you may lose radio presets; not required for this job.
- ⚠️ Don’t touch bulb glass with bare fingers (skin oils can shorten bulb life) if your lamp uses replaceable bulbs.
🔧 Required Tools
You'll need the following tools for this repair:
- Plastic trim removal tool set
- Phillips #2 screwdriver
- 10mm socket
- 1/4" drive ratchet
- 1/4" drive 3" extension
- Torque wrench (inch-pound or low-range Nm)
- Clean nitrile gloves
- Safety glasses
- Flashlight
🔩 Required Parts
HowToo sells all the parts you need for this repair:
- High-mount stop lamp (rear third brake light) assembly - Qty: 1
- Liftgate trim panel clips - Qty: 2-6
- High-mount stop lamp bulbs - Qty: 1-2 (only if your assembly uses replaceable bulbs)
📋 Before You Begin
- Park on level ground and shift to P.
- Open the liftgate fully.
- Lay a towel over the bumper area to protect paint while you work.
- Trim clips can pop—wear safety glasses.
🔨 Step-by-Step Instructions
Follow these steps in order:
Step 1: Remove the inner liftgate trim panel
- Use a flashlight to locate the access panel/trim around the inside of the liftgate near the third brake light area.
- Use a plastic trim removal tool set to gently pry at the edge of the panel and pop the clips free.
- If your panel has screws, remove them with a Phillips #2 screwdriver, then continue releasing clips with the plastic trim removal tool set.
- Pry close to each clip to avoid bending the panel.
Step 2: Disconnect the third brake light connector
- Locate the lamp wiring connector behind the third brake light.
- Press the locking tab and unplug it by hand (use clean nitrile gloves for grip if needed).
Step 3: Remove the third brake light
- Remove the lamp retaining nuts/bolts using a 10mm socket, 1/4" drive ratchet, and 1/4" drive 3" extension.
- Support the lamp with one hand as you remove the last fastener so it doesn’t drop.
- From the outside, carefully lift the lamp away from the liftgate. If it feels stuck, gently work it loose—do not pry against paint.
Step 4: Transfer parts (if needed) and install the new lamp
- If your replacement is a full assembly, set the old one aside and position the new lamp in place.
- If your lamp uses replaceable bulbs, swap the bulb(s) using clean nitrile gloves (avoid touching the glass).
- Make sure the lamp gasket/seal sits flat all the way around (this prevents water leaks).
Step 5: Tighten fasteners and reconnect wiring
- Thread the nuts/bolts by hand first to avoid cross-threading.
- Tighten using a 10mm socket and 1/4" drive ratchet until snug.
- Final tighten with a torque wrench (inch-pound or low-range Nm): Torque to 9 Nm (80 in-lbs).
- Reconnect the electrical plug until it clicks in place.
- Overtightening can crack the lamp housing.
Step 6: Reinstall the liftgate trim panel
- Line up the trim panel and clips with their holes.
- Press the panel straight in by hand to snap clips back in.
- Reinstall any screws using a Phillips #2 screwdriver.
- If any clip is damaged, replace it with new liftgate trim panel clips before final assembly.
✅ After Repair
- Press the brake pedal (or have a helper press it) and confirm the third brake light illuminates evenly.
- Check the left and right brake lights too (sometimes multiple brake lights fail from the same issue).
- Spray a little water over the lamp area and check inside for moisture after a few minutes (quick leak check).
💰 DIY vs Shop Cost
Shop Cost: $120-$280 (parts + labor)
DIY Cost: $35-$170 (parts only)
You Save: $85-$110 by doing it yourself!
Shop labor rates vary but typically run $100-$150/hour. This repair takes a shop approximately 0.5-1.0 hours.
🎯 Ready to get started?
HowToo makes it easy: same-day/2-day shipping on every part, plus all the tools and specialty tools you need! Check out the parts and tools sections below to add everything to your cart.
Assumption: Rear third light is the liftgate high-mount stop lamp held with 10mm fasteners; procedure covers the common Crosstour setup.