






2018 Chevrolet Camaro Alternator Replace Guide: Tools, Torque & Steps to Fix
Also works for 2016, 2017, 2018, 2019
2018 Chevrolet Camaro Alternator Replace Guide: Tools, Torque & Steps to Fix
Also works for 2016, 2017, 2018, 2019


Camaro - Alternator Replacement 🔧
I’ll walk you through replacing the alternator on your LT (3.6L V6, manual). It’s a beginner-friendly job with patience. First, two quick questions:
- 🧰 Do you have basic hand tools (ratchets, sockets, wrenches) and a floor jack with stands?
- 🔋 Will you be installing a new alternator or a remanufactured unit? Helps with warranty and core return tips.
Tools & Parts You’ll Need 🛠️
- 🧩 Alternator (3.6L LGX engine, with 150A rating; match by part number)
- 🧰 Socket set: 10mm, 13mm, 15mm, 16mm, 18mm
- 🧰 Wrenches: 10mm, 13mm
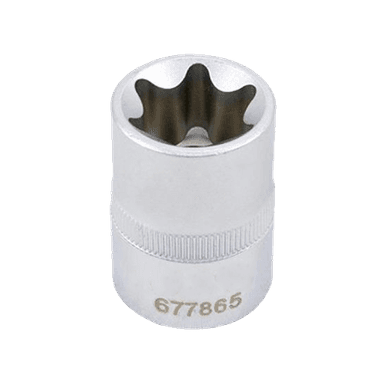
- 🧰 Torx bit: T50 (for belt tensioner on some builds)
- 🧰 Serpentine belt tool or long-handled 3/8" or 1/2" breaker bar; gives extra leverage on the belt tensioner
- 🧰 Torque wrench (10–75 lb-ft range) — tightens bolts to factory spec
- 🧰 Trim tool — plastic prying tool; pops fasteners without damage
- 🧰 Floor jack + jack stands — support the car safely
- 🧰 Fender cover — protects paint while you work
- 🧰 Multimeter — checks battery/charging voltage
- 🧰 Dielectric grease — light coat on electrical connectors to resist corrosion
- 🧰 Replacement serpentine belt (optional but smart if old)
- 🧰 Battery memory saver (optional) — keeps radio presets when battery is disconnected
Safety First ⚠️
- 🧯 Disconnect the battery negative cable (10mm) before touching the alternator. Prevents sparks.
- 🧯 Support the vehicle with jack stands if lifting. Never rely on the jack alone.
- 🧯 Keep fingers clear of the belt path. That spring tensioner is strong.
Belt Routing 📎
The 3.6L LGX uses a single serpentine belt. Snap a photo of the belt routing before removal. If the under-hood decal is missing, draw a quick sketch.
Removal Steps 🧪
- 🛑 Battery: Open trunk, lift floor panel, disconnect negative (-) terminal (10mm).
- 🛑 Access: Remove the engine appearance cover (pull up) for room.
- 🛑 Relieve belt tension: Insert your serpentine tool/breaker bar into the tensioner square drive (3/8" or 1/2" depending on build) and rotate clockwise. Slip the belt off the alternator pulley only. No need to fully remove belt.
- 🛑 Unplug alternator:
- Press tab and remove the small regulator connector.
- Remove the protective cap and the B+ cable nut (13mm). Stow cable safely.
- 🛑 Unbolt alternator:
- Remove the upper mounting bolt (15mm).
- Remove the lower pivot bolt (15mm). Support the alternator as you pull it free.
- 🛑 If tight in the bracket, gently pry with a trim tool or wiggle to break the locating sleeves free. A dab of penetrating oil helps.
Install Steps ✅
- 🔧 Compare units: Clocking, pulley, and connector must match. Transfer any spacers.
- 🔧 Set the alternator into the bracket. Install lower pivot bolt finger-tight, then the upper bolt.
- 🔧 Torque bolts:
- Alternator mounting bolts: 37 lb-ft (50 N·m)
- B+ terminal nut: 15 lb-ft (20 N·m)
- 🔧 Reconnect the regulator connector until it clicks. Add a thin smear of dielectric grease to seal (optional).
- 🔧 Re-route belt and rotate the tensioner clockwise. Slip belt over the alternator pulley. Double-check all ribs seated on every pulley.
- 🔧 Refit the engine cover.
- 🔧 Reconnect battery negative (10mm) and snug to ~62 in-lb (7 N·m). Do not overtighten.
Post-Repair Checks 🔍
- 🧪 Start engine. Measure across the battery: you want 13.8–14.8V at idle with lights off.
- 🧪 Turn on headlights and blower. Voltage should hold above 13.5V.
- 🧪 Verify charge light is off and no “Service Charging System” message.
- 🧪 If the belt chirps, recheck routing and tensioner alignment.
Tips & Tricks 💡
- 🧠 If the alternator felt stuck, the bracket’s steel sleeves can “pinch.” A light tap on the alternator ear while tightening helps it seat.
- 🧠 If the belt is cracked or glazed, replace it now. Belt routing saves time later.
- 🧠 A weak battery can cook a new alternator. Have it load-tested if cranking is slow.
Torque Summary 📏
- 🧷 Alternator bolts: 37 lb-ft (50 N·m)
- 🧷 B+ terminal nut: 15 lb-ft (20 N·m)
- 🧷 Battery negative clamp: 62 in-lb (7 N·m)
Parts & Tools from HowToo 🛒
I’ll show you the correct alternator, belt, and the belt tool below. You can add items to your cart from the parts section. HowToo makes it easy: same-day/2-day shipping on every part, plus all the tools and specialty tools you need!