

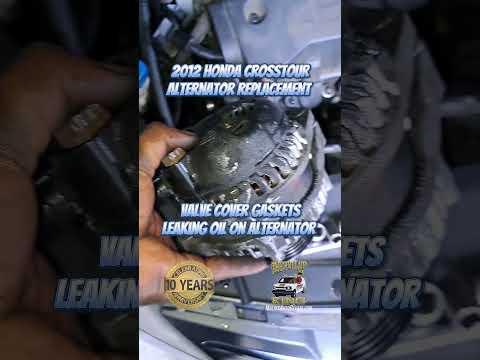





2014 Honda Crosstour AWD Alternator Replacement Guide: Steps, Tools, Torque Specs
Also works for 2013, 2014, 2015
2014 Honda Crosstour AWD Alternator Replacement Guide: Steps, Tools, Torque Specs
Also works for 2013, 2014, 2015


Crosstour - Alternator Replacement 🔧
I can walk you through replacing the alternator on your EX V6. Two quick questions first:
- 🔎 Does your Crosstour have AWD or FWD?
- 🔎 Do you have basic hand tools and a floor jack with jack stands?
Reply, and I’ll tailor the exact steps and torque specs (layout differs slightly FWD vs AWD).
Crosstour - Alternator Replacement 🔧
Great—AWD with basic tools is perfect. I’ll guide you step by step for the J35Y V6 layout used in your EX AWD.
Parts & Specs 📦
- 🔩 Alternator: 130A unit for J35 V6 (AWD)
- 🔩 Serpentine belt (recommended): 7-rib belt for V6
- 🔩 New alternator nut/bolt hardware (optional but recommended)
- 🔩 Dielectric grease for electrical connections (protects from corrosion)
- 🔩 Anti-seize for mounting bolts (light coat)
- 🔩 Torque specs:
- Alternator mounting bolts: 41 N·m (30 lb-ft)
- Alternator B+ terminal nut: 9 N·m (80 in-lb)
- Battery negative clamp: 5 N·m (44 in-lb)
- Belt tensioner pivot bolt: 54 N·m (40 lb-ft)
- Idler pulley bolt (if removed): 54 N·m (40 lb-ft)
Tools You’ll Need 🧰
- 🧰 Metric socket set: 10mm, 12mm, 14mm, 17mm, 19mm (deep and shallow)
- 🧰 3/8" and 1/2" ratchets, extensions (3–6")
- 🧰 Torque wrench (tightens fasteners to exact spec)
- 🧰 Serpentine belt tool or 14mm box wrench (long) for the tensioner
- 🧰 Flat screwdriver or trim tool (for clips)
- 🧰 Floor jack and jack stands (supports the vehicle safely)
- 🧰 Wheel chocks (prevents rolling)
- 🧰 Work light and gloves
Safety First ⚠️
- ⚠️ Disconnect the negative battery cable before touching alternator wiring. Prevents short circuits.
- ⚠️ Use jack stands under the front subframe or pinch welds; never rely on the jack alone.
- ⚠️ Let the engine cool. The exhaust and front bank get hot.
Preparation 🗂️
- 🔧 Park on level ground, set parking brake, chock rear wheels.
- 🔧 Open hood. Save radio presets if you like—battery will be disconnected.
- 🔧 Disconnect negative battery terminal (10mm) and isolate the cable.
Access Steps (AWD V6) 🪛
- 🛞 Raise the front:
- Lift the front center jacking point; place jack stands under the reinforced pinch welds or front subframe.
- Remove the front lower splash shield (clips/10mm bolts). This improves access to the belt and pulleys.
- 🔦 From above, remove the engine cover (pull up) for room.
- 🔦 Unclip and move the fresh air snorkel from the airbox to the core support if it crowds your hands.
Serpentine Belt Removal ♻️
- 📝 Note the belt routing. Snap a photo before removal.
- 🔧 Place a 14mm box wrench or belt tool on the tensioner hex and rotate it clockwise to relieve tension.
- 🔧 Slip the belt off the alternator pulley first, then let the tensioner return slowly. Remove the belt fully if replacing.
Alternator Removal 🧲
- 🔌 Disconnect the alternator electrical connectors:
- Press-tab field connector at the back—gently pry the tab if stiff.
- Remove the rubber boot and the B+ cable nut (typically 10mm). Cap the cable tip to avoid accidental contact.
- 🔩 Remove the alternator mounting bolts:
- Upper through-bolt (14mm head) and lower pivot bolt (14mm). Support the alternator with one hand.
- 📤 Work the alternator out upward. If tight, wiggle while pulling. A small pry between ears and bracket helps—don’t mar the mating faces.
Install New Alternator 🆕
- 🧼 Clean the bracket pads. Apply a light film of anti-seize to the bolt shanks only.
- 📥 Set the alternator into place and hand-start both bolts.
- 🔩 Tighten mounting bolts evenly to 41 N·m (30 lb-ft).
- 🔌 Reconnect B+ cable, torque to 9 N·m (80 in-lb), reinstall the boot. Plug in the field connector until it clicks. Optional: a dab of dielectric grease on terminals.
Belt Refit ✅
- 🧭 Route the belt per your photo. Make sure ribs sit in grooves on every pulley.
- 🔧 Rotate the tensioner clockwise, slip belt over the alternator last, then release the tensioner slowly.
- 👀 Inspect alignment from above and below. Mis-seated ribs squeal and shred belts.
Reassembly 🔙
- 🔧 Reinstall the lower splash shield and any air snorkel pieces.
- 🔧 Refit the engine cover.
- 🔧 Lower the vehicle to the ground.
- 🔋 Reconnect the negative battery terminal, torque to 5 N·m (44 in-lb).
Post-Repair Checks 🧪
- ⚙️ Start the engine. Using a multimeter at the battery, confirm charging voltage at 13.8–14.8V with no load, ~13.5–14.5V with headlights and blower on.
- 🧠 The PCM/charging system is self-learning—no coding needed.
- 💡 If the battery light stays on or voltage is low, recheck the B+ nut, connector, and belt seating.
Tips & Tricks 🪄
- 🧊 If the alternator is stuck in the bracket, thread the upper bolt in a few turns and tap the bolt head sideways to break corrosion.
- 🧴 Replace the belt if it’s glazed, cracked, or older than 5 years. Consider a new tensioner if the belt chirps at startup.
- 🧽 Keep oil and coolant off the belt—clean pulleys with brake cleaner on a rag.
HowToo makes it easy: same-day/2-day shipping on every part, plus all the tools and specialty tools you need!