

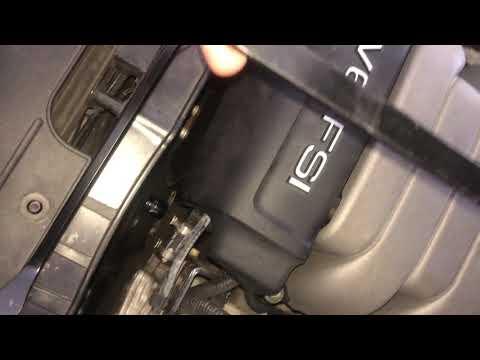








2014 Audi A5 Alternator Replacement Guide: Tools, Steps, Torque Specs & Tips
Also works for 2013, 2014
2014 Audi A5 Alternator Replacement Guide: Tools, Steps, Torque Specs & Tips
Also works for 2013, 2014


A5 - Alternator Replacement 🔧
ALTERNATOR GO BABY GOOOOOO!!!!!
Got it. I’ll walk you through replacing the alternator on your A5 Cabriolet 2.0T (EA888 Gen 2). This engine uses a serpentine belt-driven alternator on the front right side. We’ll work safely, make space, and swap it cleanly.
Quick check: Do you have basic hand tools and a safe way to lift the front (jack + jack stands)? Also, is your battery less than 4 years old? A weak battery can kill a new alternator.
Parts, Specs & Notes 📦
- 🧩 Alternator: 150A, smart-controlled (LIN) unit for 2.0T. Bring your old core back. Match the plug (1-pin LIN + B+ stud).
- 🧩 Serpentine belt (strongly recommended): 6-rib. Replace if glazed, cracked, or over 60k miles.
- 🧩 Belt tensioner (optional but smart): Replace if the arm is jumpy or pulley rough.
- 🧩 New alternator pulley cap if damaged (cosmetic dust cap).
- 🧪 Dielectric grease (light film on electrical connections).
- 📐 Torque specs:
- Alternator mounting bolts: 23 Nm (17 ft-lb) + 90° (torque-to-yield)
- B+ cable nut (output stud): 15 Nm (11 ft-lb)
- Serpentine belt tensioner bolt (if removed): 45 Nm (33 ft-lb)
- Front right wheel bolts (if removed): 120 Nm (89 ft-lb)
- Undertray screws: snug, 3–5 Nm
Tools You’ll Need 🧰
- 🛠️ Socket set (8–19 mm), ratchets, and extensions
- 🛠️ Torx bits (T25, T30) for undertray and guards
- 🛠️ Triple-square bit (M10) for some accessory bolts on VAG cars
- 🛠️ Serpentine belt tool or long 16 mm wrench for the tensioner
- 🛠️ E-torx sockets (E10/E12) if your alternator bolts use external torx heads
- 🛠️ Torque wrench (capable of angle tightening; or use a simple angle gauge)
- 🛠️ Flat trim tool to pop covers without marring
- 🛡️ Floor jack, jack stands, and wheel chocks
- 🔋 10 mm wrench for battery terminal
- 🔎 Mirror and flashlight for alignment and routing
- 🧼 Gloves and safety glasses
Serpentine belt tool: a slim, long-handled bar that fits the tensioner in tight spaces.
Safety First ⚠️
- 🛑 Disconnect the battery negative (-) terminal before touching alternator wiring.
- 🧯 Keep metal tools away from the alternator B+ stud once the battery is connected.
- 🧱 Support the car on jack stands; never rely on the jack alone.
- 🌡️ Work on a cool engine to avoid burns.
Prep & Access 🧩
- 🛞 Park, set parking brake, chock rear wheels. Open hood. Note belt routing with a quick photo.
- 🔋 Disconnect battery negative (-) in the trunk’s right-side compartment.
- 🧰 Raise front right corner and remove the front right wheel for better access through the fender liner service flap (optional but helpful on the Cabriolet).
- 🧰 Remove the lower engine undertray (T25/T30 screws). Drop it down.
- 🧰 If equipped, open the small fender liner service door to reach the belt/tensioner.
Remove the Belt 🔄
- 🔧 Place the serpentine tool or 16 mm wrench on the belt tensioner and rotate clockwise to relieve tension.
- 🧠 Slip the belt off the alternator pulley first. Slowly release the tensioner back.
- 🔎 Inspect the belt. If worn, replace it now.
Disconnect Alternator Wiring 🔌
- 🔧 Pull off the plastic cap covering the B+ stud on the back of the alternator.
- 🔧 Remove the nut and lift off the B+ cable. Tape the end so it can’t touch metal.
- 🔌 Unplug the small LIN control connector (press the tab; don’t pry the wires).
Remove Alternator 🧱
- 🔩 Remove the alternator mounting bolts (usually two long bolts through the bracket). Note their length and position.
- 🧠 Wiggle the alternator forward off the bracket dowels. If tight, use a gentle pry on the ear—do not pry on the case vents.
- 📦 Snake the alternator out downward through the bottom. Slightly rotate to clear the radiator fan shroud. If tight, lower the car a bit to change angle, or remove the small air guide as needed.
Install Alternator ✅
- 🧼 Clean the mounting pad and bracket. A light film of dielectric grease on dowels helps seating.
- 📥 Position the new alternator and slide onto the bracket dowels fully seated.
- 🔩 Install the mounting bolts finger tight. Torque to 23 Nm (17 ft-lb) + 90° in stages.
- 🔌 Reconnect the LIN connector until it clicks.
- 🔩 Install the B+ cable, torque the nut to 15 Nm (11 ft-lb), and refit the plastic cap.
Refit Belt 🪢
- 🧭 Route the belt per your photo. Ensure ribs seat in every pulley groove.
- 🔧 Rotate the tensioner clockwise, slide belt over the alternator last, and release slowly.
- 🔎 Double-check alignment. Misrouted belts shred fast.
Reassemble 🧲
- 🧰 Reinstall undertray and the wheel if removed (torque wheel bolts to 120 Nm in a star pattern).
- 🔋 Reconnect battery negative (-). Tighten snugly.
First Start & Checks 🚗
- 🧪 Start the engine. With a multimeter at the battery, you should see 13.8–14.7V at idle with minimal load.
- 🔄 Turn on headlights, rear defrost, blower. Voltage should stay above 13.5V.
- ⚠️ If the battery light stays on or voltage is low, recheck the LIN plug and B+ nut.
- 👂 Listen for belt chirp. If present, recheck belt path and tensioner behavior.
Tips & Tricks 💡
- 🧠 If the alternator won’t seat, the threaded sleeves in the bracket may be expanded—light taps inward with a punch will help.
- 🧰 Replace the belt and tensioner together if the belt shows edge fray or glazing.
- 🔋 After replacement, a weak battery can trigger charging faults. Test and replace if resting voltage is under 12.4V.
HowToo makes it easy: same-day/2-day shipping on every part, plus all the tools and specialty tools you need!