

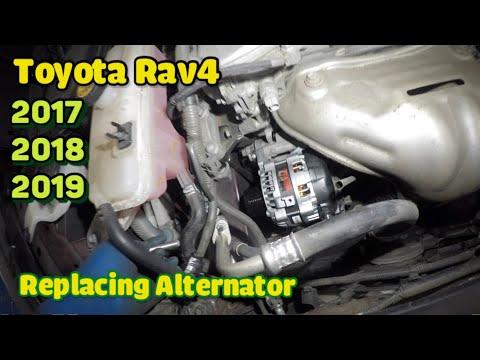







Troubleshoot No Alternator on a 2013-2018 Toyota RAV4 Hybrid (Trim: Hybrid SE)
Step-by-step 12-volt charging diagnosis with DC-DC converter tests, tools, and safety tips for 2013, 2014, 2015, 2016, 2017, 2018
Troubleshoot No Alternator on a 2013-2018 Toyota RAV4 Hybrid (Trim: Hybrid SE)
Step-by-step 12-volt charging diagnosis with DC-DC converter tests, tools, and safety tips for 2013, 2014, 2015, 2016, 2017, 2018


🔧 RAV4 - Alternator Replacement
Your RAV4 Hybrid SE does not use a conventional belt-driven alternator. The 12-volt battery is charged by the hybrid system through a DC-DC converter inside the inverter/converter assembly, so there is no alternator to remove or replace.
Difficulty Level: Advanced | Estimated Time: Not applicable for alternator replacement
⚠️ Safety & Precautions
- ⚠️ Your RAV4 has a high-voltage hybrid system. Orange cables and inverter components can carry dangerous voltage.
- ⚠️ Do not open, unplug, probe, or remove inverter/converter parts unless you are hybrid-certified and using OEM high-voltage procedures.
- ⚠️ If the 12-volt battery is not charging, diagnosis should start with the 12-volt battery, fuses, grounds, and DC-DC converter operation.
- ⚠️ Disconnecting the 12-volt battery may erase learned settings and require window initialization afterward.
- ⚠️ Never jump or charge the high-voltage hybrid battery with standard automotive charging equipment.
🔧 Required Tools
You'll need the following tools for this repair:
- Safety glasses
- Nitrile gloves
- Digital multimeter
- 10mm wrench
- 10mm socket
- 1/4-inch ratchet
- OBD-II scan tool with hybrid system capability (specialty)
🔩 Required Parts
HowToo sells all the parts you need for this repair:
- 12-volt auxiliary battery - Qty: 1 if testing confirms failure
- DC-DC converter/inverter assembly - Qty: 1 only if professionally diagnosed as failed
- Main fusible link or charging-system fuse - Qty: 1 if testing confirms failure
📋 Before You Begin
- Park your RAV4 on level ground.
- Shift to Park and set the parking brake.
- Turn the power switch OFF.
- Keep the key fob at least 15 feet away from the vehicle.
- A DC-DC converter changes high-voltage hybrid power into normal 12-volt charging power for the small battery and accessories.
- A multimeter is a handheld tester that measures battery voltage.
- This procedure is for confirming the no-alternator design and checking basic 12-volt charging operation only.
🔨 Step-by-Step Instructions
Follow these steps in order:
Step 1: Confirm There Is No Alternator
- Open the hood and use a flashlight if needed to look at the engine accessory area.
- Your RAV4 Hybrid does not have a belt-driven alternator mounted to the engine.
- The hybrid inverter/converter handles 12-volt charging.
- Do not remove engine components looking for an alternator.
- No alternator is installed.
Step 2: Locate The 12-Volt Battery
- Use safety glasses and nitrile gloves.
- Open the rear cargo area.
- Lift the cargo floor panel by hand.
- Locate the 12-volt auxiliary battery in the rear cargo battery compartment.
- Do not touch orange high-voltage cables or connectors.
Step 3: Check 12-Volt Battery Resting Voltage
- Set the digital multimeter to DC volts.
- Place the red meter lead on the battery positive terminal.
- Place the black meter lead on the battery negative terminal.
- A healthy fully charged 12-volt battery usually reads about 12.6 volts with the vehicle OFF.
- If it reads near or below 12.2 volts, charge and test the 12-volt battery before condemning any hybrid charging component.
Step 4: Check DC-DC Charging Voltage
- Keep the digital multimeter connected to the 12-volt battery terminals.
- Press the brake pedal and turn the power switch ON until the vehicle shows READY.
- Read the voltage on the digital multimeter.
- Normal DC-DC converter charging voltage is typically around 13.5-14.8 volts in READY mode.
- If voltage rises into that range, the hybrid charging system is working and the problem is likely not a missing alternator.
Step 5: Scan For Hybrid And Charging Codes
- Plug the OBD-II scan tool with hybrid system capability (specialty) into the diagnostic port under the driver side of the dash.
- Turn the vehicle to READY mode.
- Use the scan tool menu to check Hybrid Control, Battery Control, Engine Control, and Power Management codes.
- Record any codes exactly before clearing them.
- Do not clear codes until the issue is repaired.
Step 6: Inspect Basic 12-Volt Connections
- Turn the power switch OFF.
- Use the 10mm wrench to check that the 12-volt battery terminal clamps are snug.
- If a terminal is loose, tighten carefully with the 10mm wrench.
- Torque to 5.4 Nm (48 in-lbs).
- Use the 10mm socket and 1/4-inch ratchet to check the visible battery hold-down fastener if disturbed.
- Torque to 5.0 Nm (44 in-lbs).
Step 7: Stop If Charging Voltage Is Missing
- If the vehicle is READY and the 12-volt battery still reads only battery voltage, do not replace an alternator.
- Use the OBD-II scan tool with hybrid system capability (specialty) to continue diagnosis.
- Possible faults include a blown fusible link, wiring problem, inverter/converter fault, or control-system fault.
- High-voltage diagnosis requires insulated tools, OEM procedures, and hybrid safety training.
✅ After Repair
- Confirm the vehicle enters READY mode normally.
- Confirm 12-volt charging voltage is about 13.5-14.8 volts in READY mode.
- Clear diagnostic trouble codes only after the actual fault is repaired.
- If the 12-volt battery was disconnected, initialize the power windows by fully lowering and fully raising each window from its switch, then holding the switch up for about 1 second.
- Reset the clock and any lost user settings if needed.
💰 DIY vs Shop Cost
Shop Cost: $150-$350 for basic charging-system diagnosis; $2,500-$4,500+ if inverter/converter replacement is required
DIY Cost: $0-$250 for basic testing or 12-volt battery replacement if needed
You Save: $150-$300 by doing basic diagnosis yourself!
Shop labor rates vary but typically run $100-$150/hour. Basic diagnosis takes a shop approximately 1-2 hours.
🎯 Ready to get started?
HowToo makes it easy: same-day/2-day shipping on every part, plus all the tools and specialty tools you need! Check out the parts and tools sections below to add everything to your cart.