

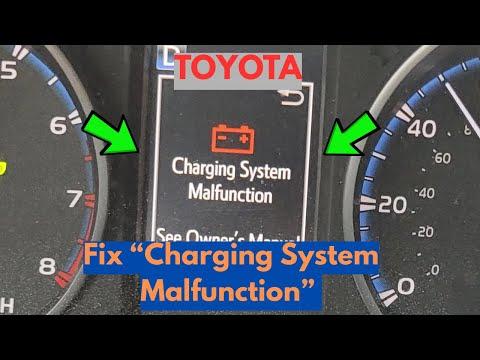




How to Troubleshoot Alternator Charging Issues on a 2019-2022 Toyota RAV4 Hybrid (Engine: Inline 4 2.5L)
Step-by-step DC-DC converter, 12V battery, fusible link, and hybrid system diagnosis for 2019, 2020, 2021, 2022
How to Troubleshoot Alternator Charging Issues on a 2019-2022 Toyota RAV4 Hybrid (Engine: Inline 4 2.5L)
Step-by-step DC-DC converter, 12V battery, fusible link, and hybrid system diagnosis for 2019, 2020, 2021, 2022


🔧 RAV4 - Alternator Replacement
Your RAV4 Hybrid does not use a conventional belt-driven alternator. The 12-volt battery is charged by the hybrid DC-DC converter inside the inverter/converter assembly, so there is no alternator to replace.
If you have charging-system symptoms, the correct repair path is to diagnose the 12V battery, fusible links, inverter/converter, wiring, and hybrid control system.
Difficulty Level: Advanced | Estimated Time: Diagnosis: 0.5-2 hours
⚠️ Safety & Precautions
- ⚠️ Your RAV4 Hybrid has a high-voltage hybrid system that can cause serious injury if handled incorrectly.
- ⚠️ Do not open the inverter/converter assembly or touch orange high-voltage cables.
- ⚠️ Disconnecting the 12V battery may erase learned settings and can set warning lights until the vehicle completes relearn checks.
- ⚠️ If the vehicle shows hybrid system warnings, do not continue driving until the charging system is diagnosed.
- ⚠️ Battery disconnect is required before inspecting major 12V charging cables or fusible links.
🔧 Required Tools
You'll need the following tools for this repair:
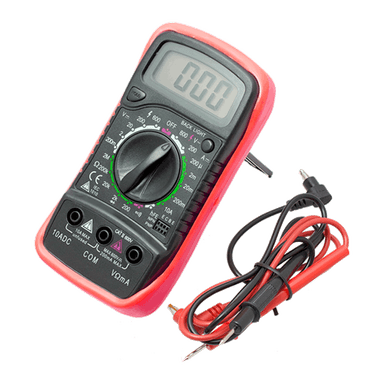
- Digital multimeter
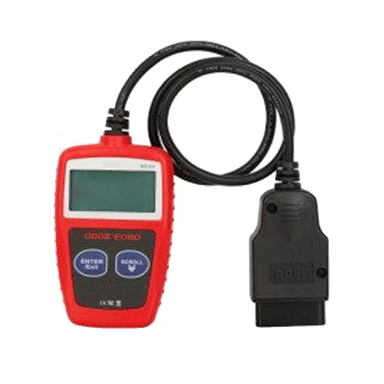
- OBD2 scan tool with Toyota hybrid system support (specialty)
- 10mm socket
- 12mm socket
- 3/8-inch drive ratchet
- 3/8-inch drive extension 6-inch
- Torque wrench 5-25 Nm
- Trim clip removal tool
- Insulated gloves rated 1000V (specialty)
- Safety glasses
- Nitrile gloves
🔩 Required Parts
HowToo sells all the parts you need for this repair:
- 12V AGM battery - Qty: 1, if testing fails
- Fusible link block - Qty: 1, if open or heat-damaged
- 12V battery terminal hardware - Qty: 1 set, if corroded or damaged
- Inverter/converter assembly - Qty: 1, only if confirmed faulty by Toyota hybrid diagnostics
📋 Before You Begin
- Park your RAV4 on level ground and press the P button to select Park.
- Set the parking brake.
- Turn the vehicle OFF and keep the key fob at least 15 feet away.
- Wait at least 5 minutes before disconnecting the 12V battery so control modules can power down.
- A digital multimeter measures voltage; set it to DC volts before testing the 12V system.
- An OBD2 scan tool reads fault codes; for this job it must support Toyota hybrid systems, not just engine codes.
🔨 Step-by-Step Instructions
Follow these steps in order:
Step 1: Confirm There Is No Alternator
- Open the hood using the interior hood release and the front safety latch.
- Use a flashlight to look near the engine drive belt area.
- Your RAV4 Hybrid does not have a traditional alternator. Do not remove the belt or search for an alternator bracket.
- The 12V system is charged by the DC-DC converter, which changes high-voltage hybrid battery power into 12V power.
Step 2: Check the 12V Battery Resting Voltage
- Use a trim clip removal tool if you need to remove any small plastic covers around the 12V battery access area.
- Use a digital multimeter set to DC volts.
- Touch the red meter lead to the positive battery terminal and the black meter lead to the negative battery terminal.
- A healthy fully charged 12V battery usually reads about 12.6 volts with the vehicle OFF.
- If it reads below about 12.2 volts, charge and retest the battery before blaming the charging system.
- Tip: Weak 12V batteries mimic major hybrid faults.
Step 3: Check DC-DC Converter Charging Voltage
- Keep the digital multimeter connected to the 12V battery terminals.
- Press the brake pedal and start the vehicle normally.
- Confirm the dash shows READY. READY means the hybrid system is active and can charge the 12V battery.
- Read the voltage on the digital multimeter.
- Normal charging voltage is usually around 13.5-14.8 volts in READY mode.
- If voltage stays near battery voltage, the DC-DC charging system is not working correctly.
Step 4: Scan the Hybrid Control System
- Use an OBD2 scan tool with Toyota hybrid system support.
- Connect the scan tool to the diagnostic port under the driver side lower dash.
- Turn the vehicle to READY mode.
- Scan these systems: Hybrid Control, Power Management Control, Engine Control, and Battery Control.
- Record all diagnostic trouble codes before clearing anything.
- If codes point to inverter/converter failure, do not replace parts until wiring and fuses are checked.
Step 5: Disconnect the 12V Battery Before Fuse or Cable Inspection
- Turn the vehicle OFF.
- Keep the key fob away from the vehicle.
- Use a 10mm socket and 3/8-inch drive ratchet to loosen the negative battery terminal clamp.
- Remove the negative cable and position it so it cannot spring back onto the battery post.
- Use safety glasses and nitrile gloves while working near the battery.
Step 6: Inspect the 12V Fusible Links and Main Cables
- Use a trim clip removal tool to remove plastic covers carefully.
- Use a 10mm socket or 12mm socket only if a cover or cable fastener must be removed for inspection.
- Look for melted plastic, green corrosion, loose terminals, or burned fusible links.
- A fusible link is a high-current safety fuse that protects the vehicle from electrical overload.
- If a fusible link is open or heat-damaged, replace the fusible link block instead of bypassing it.
- When reinstalling 12V terminal fasteners, use a torque wrench 5-25 Nm and tighten small battery terminal nuts to Torque to 5.4 Nm (48 in-lbs).
Step 7: Reconnect the 12V Battery
- Install the negative battery cable onto the battery post.
- Use a 10mm socket and torque wrench 5-25 Nm to tighten the clamp nut.
- Torque to 5.4 Nm (48 in-lbs).
- Make sure the terminal does not twist by hand after tightening.
Step 8: Decide the Correct Repair
- If the 12V battery fails a load test, replace the 12V AGM battery.
- If charging voltage is normal in READY mode, the DC-DC converter is likely working.
- If charging voltage is low and Toyota hybrid codes are present, diagnose the inverter/converter circuit before replacement.
- If the inverter/converter assembly is confirmed faulty, replacement requires high-voltage isolation procedures and is not a beginner DIY repair.
- Use insulated gloves rated 1000V only if you are trained to work around high-voltage hybrid systems.
✅ After Repair
- Start your RAV4 and confirm the dash shows READY.
- Use the digital multimeter to verify about 13.5-14.8 volts at the 12V battery in READY mode.
- Use the OBD2 scan tool with Toyota hybrid system support to clear codes only after recording them and completing repairs.
- Drive slowly at first and confirm no hybrid system, battery, ABS, or charging warnings return.
- Reset clock, radio presets, and window auto-up/down if needed after 12V battery disconnection.
💰 DIY vs Shop Cost
Shop Cost: $150-$350 for charging-system diagnosis, $350-$600 for 12V battery replacement, $2,500-$4,500+ for inverter/converter replacement if required
DIY Cost: $0-$40 for basic testing if you already have tools, $180-$350 for a 12V AGM battery, higher if inverter/converter replacement is confirmed
You Save: $150-$250 by doing basic diagnosis yourself, and $100-$250 on a 12V battery replacement!
Shop labor rates vary but typically run $100-$150/hour. This diagnosis takes a shop approximately 0.5-2 hours.
🎯 Ready to get started?
HowToo makes it easy: same-day/2-day shipping on every part, plus all the tools and specialty tools you need! Check out the parts and tools sections below to add everything to your cart.