

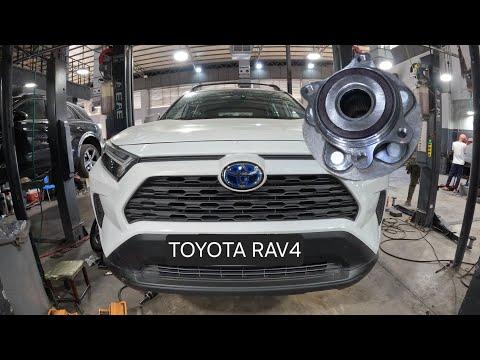







How to Replace Wheel Bearings on a 2019-2023 Toyota RAV4
Step-by-step hub assembly replacement with tools, parts, torque specs, and safety tips for 2019, 2020, 2021, 2022, 2023
How to Replace Wheel Bearings on a 2019-2023 Toyota RAV4
Step-by-step hub assembly replacement with tools, parts, torque specs, and safety tips for 2019, 2020, 2021, 2022, 2023


🔧 Wheel Bearing - Replacement
On your RAV4, the wheel bearings are built into bolt-on hub assemblies. That means you replace the hub and bearing assembly as one unit instead of pressing the bearing in and out.
Difficulty Level: Intermediate | Estimated Time: 2-3 hours per wheel
⚠️ Safety & Precautions
- ⚠️ Support your RAV4 with jack stands only; never work under a vehicle held by a jack.
- ⚠️ Keep the key fob away from the vehicle so the hybrid system cannot accidentally go READY.
- ⚠️ Do not touch or disconnect orange high-voltage cables. This repair does not require hybrid system service.
- ⚠️ The front and rear procedures are different because your RAV4 is AWD.
- ⚠️ Do not pull or stretch the ABS wheel speed sensor wiring.
- ⚠️ Do not let the brake caliper hang by the brake hose.
- ⚠️ Replace the axle nut if the hub being serviced uses one.
🔧 Required Tools
You'll need the following tools for this repair:
- Floor jack (rated 3-ton minimum)
- Jack stands (rated 3-ton minimum)
- Wheel chocks
- Safety glasses
- Mechanic gloves
- 21mm lug nut socket
- Breaker bar 1/2-inch drive
- Torque wrench 1/2-inch drive
- Ratchet 1/2-inch drive
- Ratchet 3/8-inch drive
- 14mm socket
- 17mm socket
- 19mm socket
- 30mm axle nut socket
- 10mm socket
- Flathead screwdriver
- Needle-nose pliers
- Dead blow hammer
- Hub puller kit (specialty)
- Slide hammer hub adapter (specialty)
- Wire brush
- Bungee cord
- Brake cleaner
- Anti-seize compound
- Penetrating oil
🔩 Required Parts
HowToo sells all the parts you need for this repair:
- Wheel hub and bearing assembly - Qty: 1 per wheel
- Axle nut - Qty: 1 per driven wheel
- Brake rotor retaining hardware - Qty: 1 if equipped or damaged
- Hub mounting bolts - Qty: 4 if corroded or damaged
📋 Before You Begin
- Park your RAV4 on level ground.
- Shift to Park and set the parking brake only when loosening wheel nuts. Release the parking brake before removing a rear brake rotor if servicing the rear.
- Place wheel chocks on the wheels that stay on the ground.
- A hub assembly is the part that holds the wheel studs and contains the bearing.
- A slide hammer is a puller tool that uses a sliding weight to shock a stuck hub loose.
- If servicing a rear wheel, place the electronic parking brake in service mode before removing rear brake parts.
- Rear EPB service mode path: with ignition ON and brake pedal pressed, release parking brake, then switch ignition OFF and keep the key away from the vehicle.
🔨 Step-by-Step Instructions
Follow these steps in order:
Step 1: Loosen the Wheel Lug Nuts
- Use the 21mm lug nut socket and breaker bar 1/2-inch drive to loosen the lug nuts one turn while the tire is still on the ground.
- If servicing a driven hub with an axle nut, remove the center cap and loosen the axle nut with the 30mm axle nut socket and breaker bar 1/2-inch drive.
- Do not fully remove the lug nuts yet.
- Break tight nuts loose first.
Step 2: Raise and Support the Vehicle
- Use the floor jack (rated 3-ton minimum) to lift your RAV4 at the proper jacking point.
- Place jack stands (rated 3-ton minimum) under the body support points.
- Lower the vehicle onto the stands and gently shake it to confirm it is stable.
Step 3: Remove the Wheel
- Use the 21mm lug nut socket and ratchet 1/2-inch drive to remove the lug nuts.
- Remove the wheel and place it flat under the side of the vehicle as a backup safety cushion.
Step 4: Remove the Brake Caliper
- Use the 14mm socket and ratchet 3/8-inch drive to remove the two caliper slide pin bolts.
- Lift the caliper off the bracket.
- Use a bungee cord to hang the caliper from the strut or spring area.
- Do not let the caliper hang from the brake hose.
Step 5: Remove the Caliper Bracket
- Use the 17mm socket or 19mm socket with the breaker bar 1/2-inch drive to remove the two caliper bracket bolts.
- Remove the caliper bracket and set it aside.
- For installation, Torque front caliper bracket bolts to 107 Nm (79 ft-lbs).
- For installation, Torque rear caliper bracket bolts to 88 Nm (65 ft-lbs).
Step 6: Remove the Brake Rotor
- Pull the rotor straight off by hand.
- If stuck, spray the hub area with penetrating oil.
- Use a dead blow hammer to tap around the rotor hat until it loosens.
- If servicing the rear and the rotor will not move, confirm the parking brake is released.
Step 7: Remove the ABS Sensor or Move the Wire Clear
- Use a 10mm socket and ratchet 3/8-inch drive to remove the ABS wheel speed sensor bolt if the sensor blocks access.
- Gently twist and lift the sensor out by hand.
- If the sensor feels stuck, leave it in place and only unclip the harness enough to move it safely.
- ABS sensors break easily.
Step 8: Remove the Axle Nut if Equipped
- Use the 30mm axle nut socket and ratchet 1/2-inch drive to remove the loosened axle nut.
- Push the axle inward by hand to confirm it slides through the hub splines.
- If stuck, use the dead blow hammer to lightly tap the axle end with the old nut threaded on flush.
- Do not damage the axle threads.
Step 9: Remove the Hub Mounting Bolts
- From the back side of the knuckle, use the 14mm socket or 17mm socket with the ratchet 1/2-inch drive to remove the four hub mounting bolts.
- Spray the bolt heads with penetrating oil if they are rusty.
- Keep the bolts organized if you plan to reuse them.
Step 10: Remove the Hub and Bearing Assembly
- Try pulling the hub straight out by hand first.
- If stuck, attach the hub puller kit (specialty) to the wheel studs.
- Use the slide hammer hub adapter (specialty) to pull the hub out of the knuckle.
- Use a dead blow hammer for light side taps only. Do not hit the ABS tone ring area.
Step 11: Clean the Mounting Surface
- Use a wire brush to clean rust and dirt from the hub mounting face.
- Spray the area with brake cleaner and wipe it dry.
- Apply a very thin film of anti-seize compound to the center bore only.
- Keep anti-seize off the brake rotor, studs, and wheel nut seats.
Step 12: Install the New Hub Assembly
- Slide the new wheel hub and bearing assembly into the knuckle by hand.
- Make sure the ABS sensor opening and bolt holes line up correctly.
- Start all four hub bolts by hand.
- Use the 14mm socket or 17mm socket and torque wrench 1/2-inch drive to tighten the hub bolts evenly in a crisscross pattern.
- Torque hub mounting bolts to 80 Nm (59 ft-lbs).
Step 13: Reinstall the Axle Nut if Equipped
- Install the new axle nut by hand.
- Use the 30mm axle nut socket and torque wrench 1/2-inch drive to tighten it.
- Torque front axle nut to 216 Nm (159 ft-lbs).
- Torque rear AWD axle nut to 216 Nm (159 ft-lbs).
- Stake or lock the axle nut if the replacement nut design requires it.
Step 14: Reinstall the ABS Sensor
- Carefully insert the ABS sensor by hand.
- Use the 10mm socket and ratchet 3/8-inch drive to install the bolt.
- Torque to 8 Nm (71 in-lbs).
- Clip the ABS wiring back into its original retainers.
Step 15: Reinstall the Brake Rotor
- Spray both rotor friction surfaces with brake cleaner if greasy or dirty.
- Slide the rotor onto the hub by hand.
- Use one lug nut hand-tight to hold the rotor flat while installing the caliper parts.
Step 16: Reinstall the Caliper Bracket
- Place the caliper bracket over the rotor.
- Install the bracket bolts by hand first.
- Use the 17mm socket or 19mm socket and torque wrench 1/2-inch drive to tighten the bracket bolts.
- Torque front caliper bracket bolts to 107 Nm (79 ft-lbs).
- Torque rear caliper bracket bolts to 88 Nm (65 ft-lbs).
Step 17: Reinstall the Brake Caliper
- Remove the bungee cord and place the caliper over the brake pads and bracket.
- Use the 14mm socket and torque wrench 1/2-inch drive to tighten the slide pin bolts.
- Torque caliper slide pin bolts to 34 Nm (25 ft-lbs).
Step 18: Reinstall the Wheel
- Install the wheel by hand.
- Use the 21mm lug nut socket and ratchet 1/2-inch drive to snug the lug nuts in a star pattern.
- Raise the vehicle slightly with the floor jack (rated 3-ton minimum), remove the jack stands (rated 3-ton minimum), and lower the vehicle to the ground.
- Use the 21mm lug nut socket and torque wrench 1/2-inch drive to tighten the lug nuts in a star pattern.
- Torque wheel lug nuts to 103 Nm (76 ft-lbs).
Step 19: Pump the Brake Pedal
- Before driving, press the brake pedal several times until it feels firm.
- This seats the brake caliper back against the pads.
- If you serviced a rear wheel, switch the vehicle ON and apply/release the parking brake once to confirm normal operation.
✅ After Repair
- ✅ Road test at low speed first and listen for scraping, grinding, or ABS warning lights.
- ✅ Then drive at 30-45 mph and listen for the original humming noise to confirm it is gone.
- ✅ Recheck lug nut torque after the test drive using the 21mm lug nut socket and torque wrench 1/2-inch drive.
- ✅ If the ABS, brake, or traction light stays on, scan for wheel speed sensor codes before continuing normal driving.
- ✅ No alignment is normally required for a hub assembly replacement if suspension parts were not loosened.
💰 DIY vs Shop Cost
Shop Cost: $450-$850 per wheel (parts + labor)
DIY Cost: $120-$300 per wheel (parts only)
You Save: $250-$550 per wheel by doing it yourself!
Shop labor rates vary but typically run $100-$150/hour. This repair takes a shop approximately 1.5-2.5 hours per wheel.
🎯 Ready to get started?
HowToo makes it easy: same-day/2-day shipping on every part, plus all the tools and specialty tools you need! Check out the parts and tools sections below to add everything to your cart.