

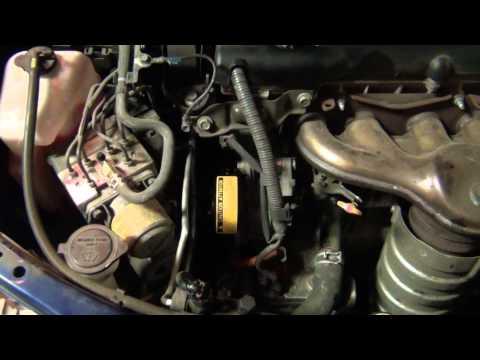






How to Replace the Water Pump on a 2019 Toyota Camry
Step-by-step instructions with tools, parts, torque specs, and safety tips for 2018, 2019, 2020, 2021, 2022
How to Replace the Water Pump on a 2019 Toyota Camry
Step-by-step instructions with tools, parts, torque specs, and safety tips for 2018, 2019, 2020, 2021, 2022


🔧 Water Pump - Replacement
This job replaces the engine coolant pump on your Camry. The water pump keeps coolant moving through the engine, and a leak or bearing noise can quickly lead to overheating. Assumption: this procedure is for the engine water pump, not the hybrid inverter coolant pump.
Difficulty Level: Intermediate | Estimated Time: 3-5 hours
⚠️ Safety & Precautions
- Work only when the engine is completely cold. Hot coolant can cause severe burns.
- Keep the car in READY mode off. Make sure the hybrid system is shut down before starting.
- Disconnect the negative 12V battery terminal before removing the pump or belt area.
- Use care around the orange hybrid cables and inverter area. Do not open any high-voltage components.
- Catch and dispose of coolant properly. Keep pets and children away from spilled coolant.
- Do not reuse damaged clamps, gaskets, or O-rings.
🔧 Required Tools
You'll need the following tools for this repair:
- 10mm socket
- 12mm socket
- Ratchet
- Extensions
- Torque wrench
- Serpentine belt tool (specialty)
- Drain pan
- Funnel
- Pick tool
- Flat-blade trim tool
- Pliers
- Jack stands
- Floor jack
- Safety glasses
- Nitrile gloves
🔩 Required Parts
HowToo sells all the parts you need for this repair:
- Engine water pump - Qty: 1
- Water pump gasket / O-ring - Qty: 1
- Engine coolant (Toyota Super Long Life Coolant, premixed pink) - Qty: 2-3 gallons
- Serpentine belt - Qty: 1
- Coolant hose clamp - Qty: As needed
- Engine under-cover clips - Qty: As needed
📋 Before You Begin
- Park on level ground and set the parking brake.
- Let the engine cool fully before opening the cooling system.
- Disconnect the negative 12V battery terminal before starting.
- Raise the front of the car only if needed for drain access, and support it with jack stands.
- Have a drain pan ready before opening the radiator drain or hose.
🔨 Step-by-Step Instructions
Follow these steps in order:
Step 1: Drain the coolant
- Remove the engine under-cover with a 10mm socket and flat-blade trim tool.
- Place a drain pan under the radiator drain area.
- Open the drain and lower the coolant level until the pump area is empty enough to work safely.
- Torque to factory specification when reinstalling the drain plug or valve.
Step 2: Remove the drive belt
- Use the serpentine belt tool to relieve tension from the belt tensioner.
- Slip the belt off the water pump pulley and move it aside.
- Take a quick belt-routing photo first.
Step 3: Access the water pump
- Remove any covers or ducts blocking access using a 10mm socket or 12mm socket.
- Move hoses or wiring clips aside carefully with a pick tool or pliers.
Step 4: Remove the old water pump
- Disconnect the coolant hose from the pump and cap or lift it out of the way.
- Remove the water pump bolts with a 12mm socket.
- Lift the pump off the engine and remove the old gasket or O-ring.
- Torque to factory specification for all pump fasteners during installation.
Step 5: Install the new water pump
- Clean the sealing surface until it is smooth and dry.
- Install the new gasket or O-ring on the new pump.
- Position the pump and start all bolts by hand with a 12mm socket.
- Tighten the bolts evenly in steps.
- Torque water pump bolts to 10 Nm (89 in-lb).
Step 6: Reinstall the belt and covers
- Route the belt back onto the pulleys using the serpentine belt tool.
- Make sure the belt is seated correctly in every pulley groove.
- Reinstall any covers or ducts with a 10mm socket or 12mm socket.
Step 7: Refill coolant
- Fill the cooling system with Toyota Super Long Life Coolant, premixed pink through a funnel.
- Fill slowly to reduce air pockets.
- Torque to factory specification for the drain plug or valve after filling.
Step 8: Bleed air from the system
- Reconnect the 12V battery.
- Start the car and let it reach operating temperature.
- Set the cabin heat to full hot and the fan on low.
- Watch the coolant level and top off as the air bleeds out.
- Check for steady heat from the vents and no bubbling in the reservoir.
✅ After Repair
- Check for coolant leaks at the pump, hoses, and drain point.
- Listen for belt noise or pulley wobble.
- Verify the engine reaches normal temperature and stays there.
- Recheck coolant level after the first test drive and again when cold.
- If the coolant warning light comes on, stop and inspect immediately.
💰 DIY vs Shop Cost
Shop Cost: $650-$1,100 (parts + labor)
DIY Cost: $180-$380 (parts only)
You Save: $470-$720 by doing it yourself!
Shop labor rates vary but typically run $100-$150/hour. This repair takes a shop approximately 3-5 hours.
🎯 Ready to get started?
HowToo makes it easy: same-day/2-day shipping on every part, plus all the tools and specialty tools you need! Check out the parts and tools sections below to add everything to your cart.