

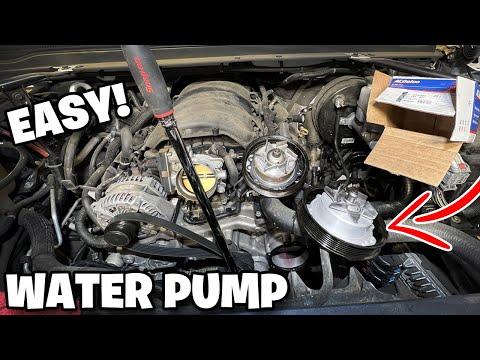





How to Replace the Water Pump on a 2019 Chevrolet Silverado 1500 6.2L (Trim: High Country | Engine: V8 5.3L)
Step-by-step DIY instructions with tools, parts, torque specs, coolant refill, and safety tips for 2019
How to Replace the Water Pump on a 2019 Chevrolet Silverado 1500 6.2L (Trim: High Country | Engine: V8 5.3L)
Step-by-step DIY instructions with tools, parts, torque specs, coolant refill, and safety tips for 2019


🔧 Silverado 1500 - Water Pump Replacement
This is an intermediate repair, but a careful first-time DIYer can handle it. Drain the coolant, remove the drive belt and pump pulley, disconnect the hoses, then replace the pump and its three seals. The pump sits at the front of the engine, so access is considerably better than on many modern vehicles.
Difficulty Level: Intermediate | Estimated Time: 3-5 hours
Assumption: This procedure is for the new-body 6.2L Silverado 1500, not the limited-production 2019 Silverado LD.
⚠️ Safety & Precautions
- ⚠️ Let the engine become completely cold before opening the cooling system. Hot coolant can cause severe burns.
- ⚠️ Disconnect the negative battery cable before working near the electric cooling fans. They can start without warning.
- ⚠️ Keep coolant away from children and animals. Its sweet smell attracts them, but it is poisonous.
- ⚠️ Support the hood securely and remove loose clothing or jewelry before working around pulleys.
- ⚠️ Never run the engine without the accessory drive belt installed.
- ⚠️ Collect and recycle the old coolant. Don't pour it onto the ground or into a drain.
🔧 Required Tools
You'll need the following tools for this repair:
- 1/4-inch drive ratchet
- 3/8-inch drive ratchet
- 1/2-inch drive breaker bar
- 7mm socket
- 8mm socket
- 10mm socket
- 13mm socket
- 15mm socket
- 3/8-inch drive torque wrench rated 10-80 ft-lbs
- 1/2-inch drive torque wrench rated 20-150 ft-lbs
- 6-inch socket extension
- Serpentine belt tool with 15mm socket
- Hose-clamp pliers (specialty)
- 90-degree hose-pick set
- Plastic gasket scraper
- Nylon cleaning brush
- 4-gallon coolant drain pan
- Cooling-system vacuum fill tool (specialty)
- Cooling-system pressure tester (specialty)
- Plastic fill funnel
- Wheel chocks
- Nitrile gloves
- Safety glasses
- Shop towels
🔩 Required Parts
HowToo sells all the parts you need for this repair:
- Water pump assembly for the 6.2L engine - Qty: 1
- FelPro Premium water pump gasket set - Qty: 1
- DEX-COOL-compatible 50/50 premixed coolant - Qty: 3 gallons
- Accessory drive belt - Qty: 1 if cracked, glazed, contaminated, or worn
The listed FelPro set contains three application-specific seals. Use fresh seals even if the replacement pump includes replacements. Reusing flattened seals is how a straightforward Saturday repair becomes a Sunday leak hunt.
📋 Before You Begin
- 📋 Park your Silverado on level ground, select Park, apply the parking brake, and chock the rear wheels.
- 📋 Allow the engine to cool for several hours. The upper radiator hose should feel cool and soft.
- 📋 Photograph the accessory-belt routing before removing it.
- 📋 Check the replacement pump against the original before installation. Compare every hose connection, mounting hole, pulley position, and sealing surface.
- 📋 Disconnecting the battery may reset stored settings. No battery registration or programming is required afterward.
- 📋 A vacuum fill tool uses compressed air to remove air from the cooling system before drawing coolant in. It is strongly recommended but not mandatory.
🔨 Step-by-Step Instructions
Follow these steps in order:
Step 1: Disconnect the battery
- Use a 10mm socket and ratchet to loosen the negative battery-terminal clamp.
- Remove the negative cable and position it where it cannot spring back onto the terminal.
Step 2: Remove the intake duct
- Use a 7mm or 8mm socket to loosen the intake-duct clamps at the air-cleaner box and throttle body.
- Disconnect any breather hose attached to the duct. Press its release tabs rather than pulling on the hose.
- Lift out the duct and cover the throttle-body opening with a clean shop towel.
Step 3: Drain the coolant
- Place the 4-gallon coolant drain pan beneath the lower radiator area.
- Slowly loosen the coolant reservoir cap only after confirming the engine is cold.
- Open the radiator drain fitting if accessible. Otherwise, use hose-clamp pliers to release the lower radiator-hose clamp and carefully loosen the hose.
- Allow the coolant to drain completely before continuing.
- Loosen hoses slowly to control the spill.
Step 4: Remove the accessory drive belt
- Compare your photograph with the underhood belt-routing diagram.
- Fit the serpentine belt tool with 15mm socket onto the tensioner.
- Rotate the tensioner against spring pressure and slide the belt off the water-pump pulley.
- Slowly release the tensioner. Never let it snap against its stop.
- Remove the belt if you are replacing it. Otherwise, move it clear of the work area.
Step 5: Loosen and remove the water-pump pulley
- Use a 10mm socket and ratchet to loosen the pulley bolts before allowing the pulley to rotate freely.
- If the pulley turns, hold it with the old belt while loosening each bolt.
- Remove the bolts and pulley. Keep the pulley from falling into the radiator or fan assembly.
Step 6: Disconnect the water-pump hoses
- Use hose-clamp pliers to move each spring clamp away from the water-pump connection.
- Mark similar hoses with tape before disconnecting them.
- Twist each hose gently to break its seal. Use a 90-degree hose pick only between the rubber hose and fitting.
- Don't pry against or scratch a plastic or aluminum hose neck.
- Expect additional coolant to drain when each hose is removed.
Step 7: Remove the water pump
- Support the pump with one hand while using a 10mm or 13mm socket, extension, and ratchet to remove its mounting bolts.
- Note each bolt's original location. Reinstall bolts in the same positions if their lengths differ.
- Pull the pump straight away from the engine. Rock it gently if the seals are stuck.
- Do not drive a screwdriver between the aluminum sealing surfaces.
Step 8: Clean and inspect the mounting surfaces
- Use a plastic gasket scraper and nylon brush to remove old seal material and deposits.
- Wipe the surfaces with clean shop towels. They must be smooth, clean, and dry.
- Inspect the hose ends for swelling, cracking, oil contamination, or cuts.
- Check the belt tensioner and idler pulleys by hand. Roughness, looseness, or noise means they should be replaced.
- Do not use abrasive power tools on the aluminum engine surface.
Step 9: Prepare the replacement pump
- Install the three new water-pump seals in their correct grooves.
- Lightly wet rubber seals with fresh DEX-COOL-compatible coolant unless the pump manufacturer supplies different instructions.
- Do not add RTV silicone to molded rubber seals. RTV can make them slide out of position while the bolts are tightened.
Step 10: Install the replacement pump
- Hold the pump squarely against the engine without disturbing the seals.
- Start every mounting bolt by hand for several turns. This prevents cross-threading the aluminum engine threads.
- Use a 10mm or 13mm socket to snug the bolts gradually in a crossing pattern.
- Use the 3/8-inch drive torque wrench for final tightening.
- Torque the water-pump mounting bolts to 25 Nm (18 ft-lbs), unless the instructions supplied with the replacement pump specify otherwise.
- Tighten in two passes and work from the center outward.
Step 11: Reconnect the coolant hoses
- Push each hose fully over its original fitting.
- Use hose-clamp pliers to place each spring clamp over the raised bead on the fitting.
- Confirm no clamp is crooked and no hose is twisted or rubbing against a pulley.
Step 12: Reinstall the water-pump pulley
- Position the pulley and start all bolts by hand.
- Use a 10mm socket to tighten the bolts evenly while holding the pulley with the old belt.
- Use the 3/8-inch drive torque wrench for final tightening.
- Torque the water-pump pulley bolts to 25 Nm (18 ft-lbs).
Step 13: Install the accessory drive belt
- Route the belt around every pulley according to your photograph and the underhood diagram.
- Leave one smooth pulley for last.
- Use the serpentine belt tool with 15mm socket to rotate the tensioner and slip the belt into place.
- Slowly release the tensioner.
- Check every ribbed pulley closely. Every belt rib must sit inside a pulley groove.
Step 14: Reinstall the intake duct
- Remove the protective shop towel from the throttle body.
- Install the intake duct and reconnect its breather hose.
- Use a 7mm or 8mm socket to tighten the duct clamps until secure. Do not crush the plastic duct.
Step 15: Refill the cooling system
- Close the radiator drain or reinstall the lower radiator hose and clamp.
- For the preferred method, connect the cooling-system vacuum fill tool and follow its operating instructions.
- Pull and hold vacuum first. A falling vacuum indicates a leak that must be corrected before filling.
- Allow the tool to draw fresh DEX-COOL-compatible 50/50 premixed coolant into the system.
- If filling manually, use a plastic fill funnel and slowly fill the coolant reservoir to the cold-fill mark.
- Do not mix conventional green coolant with DEX-COOL.
Step 16: Reconnect the battery
- Place the negative cable onto the battery terminal.
- Use a 10mm socket to tighten the clamp securely without overtightening it.
✅ After Repair
- ✅ Leave the reservoir cap off initially and start the engine only if you used the manual filling method.
- ✅ Set the heater to maximum temperature. Let the engine idle while watching the coolant level and temperature gauge.
- ✅ Add 50/50 coolant as the level drops. Do not reach near the moving belt or pulleys.
- ✅ Install the reservoir cap once the level stabilizes. Shut the engine off immediately if temperature rises abnormally or the heater suddenly blows cold.
- ✅ Inspect the pump, hose connections, drain fitting, and mounting surfaces for leaks.
- ✅ After the engine cools completely, recheck the reservoir and adjust it to the cold-fill mark.
- ✅ Use a cooling-system pressure tester to pressure-test the cold system to the pressure printed on the reservoir cap. Do not exceed that rating.
- ✅ Recheck the coolant level and the area beneath your Silverado after the next two or three drives.
- ✅ No programming, calibration, or battery registration is required for this repair.
💰 DIY vs Shop Cost
Shop Cost: $900-$1,500 USD (parts + labor)
DIY Cost: $250-$600 USD (parts and coolant)
You Save: $500-$1,000 USD by doing it yourself!
Labor pricing varies by region. This repair generally takes a professional shop approximately 2.5-4 hours.
🎯 Ready to get started?
HowToo makes it easy: same-day/2-day shipping on every part, plus all the tools and specialty tools you need! Check out the parts and tools sections below to add everything to your cart.