

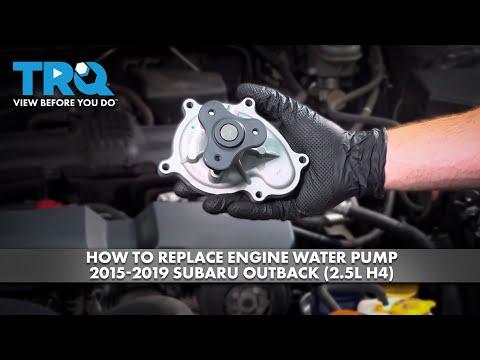







How to Replace the Water Pump on a 2019-2021 Subaru Ascent 2.4L Turbo (Trim: Limited | Engine: Flat 4 2.4L)
Advanced step-by-step guide covering tools, parts, coolant bleeding, and safety tips for 2019, 2020, 2021
How to Replace the Water Pump on a 2019-2021 Subaru Ascent 2.4L Turbo (Trim: Limited | Engine: Flat 4 2.4L)
Advanced step-by-step guide covering tools, parts, coolant bleeding, and safety tips for 2019, 2020, 2021


🔧 Ascent - Water Pump Replacement
This is an advanced repair, not a good first-time project. The water pump is packaged tightly at the front of the FA24 turbo engine, and access may involve substantial front-engine disassembly. Exact fastener locations, bolt lengths, tightening sequence, and current Subaru torque data must come from the factory service procedure.
The pump aisle is open with an OE-tier replacement matched to your Ascent. Sonīpat heat makes a perfectly bled cooling system especially important. An air pocket can turn a successful repair into an overheated engine surprisingly fast.
Difficulty Level: Advanced | Estimated Time: 6-10 hours
Assumption: This procedure outlines the factory-style workflow, but intentionally does not invent unavailable torque values.
⚠️ Safety & Precautions
- ⚠️ Let the engine become completely cold, preferably overnight.
- ⚠️ Never remove a coolant pressure cap from a warm engine. Pressurized coolant can cause severe burns.
- ⚠️ Stop driving immediately if the temperature warning appears or steam is visible.
- ⚠️ Support the Ascent only at approved lifting points with properly rated jack stands.
- ⚠️ Disconnect the negative battery terminal before working around the accessory drive and electrical connections.
- ⚠️ Keep coolant away from children and animals. Collect it in a sealable drain pan.
- ⚠️ Do not rotate the crankshaft or camshafts independently if timing components are exposed.
- ⚠️ Do not use excessive torque on small bolts threaded into aluminum.
🔧 Required Tools
You'll need the following tools for this repair:
- Safety glasses
- Coolant-resistant nitrile gloves
- Wheel chocks
- Floor jack rated 3-ton minimum
- Jack stands rated 3-ton minimum
- Drain pan rated 15-quart minimum
- 3/8-inch drive metric socket set, 8mm-19mm
- 1/2-inch drive metric socket set, 10mm-22mm
- 3/8-inch drive ratchet
- 1/2-inch drive breaker bar
- 3/8-inch drive torque wrench, 20-250 in-lbs
- 1/2-inch drive torque wrench, 20-150 ft-lbs
- Metric combination wrench set, 8mm-19mm
- Serpentine-belt tensioner tool (specialty)
- Crankshaft pulley holding tool (specialty)
- Hose-clamp pliers (specialty)
- Trim clip remover
- Plastic gasket scraper
- Nylon cleaning brush
- Cooling-system pressure tester (specialty)
- Vacuum coolant filling tool (specialty)
- Air compressor rated 90 psi minimum
- Coolant-safe funnel
- Mechanic's inspection mirror
- LED work light
🔩 Required Parts
HowToo sells all the parts you need for this repair:
- OE-tier engine water pump - Qty: 1
- Water pump gasket or sealing ring - Qty: 1
- Subaru Super Coolant, premixed blue - Qty: Up to 3 gallons
- Water-pipe O-rings disturbed during removal - Qty: As required
- Accessory drive belt - Qty: 1 if cracked, glazed, or coolant-soaked
- Single-use fasteners identified by Subaru - Qty: As required
- Subaru-specified sealing compound - Qty: 1 if the front cover is removed
The complete system holds approximately 11.1 liters or 11.7 US quarts, although a pump replacement normally drains less. Subaru specifies premixed Subaru Super Coolant and warns against mixing coolant types. viewer.joomag.com)
📋 Before You Begin
- Park on level concrete, select Park, apply the parking brake, and chock the rear wheels.
- Record the accessory-belt routing with a clear photograph.
- With the engine cold, use a 10mm socket to disconnect the negative battery terminal.
- Use a cooling-system pressure tester to confirm that the pump is actually leaking before disassembly.
- Inspect the thermostat housing, coolant pipes, hose connections, radiator, turbo cooling lines, and cylinder-head area for another leak source.
- Obtain the current Subaru service procedure for the FA24 water pump before loosening pump or front-cover fasteners.
- Arrange every removed bolt in a labeled cardboard template. Subaru lists multiple bolt lengths in the water-pump area, so position matters. subarupartsdeal.com
🔨 Step-by-Step Instructions
Follow these steps in order:
Step 1: Verify the leak
- Remove the upper engine cover by hand and use the LED work light and inspection mirror to inspect the pump area.
- Install the cooling-system pressure tester only on a cold engine and pump it to the cap's marked pressure. Do not exceed that rating.
- Look for fresh coolant at the pump body, shaft area, gasket joint, hoses, and nearby water pipes.
- If the leak source remains unclear, clean the area and repeat the pressure test before replacing anything.
Step 2: Raise the front and remove lower protection
- Use the 3-ton floor jack at the approved front lifting point.
- Lower the Ascent securely onto 3-ton jack stands and gently verify stability.
- Use the trim clip remover and applicable metric sockets to remove the lower splash shield.
- Position the 15-quart drain pan beneath the cooling-system drain.
Step 3: Drain the coolant
- Confirm the engine is cold, then slowly open the coolant pressure cap.
- Open the radiator drain using the appropriate hand tool. Do not force the plastic drain fitting.
- Capture the coolant completely and close the drain after flow stops.
- Keep the drain pan centered. Coolant travels.
Step 4: Create working clearance
- Use the 8mm-19mm socket set and trim clip remover to remove the air-intake ducting and obstructing brackets identified in the Subaru procedure.
- Disconnect only the electrical connectors and hoses required for pump access.
- Mark every hose and connector with matching labels before separation.
- Plug open coolant connections with clean caps. Do not allow dirt into the system.
Step 5: Remove the accessory drive belt
- Use the serpentine-belt tensioner tool to rotate the automatic tensioner away from the belt.
- Slide the belt off one smooth pulley, then slowly release the tensioner.
- Compare the removed belt with your routing photograph.
- Replace the belt if coolant-soaked, cracked, hardened, frayed, or shiny from slipping.
Step 6: Remove the pump pulley and required front components
- Use the applicable metric socket to loosen the water-pump pulley fasteners while holding the pulley with the correct holding tool.
- Remove the pulley and keep its fasteners together.
- If the Subaru procedure requires crankshaft pulley or front-cover removal, use the crankshaft pulley holding tool and specified socket.
- Do not use the starter motor to loosen a crankshaft bolt. That shortcut can cause injury and engine damage.
- Mark and store every front-cover bolt by its exact installed position.
Step 7: Preserve engine timing if exposed
- Use the appropriate crankshaft socket to position the engine exactly as directed by Subaru before exposing timing components.
- Mark chain, sprocket, and guide positions only as a secondary reference. Factory timing marks remain authoritative.
- Secure the timing chain and tensioner using the factory procedure.
- Do not rotate the crankshaft or either camshaft after timing tension is released.
- If the chain slips or timing marks move, stop and perform the full timing verification procedure before reassembly.
Step 8: Remove the old water pump
- Use hose-clamp pliers to release any pump hoses, then gently twist each hose free.
- Use the correct metric socket to loosen the pump fasteners gradually and evenly.
- Record each bolt's location because different lengths may be used.
- Remove the pump straight from its mounting surface without prying against sealing faces.
- Discard the old gasket or sealing ring.
Step 9: Clean and inspect the mounting surface
- Use the plastic gasket scraper and nylon brush to remove gasket residue.
- Do not use a rotary abrasive disc. It can remove aluminum and leave damaging grit inside the engine.
- Inspect the housing for corrosion, cracks, pitting, or evidence that the impeller contacted the casting.
- Clean bolt holes and confirm no coolant or oil remains trapped inside blind holes.
Step 10: Install the replacement pump
- Compare the new pump with the removed unit, including hose outlets, pulley alignment, impeller depth, and mounting holes.
- Install a new dry gasket or sealing ring unless Subaru specifically requires lubricant or sealant.
- Do not add RTV silicone to a molded gasket unless the factory procedure explicitly calls for it.
- Start every fastener by hand for several turns.
- Use the inch-pound torque wrench to tighten pump fasteners in the Subaru sequence and to the current factory specification.
- Do not substitute a guessed torque value. These small fasteners thread into aluminum and can strip or break.
Step 11: Reassemble the front of the engine
- If the front cover was removed, use the plastic scraper to prepare both sealing surfaces without scratching them.
- Apply only the Subaru-specified sealing compound in the factory bead size and locations.
- Install the cover within the sealant's specified assembly time.
- Use both torque wrenches to tighten every fastener in the factory sequence and to its listed specification.
- Reinstall the pulley, brackets, hoses, connectors, intake ducting, and accessory belt in reverse order.
- Use the belt-tensioner tool to install the belt, then verify every rib is centered in every grooved pulley.
Step 12: Refill the cooling system
- Connect the vacuum coolant filling tool to the system and the air compressor set to its required operating pressure.
- Draw the specified vacuum and verify it holds. A falling reading suggests an open connection or leak.
- Allow the tool to pull premixed Subaru Super Coolant into the system.
- If vacuum filling equipment is unavailable, fill slowly through a coolant-safe funnel and repeatedly inspect for trapped air.
- Fill the expansion reservoir only to the cold-level mark.
Step 13: Reconnect the battery and inspect
- Use the 10mm socket to reconnect the negative battery terminal.
- Subaru specifies 7.5 Nm or 5.5 ft-lbs for the battery-sensor ground connection when supporting the sensor with the other hand. static.nhtsa.gov
- Leave the lower splash shield off temporarily so the pump and hose joints remain visible.
Step 14: Bleed and test the system
- Set the cabin heater to maximum temperature and start the engine.
- Watch coolant temperature continuously while checking for leaks.
- Confirm steady cabin heat and normal radiator-hose warming.
- Shut the engine off immediately if temperature rises abnormally, coolant erupts from the funnel, or the heater suddenly turns cold.
- After the cooling fans cycle normally, shut the engine off and let it become completely cold.
- Correct the cold coolant level, then reinstall the lower shield using the trim tool and applicable sockets.
✅ After Repair
- Pressure-test the cold cooling system again and inspect every disturbed connection.
- Run the engine until fully warm while monitoring temperature and heater output.
- Check the pump pulley for wobble, noise, and belt misalignment.
- Allow one complete overnight cool-down, then recheck the radiator and reservoir levels.
- Inspect beneath the Ascent after the first short drive and again after several days.
- Recycle the drained coolant through an approved hazardous-waste facility.
- If overheating continues, stop driving and check for trapped air, thermostat trouble, combustion gases, or another leak.
💰 DIY vs Shop Cost
Shop Cost: Approximately $750-$1,800 USD, with local imported-parts costs potentially higher
DIY Cost: Approximately $150-$500 USD for parts and fluids, excluding specialty tools
You Save: Approximately $400-$1,300 by doing it yourself!
Labor pricing varies considerably. Current U.S. estimates begin around $768-$866, but front-cover work or additional leaks can increase the total. kbb.com
🎯 Ready to get started?
HowToo makes it easy: same-day/2-day shipping on every part, plus all the tools and specialty tools you need! Check out the parts and tools sections below to add everything to your cart.