

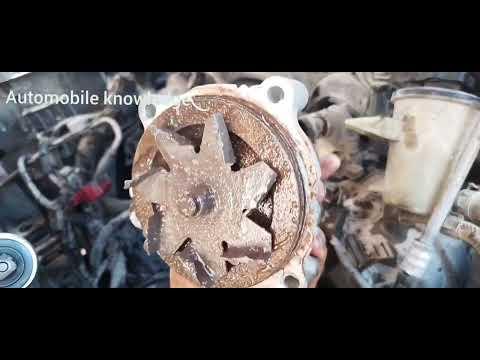




How to Replace the Water Pump on a 2018-2021 Ford Expedition (Engine: V6 3.5L)
Step-by-step DIY guide with tools, parts, coolant refill, torque specs, and leak checks for 2018, 2019, 2020, 2021
How to Replace the Water Pump on a 2018-2021 Ford Expedition (Engine: V6 3.5L)
Step-by-step DIY guide with tools, parts, coolant refill, torque specs, and leak checks for 2018, 2019, 2020, 2021


🔧 Expedition - Water Pump Replacement
This repair replaces the external engine water pump on your Expedition. The water pump circulates coolant through the engine and radiator; if it leaks, growls, wobbles, or causes overheating, it must be replaced before engine damage occurs.
Difficulty Level: Intermediate | Estimated Time: 3-5 hours
⚠️ Safety & Precautions
- ⚠️ Work only on a completely cold engine. Hot coolant is pressurized and can burn you badly.
- ⚠️ Disconnect the negative battery cable before working near the belt and pulleys.
- ⚠️ If you raise the front of your Expedition, support it with jack stands. Never work under a vehicle held only by a jack.
- ⚠️ Keep coolant away from children and animals. It is poisonous.
- ⚠️ Clean spilled coolant immediately because it is slippery and can damage rubber belts.
🔧 Required Tools
You'll need the following tools for this repair:
- 8mm socket
- 10mm socket
- 13mm socket
- 15mm socket
- 3/8-inch drive ratchet
- 1/2-inch drive ratchet
- 3/8-inch drive extension set
- 1/2-inch breaker bar
- Torque wrench 5-80 Nm
- Serpentine belt tool (specialty)
- Flat-blade screwdriver
- Plastic trim clip remover
- Hose clamp pliers
- Plastic gasket scraper
- Drain pan 3-gallon minimum
- Cooling system vacuum fill tool (specialty)
- Spill-free coolant funnel kit
- Floor jack rated 3-ton minimum
- Jack stands rated 3-ton minimum
- Wheel chocks
- Flashlight
- Nitrile gloves
- Safety glasses
- Shop towels
🔩 Required Parts
HowToo sells all the parts you need for this repair:
- Water pump assembly - Qty: 1
- Water pump gasket or O-ring seal - Qty: 1
- Ford-approved engine coolant - Qty: 3 gallons premixed, or as needed
- Serpentine belt - Qty: 1, recommended if worn or coolant-contaminated
- Coolant hose clamps - Qty: as needed
📋 Before You Begin
- 🅿️ Park your Expedition on level ground, set the parking brake, and place wheel chocks behind the rear wheels.
- ❄️ Let the engine cool fully. The upper radiator hose should feel cool and soft before you open the cooling system.
- 🔋 Use a 10mm socket to disconnect the negative battery cable.
- 🧰 A serpentine belt tool is a long wrench used to move the belt tensioner. The tensioner is the spring-loaded pulley that keeps the belt tight.
- 🧰 A vacuum fill tool removes air from the cooling system before refilling. This helps prevent overheating from trapped air pockets.
🔨 Step-by-Step Instructions
Follow these steps in order:
Step 1: Remove the Engine Cover
- Use both hands to pull the plastic engine cover straight upward.
- The cover is held by rubber grommets, which are soft push-in mounts.
- Set the cover aside where it will not be stepped on.
- Pull straight up gently.
Step 2: Disconnect the Battery
- Use a 10mm socket to loosen the negative battery terminal nut.
- Lift the negative cable off the battery post.
- Move the cable aside so it cannot touch the battery post while you work.
Step 3: Raise and Support the Front
- Use wheel chocks behind the rear wheels.
- Use a floor jack rated 3-ton minimum to lift the front of your Expedition at a proper front lift point.
- Place jack stands rated 3-ton minimum under the frame support points.
- Lower the vehicle gently onto the jack stands.
- Shake the vehicle lightly by hand to confirm it is stable before going underneath.
Step 4: Remove the Lower Splash Shield
- Use an 8mm socket to remove the lower splash shield bolts.
- Use a plastic trim clip remover to release any plastic push clips.
- Lower the splash shield and place it aside.
Step 5: Drain the Coolant
- Place a drain pan 3-gallon minimum under the radiator drain area.
- Slowly loosen the coolant reservoir cap by hand to release any remaining pressure.
- Use a flat-blade screwdriver to open the radiator drain valve if accessible.
- If the drain valve is not practical to reach, use hose clamp pliers to release the lower radiator hose clamp and carefully slide the hose off.
- Let the coolant drain completely into the drain pan.
- Coolant drains faster than expected.
Step 6: Remove the Intake Duct
- Use an 8mm socket to loosen the intake duct clamps.
- Use a flat-blade screwdriver to gently release any small retaining tabs.
- Lift the intake duct out of the way.
- Cover open intake areas with a clean shop towel so nothing falls inside.
Step 7: Record the Belt Routing
- Use a phone or camera to take a clear picture of the serpentine belt path.
- The serpentine belt is the long rubber belt that drives the alternator, A/C compressor, and water pump.
- Make sure your picture shows every pulley before you remove the belt.
Step 8: Remove the Serpentine Belt
- Place the serpentine belt tool on the belt tensioner.
- Rotate the tensioner to release belt tension.
- Slide the belt off one smooth pulley first.
- Slowly release the tensioner.
- Remove the belt from the remaining pulleys.
- Inspect the belt for cracks, shiny glazing, missing ribs, or coolant soaking.
Step 9: Move Coolant Hoses and Brackets
- Use hose clamp pliers to move any hose clamps away from the water pump connections.
- Twist the hoses gently by hand to break them loose before pulling them off.
- Use an 8mm socket, 10mm socket, or 13mm socket to remove any small brackets blocking water pump access.
- Keep bolts organized by location so they go back in the same places.
Step 10: Remove the Water Pump Pulley if Needed
- If the water pump pulley blocks the mounting bolts, use a 10mm socket to remove the pulley bolts.
- Hold the pulley steady by hand while loosening the bolts.
- Remove the pulley and set it aside.
- During installation, tighten pulley bolts to Torque to 25 Nm (18 ft-lbs).
Step 11: Remove the Old Water Pump
- Place shop towels below the pump to catch remaining coolant.
- Use an 8mm socket or 10mm socket to remove the water pump mounting bolts.
- Pay attention to bolt length. If bolts are different lengths, lay them out in the same pattern as the pump.
- Pull the water pump straight away from the engine.
- If it sticks, use a plastic gasket scraper to gently work around the edge.
- Do not use a metal scraper or screwdriver against the aluminum sealing surface.
Step 12: Clean the Sealing Surface
- Use a plastic gasket scraper to remove old gasket material from the engine-side surface.
- Use shop towels to wipe the area clean and dry.
- Inspect the surface with a flashlight.
- The surface must be smooth, clean, and free of old seal pieces before the new pump goes on.
Step 13: Install the New Water Pump
- Install the new gasket or O-ring seal on the new water pump.
- If the seal is an O-ring, lightly wet it with clean coolant so it slides into place without pinching.
- Position the new water pump squarely against the engine.
- Start all bolts by hand first. This prevents cross-threading, which means damaging the threads by starting a bolt crooked.
- Use an 8mm socket or 10mm socket to snug the bolts evenly.
- Use a torque wrench 5-80 Nm to tighten the water pump bolts to Torque to 10 Nm (89 in-lbs).
- Even tightening prevents leaks.
Step 14: Reinstall the Pulley, Hoses, and Brackets
- Use a 10mm socket to reinstall the water pump pulley if removed.
- Use a torque wrench 5-80 Nm to tighten pulley bolts to Torque to 25 Nm (18 ft-lbs).
- Use hose clamp pliers to reinstall coolant hoses and clamps.
- Use an 8mm socket, 10mm socket, or 13mm socket to reinstall any brackets removed earlier.
Step 15: Reinstall the Serpentine Belt
- Use your belt routing photo to place the belt around each pulley.
- Leave one smooth pulley for last.
- Use the serpentine belt tool to rotate the tensioner.
- Slide the belt over the final pulley.
- Slowly release the tensioner.
- Check every pulley with a flashlight. The belt ribs must sit fully inside the pulley grooves.
Step 16: Reinstall the Intake Duct
- Remove any shop towels from the intake openings.
- Set the intake duct back into position.
- Use an 8mm socket to tighten the duct clamps.
- Make sure the duct is fully seated and secure.
Step 17: Reinstall the Lower Splash Shield
- Raise the lower splash shield into place.
- Use a plastic trim clip remover to reinstall the plastic clips.
- Use an 8mm socket to reinstall the splash shield bolts.
Step 18: Refill the Cooling System
- Close the radiator drain valve by hand or with a flat-blade screwdriver.
- If the lower radiator hose was removed, reinstall it using hose clamp pliers.
- Best method: use a cooling system vacuum fill tool to pull vacuum and refill with Ford-approved coolant.
- Beginner method: use a spill-free coolant funnel kit at the coolant reservoir.
- Fill slowly until coolant reaches the cold fill mark on the reservoir.
- Do not mix coolant types unless the coolant label specifically says it is compatible with Ford specifications.
Step 19: Reconnect the Battery
- Place the negative battery cable back onto the battery post.
- Use a 10mm socket to tighten the negative battery terminal nut until snug.
- Do not overtighten it. The terminal can crack.
Step 20: Bleed Air From the Cooling System
- Set the cabin heat to maximum temperature and low fan speed.
- Start the engine and let it idle.
- If using a spill-free coolant funnel kit, leave it installed while the engine warms up.
- Add coolant as the level drops and air bubbles come out.
- Let the engine reach normal operating temperature.
- Confirm warm air comes from the vents.
- Install the coolant reservoir cap once the level stabilizes.
Step 21: Check for Leaks
- Use a flashlight to inspect the water pump, hose connections, radiator drain, and lower radiator hose.
- Look for wet spots, drips, steam, or coolant smell.
- Shut the engine off and let it cool fully.
- Recheck the coolant level and top off to the cold fill mark if needed.
✅ After Repair
- ✅ Take a short 10-15 minute road test while watching the temperature gauge.
- ✅ Park on level ground and check again for leaks after the road test.
- ✅ After the engine cools completely, recheck coolant level and top off if needed.
- ✅ Recheck the coolant level again after the next 1-2 drive cycles.
- ✅ Recycle old coolant properly at a fluid recycling center or parts store that accepts used coolant.
💰 DIY vs Shop Cost
Shop Cost: $650-$1,050 (parts + labor)
DIY Cost: $180-$420 (parts only)
You Save: $470-$630 by doing it yourself!
Shop labor rates vary but typically run $100-$150/hour. This repair takes a shop approximately 3-4 hours.
🎯 Ready to get started?
HowToo makes it easy: same-day/2-day shipping on every part, plus all the tools and specialty tools you need! Check out the parts and tools sections below to add everything to your cart.