
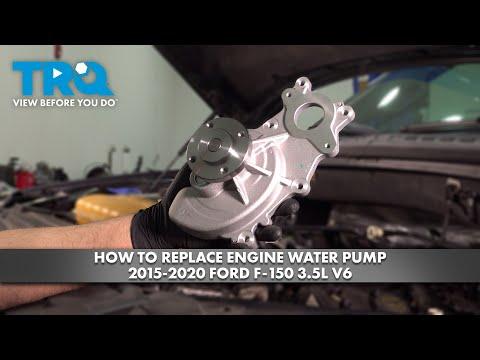




How to Replace the Water Pump on a 2018-2020 Ford F-150 3.5L EcoBoost (Trim: Limited | Engine: V6 3.5L)
Step-by-step instructions with required tools, parts, torque specs, and safety tips for 2018, 2019, 2020
How to Replace the Water Pump on a 2018-2020 Ford F-150 3.5L EcoBoost (Trim: Limited | Engine: V6 3.5L)
Step-by-step instructions with required tools, parts, torque specs, and safety tips for 2018, 2019, 2020


🔧 F-150 - Water Pump Replacement
This is an intermediate repair, and I’d use the catalog-matched Motorcraft main engine water pump. The pump sits externally at the front of the 3.5L EcoBoost, so the timing chains stay untouched. You’ll drain the coolant, move the coolant reservoir and left charge-air pipe, remove the drive belt and pulley, then replace the pump, gasket, and seals.
Difficulty Level: Intermediate | Estimated Time: 3-5 hours
Assumption: These instructions cover the belt-driven main engine water pump, not the small electric auxiliary pump.
⚠️ Safety & Precautions
- ⚠️ Work only with the engine completely cold. Hot coolant can cause severe burns.
- 🧤 Wear gloves and safety glasses. Coolant is poisonous and must be contained.
- 🚫 Keep coolant away from children and animals. Even a small spill is dangerous.
- 🔋 Disconnect the negative battery terminal before working near the belt and pulleys.
- 🛡️ Cover the separate A/C compressor belt with waterproof plastic. Ford warns that coolant contamination can damage the belt. manuals.plus
- ♻️ Capture the old coolant in a clean drain pan. Never pour it onto the ground or into a drain.
🔧 Required Tools
You'll need the following tools for this repair:
- 8mm socket
- 10mm socket
- 13mm socket
- 15mm socket
- 7mm nut driver
- 1/4-inch drive ratchet
- 3/8-inch drive ratchet
- 3/8-inch drive breaker bar
- 3-inch socket extension
- Inch-pound torque wrench rated to 89 lb-in
- Foot-pound torque wrench rated to 18 lb-ft
- Torque-angle gauge (specialty)
- Spring hose-clamp pliers (specialty)
- Cooling-system vacuum filler (specialty)
- Plastic gasket scraper
- Plastic trim tool
- Coolant drain pan rated 15-quart minimum
- Small funnel
- Waterproof plastic sheeting
- Shop towels
- Nitrile gloves
- Safety glasses
🔩 Required Parts
HowToo sells all the parts you need for this repair:
- Main engine water pump - Qty: 1
- Water pump gasket - Qty: 1
- Water pump O-ring seal - Qty: 1
- Water pump outlet connector O-ring - Qty: 1
- Ford-approved 50/50 prediluted coolant - Qty: As required
- Accessory drive belt - Qty: 1 if worn or coolant-contaminated
The parts sidebar now shows the main pumps, gaskets, and auxiliary pump separately. Don’t substitute the Bosch electric auxiliary pump for the belt-driven main pump. Use coolant meeting the Ford specification printed on your reservoir or currently installed coolant container, because Ford warns against mixing incompatible coolant formulas. parts.ford.com
📋 Before You Begin
- 🅿️ Park your F-150 on level ground, select Park, and engage the parking brake.
- 🌡️ Allow the engine to become completely cold, preferably overnight.
- 📸 Photograph the accessory-belt routing before removal. Ford also provides the routing in the owner’s manual. fordservicecontent.com
- 🔋 Use a 10mm socket to disconnect the negative battery terminal and isolate it from the post.
- 🧼 Clean loose dirt from the pump and hose area before opening the cooling system.
- 🪣 Position the drain pan beneath the radiator drain and pump area.
🔨 Step-by-Step Instructions
Follow these steps in order:
Step 1: Drain the cooling system
- Remove the coolant reservoir cap only after confirming the engine is cold.
- Use the plastic trim tool or your fingers to remove any lower access panel blocking the radiator drain.
- Open the radiator drain carefully and collect the coolant in the 15-quart drain pan.
- Close the drain once the flow stops. Don’t overtighten a plastic drain fitting.
Step 2: Remove the left charge-air intake pipe
- Use the 7mm nut driver or appropriate socket to loosen the charge-air pipe clamps.
- Release the retaining clips and disconnect the left charge-air cooler pipe.
- Cover every open pipe end with clean plastic so dirt cannot enter the turbo intake system.
- Photograph every clamp before moving it.
Step 3: Move the coolant reservoir aside
- Use spring hose-clamp pliers to release the lower reservoir hose clamp.
- Disconnect the hose and allow remaining coolant to drain into the pan.
- Use the appropriate socket to remove the reservoir retaining bolts.
- Move the reservoir aside without stretching the remaining hoses.
Step 4: Loosen the pump pulley bolts
- Use a 10mm socket and 3/8-inch ratchet to loosen the water-pump pulley bolts while the belt still holds the pulley.
- Loosen each bolt approximately one turn. Don’t remove them yet.
Step 5: Remove the accessory drive belt
- Place the 15mm socket and breaker bar on the belt tensioner.
- Rotate the tensioner against spring pressure and slide the belt off the water-pump pulley.
- Release the tensioner slowly. Never let it snap back.
- Inspect the belt for cracks, glazing, missing ribs, or coolant contamination.
Step 6: Protect the A/C belt and remove the pulley
- Wrap the separate A/C compressor belt completely with waterproof plastic.
- Use the 10mm socket to remove the previously loosened pulley bolts.
- Remove the pulley and keep its mounting face clean.
Step 7: Disconnect the pump hoses and outlet
- Use spring hose-clamp pliers to release the pump hose clamps.
- Twist each hose gently before pulling it from its fitting. Don’t pry against a plastic connection.
- Use the appropriate socket to remove the water-pump outlet connector bolts.
- Move the connector aside and discard its old O-ring.
Step 8: Remove the old water pump
- Use the 8mm and 10mm sockets as required to remove the nine pump fasteners.
- Arrange every bolt on clean cardboard in its installed position because lengths may differ.
- Pull the pump straight away from the engine. Use a plastic trim tool only at a designated edge if it sticks.
- Expect additional coolant to drain when the seal releases.
- Remove and discard the old gasket and pump O-ring.
Step 9: Clean and inspect the mounting surface
- Use the plastic gasket scraper to remove gasket residue without gouging the aluminum surface.
- Wipe the surface with a clean shop towel.
- Inspect the outlet connector and hose fittings for cracks, corrosion, or damaged sealing surfaces.
- Check the pulley for bending and the belt tensioner for rough movement.
- Metal scrapers turn small jobs into leaks.
Step 10: Install the new pump
- Fit the new gasket and O-ring to the new main water pump.
- Lubricate the O-ring lightly with clean approved coolant. Don’t use petroleum grease.
- Place the pump squarely against the engine and start all nine bolts by hand.
- Use the inch-pound torque wrench and tighten the bolts in the numbered crisscross sequence supplied with the pump or Ford service diagram.
- Tighten the pump bolts to Stage 1: 10 Nm (89 lb-in), then use the torque-angle gauge for Stage 2: an additional 45 degrees. manuals.plus
Step 11: Reinstall the outlet connector and hoses
- Lubricate the new outlet O-ring with clean coolant and seat it without twisting.
- Start the outlet connector bolts by hand.
- Use the inch-pound torque wrench to tighten them to Stage 1: 10 Nm (89 lb-in), followed by Stage 2: an additional 45 degrees. manuals.plus
- Reconnect the lower radiator and pump hoses using the spring hose-clamp pliers.
- Return each clamp to its original position behind the raised hose fitting.
Step 12: Install the pulley and belt
- Place the pulley onto the pump and install its bolts finger-tight.
- Use the 15mm socket and breaker bar to rotate the tensioner and reinstall the accessory belt.
- Check that every belt rib is centered in every grooved pulley.
- Remove the waterproof plastic from the A/C compressor belt.
- Use the foot-pound torque wrench to tighten the pulley bolts evenly to 24 Nm (18 ft-lbs). manuals.plus
Step 13: Reinstall the reservoir and charge pipe
- Position the coolant reservoir and start its bolts by hand.
- Use the inch-pound torque wrench to tighten the reservoir bolts to 7 Nm (62 lb-in). manuals.plus
- Reconnect the lower reservoir hose and return its spring clip fully into position.
- Reinstall the left charge-air pipe using the 7mm nut driver or appropriate socket.
- Confirm every pipe clip and clamp is fully locked.
Step 14: Refill and bleed the cooling system
- Use the cooling-system vacuum filler for the safest refill. A vacuum filler draws air out before pulling coolant into the system.
- Fill with the correct Ford-approved 50/50 coolant mixture.
- If vacuum filling isn’t available, fill the cold reservoir slowly to the marked level.
- Reconnect the negative battery terminal using the 10mm socket.
- Start the engine, set the heater to maximum heat, and monitor the temperature and coolant level.
- Shut the engine off immediately if the temperature rises abnormally or the heater suddenly blows cold.
✅ After Repair
- 🔍 Inspect the pump gasket, outlet connector, hoses, drain, and reservoir for leaks while the engine warms.
- 🌡️ Confirm the cabin heater produces steady heat and the engine temperature remains normal.
- 🔄 Allow the engine to cool completely, then recheck the reservoir level and top up only with matching coolant.
- 🧽 Rinse accidental coolant residue from painted or metal surfaces using clean water.
- 🛣️ Take a short test drive, let the engine cool again, and perform a second leak and level check.
- ♻️ Take the drained coolant to an approved recycling or hazardous-waste facility.
💰 DIY vs Shop Cost
Shop Cost: $550-$1,050 (parts + labor)
DIY Cost: $100-$250 (pump, seals, coolant, and optional belt)
You Save: $300-$900 by doing it yourself!
Shop labor rates vary but typically run $100-$150/hour. This repair takes a shop approximately 3-5 hours.
🎯 Ready to get started?
HowToo makes it easy: same-day/2-day shipping on every part, plus all the tools and specialty tools you need! Check out the parts and tools sections below to add everything to your cart.