

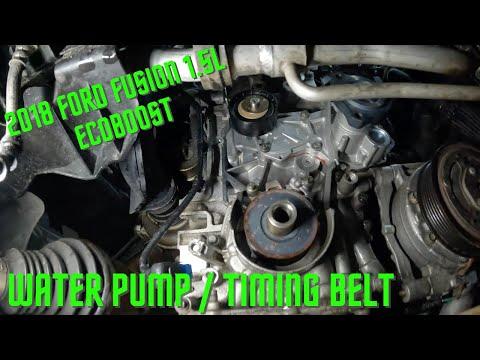





How to Replace the Water Pump on a 2017-2020 Ford Fusion 1.5L Turbo (Engine: Inline 4 2.0L)
Step-by-step DIY guide with tools, parts, coolant refill tips, and torque specs for 2017, 2018, 2019, 2020
How to Replace the Water Pump on a 2017-2020 Ford Fusion 1.5L Turbo (Engine: Inline 4 2.0L)
Step-by-step DIY guide with tools, parts, coolant refill tips, and torque specs for 2017, 2018, 2019, 2020


🔧 Fusion - Water Pump Replacement
Replacing the water pump on your Fusion means draining the cooling system, removing the accessory drive belt, removing the pump from the engine, and refilling the system with the correct coolant. The water pump moves coolant through the engine and radiator; if it leaks or the bearing fails, the engine can overheat quickly.
Difficulty Level: Intermediate | Estimated Time: 2.5-4 hours
⚠️ Safety & Precautions
- ⚠️ Let the engine cool completely before opening the cooling system; hot coolant can cause serious burns.
- ⚠️ Disconnect the negative battery cable before working near the belt and pulleys.
- ⚠️ Support the Fusion securely on jack stands if you raise the front end; never rely on a floor jack alone.
- ⚠️ Keep coolant away from children and pets; it is toxic and often smells sweet.
- ⚠️ Do not run the engine with the accessory belt removed.
🔧 Required Tools
You'll need the following tools for this repair:
- 8mm socket
- 10mm socket
- 13mm socket
- 15mm wrench
- 3/8-inch drive ratchet
- 3/8-inch drive extension set
- Torque wrench 5-80 Nm
- Flat-blade screwdriver
- Hose clamp pliers
- Drain pan 2-gallon minimum
- Plastic gasket scraper
- Cooling system vacuum fill tool (specialty)
- Floor jack rated 2-ton minimum
- Jack stands rated 2-ton minimum
- Wheel chocks
- Fender cover
- Nitrile gloves
- Safety glasses
🔩 Required Parts
HowToo sells all the parts you need for this repair:
- Engine water pump - Qty: 1
- Water pump gasket or seal - Qty: 1
- Motorcraft Orange-compatible coolant concentrate or premix - Qty: 1-2 gallons
- Distilled water - Qty: 1 gallon if using concentrate
- Accessory drive belt - Qty: 1, replace if cracked, glazed, or coolant-soaked
📋 Before You Begin
- Park the Fusion on level ground, shift to Park, and apply the parking brake.
- Place wheel chocks behind the rear wheels.
- Let the engine sit until it is fully cold.
- Open the hood and install a fender cover to protect the paint.
- Disconnect the negative battery cable using a 10mm socket.
- A vacuum fill tool pulls air out of the cooling system before refilling; this helps prevent air pockets that can cause overheating.
- Assumption: this procedure is for the stock 1.5L turbo engine with a belt-driven external water pump.
🔨 Step-by-Step Instructions
Follow these steps in order:
Step 1: Remove Pressure From the Cooling System
- Put on safety glasses and nitrile gloves.
- Make sure the engine is cold, then slowly loosen the coolant reservoir cap by hand.
- If you hear pressure escaping, stop and wait until it finishes before fully removing the cap.
- Cold engine only.
Step 2: Raise and Support the Front
- Use a floor jack rated 2-ton minimum to lift the front of the Fusion at the approved front jacking point.
- Place jack stands rated 2-ton minimum under the front support points.
- Gently lower the vehicle onto the jack stands and shake it lightly to confirm it is stable.
Step 3: Remove the Lower Splash Shield
- Use an 8mm socket and 3/8-inch drive ratchet to remove the lower engine splash shield fasteners.
- Set the shield and fasteners aside in order.
- Keep bolts grouped by location.
Step 4: Drain the Coolant
- Place a drain pan 2-gallon minimum under the radiator drain area.
- Use a flat-blade screwdriver if needed to open the radiator drain petcock carefully.
- If the petcock is difficult to access, use hose clamp pliers to loosen the lower radiator hose clamp and carefully pull the hose back enough to drain coolant.
- Close the drain petcock or reinstall the lower hose after the coolant has drained.
Step 5: Remove the Accessory Drive Belt
- Take a clear photo of the belt routing before removal.
- Use a 15mm wrench on the belt tensioner to rotate the tensioner and release belt tension.
- A belt tensioner is a spring-loaded pulley that keeps the belt tight.
- Slide the belt off the water pump pulley, then slowly release the tensioner.
- Remove the belt from the engine bay.
Step 6: Remove Obstructions Near the Water Pump
- Use a 10mm socket, 3/8-inch drive ratchet, and 3/8-inch drive extension set to remove any small brackets or covers blocking access to the water pump.
- Use hose clamp pliers to release any coolant hose clamp attached to the pump area.
- Twist hoses gently by hand before pulling; do not pry hard on plastic fittings.
Step 7: Remove the Water Pump Pulley
- Use a 10mm socket and 3/8-inch drive ratchet to loosen the water pump pulley bolts.
- If the pulley spins, hold it carefully by hand with a shop rag while loosening the bolts.
- Remove the pulley and set it aside.
- On installation, tighten the pulley bolts evenly to Torque to 25 Nm (18 ft-lbs).
Step 8: Remove the Old Water Pump
- Use an 8mm socket or 10mm socket, depending on bolt location, with a 3/8-inch drive ratchet and 3/8-inch drive extension set to remove the water pump mounting bolts.
- Note bolt length and location as you remove each bolt.
- Pull the water pump straight away from the engine.
- Expect more coolant to drain; keep the drain pan 2-gallon minimum under the pump.
Step 9: Clean the Sealing Surface
- Use a plastic gasket scraper to clean the engine sealing surface.
- Do not use metal scrapers or power sanding discs; they can gouge the aluminum surface.
- Wipe the area clean with a lint-free rag.
- A sealing surface is the flat area where the gasket seals coolant inside the engine.
Step 10: Install the New Water Pump
- Install the new water pump gasket or seal onto the new engine water pump.
- Position the pump squarely against the engine by hand.
- Start all mounting bolts by hand first to avoid cross-threading.
- Use an 8mm socket or 10mm socket with a torque wrench 5-80 Nm to tighten the water pump bolts evenly in a crisscross pattern.
- Tighten the water pump mounting bolts to Torque to 10 Nm (89 in-lbs) unless the replacement pump instructions specify otherwise.
- Hand-start every bolt.
Step 11: Reinstall the Pulley, Hoses, and Brackets
- Use a 10mm socket and torque wrench 5-80 Nm to reinstall the water pump pulley bolts.
- Tighten the pulley bolts evenly to Torque to 25 Nm (18 ft-lbs).
- Use hose clamp pliers to reinstall any removed coolant hose clamps in their original positions.
- Use a 10mm socket to reinstall any brackets or covers removed for access.
Step 12: Reinstall or Replace the Accessory Drive Belt
- Compare the belt routing to the photo you took earlier.
- Use a 15mm wrench to rotate the belt tensioner.
- Route the accessory drive belt over the pulleys, leaving the easiest smooth pulley for last.
- Slowly release the tensioner and confirm the belt ribs sit fully inside every pulley groove.
Step 13: Reinstall the Lower Splash Shield
- Lift the splash shield into position by hand.
- Use an 8mm socket and 3/8-inch drive ratchet to reinstall the splash shield fasteners.
- Tighten the fasteners snugly; do not overtighten small plastic retainers.
Step 14: Refill the Cooling System
- Use a cooling system vacuum fill tool (specialty) to pull the cooling system into vacuum.
- Fill with the correct Motorcraft Orange-compatible coolant concentrate or premix.
- If using concentrate, mix it 50/50 with distilled water before filling.
- If you do not have a vacuum fill tool, fill the reservoir slowly by hand, pause often, and squeeze the upper radiator hose gently to help move trapped air.
Step 15: Reconnect the Battery and Bleed Air
- Use a 10mm socket to reconnect the negative battery cable.
- Set the heater temperature to full hot and fan to low from the cabin controls.
- Start the engine and let it idle with the coolant reservoir cap off.
- Watch the coolant level and add coolant as the level drops.
- Install the reservoir cap once the level stabilizes and warm air comes from the vents.
Step 16: Check for Leaks
- Use a flashlight if available to inspect around the water pump, hoses, and radiator drain area.
- If you see dripping, shut the engine off and let it cool before tightening or correcting the leak.
- Do not place hands near the belt while the engine is running.
✅ After Repair
- ✅ Let the engine reach normal operating temperature while watching the temperature gauge.
- ✅ Confirm the cabin heater blows warm air; cold air can mean trapped air in the cooling system.
- ✅ After the first full heat cycle, let the engine cool completely and recheck the coolant level.
- ✅ Recheck for leaks after a short 10-15 minute test drive.
- ✅ Dispose of old coolant properly at an auto parts store or recycling center that accepts used coolant.
💰 DIY vs Shop Cost
Shop Cost: $450-$750 (parts + labor)
DIY Cost: $90-$220 (parts only)
You Save: $360-$530 by doing it yourself!
Shop labor rates vary but typically run $100-$150/hour. This repair takes a shop approximately 2.5-3.5 hours.
🎯 Ready to get started?
HowToo makes it easy: same-day/2-day shipping on every part, plus all the tools and specialty tools you need! Check out the parts and tools sections below to add everything to your cart.