

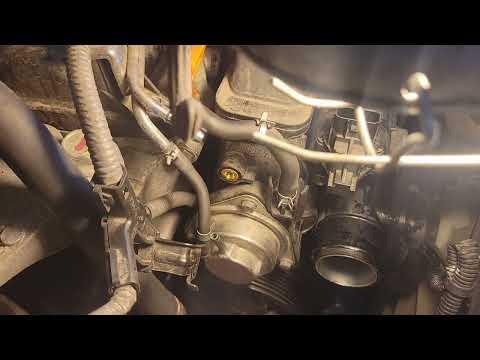




How to Replace the Water Pump on a 2017-2019 Honda CR-V 2.4L (Engine: Inline 4 2.4L)
Step-by-step instructions with required tools, parts, torque specs, and safety tips for 2017, 2018, 2019
How to Replace the Water Pump on a 2017-2019 Honda CR-V 2.4L (Engine: Inline 4 2.4L)
Step-by-step instructions with required tools, parts, torque specs, and safety tips for 2017, 2018, 2019


🔧 CR-V - Water Pump Replacement
The water pump circulates coolant through your CR-V’s 2.4L engine. Replacement requires draining the coolant, removing the accessory drive belt and water-pump pulley, then installing the new pump and bleeding air from the cooling system.
Difficulty Level: Intermediate | Estimated Time: 3-5 hours
⚠️ Safety & Precautions
- ⚠️ Let the engine cool completely before opening the radiator cap. Hot coolant can cause severe burns.
- 🧤 Wear gloves and safety glasses. Honda coolant is poisonous and must be kept away from children and animals.
- 🚙 Support your CR-V with jack stands. Never work beneath a vehicle supported only by a floor jack.
- 🔋 Battery disconnection is not required for this repair.
- 🧹 Clean spilled coolant immediately and dispose of used coolant through an approved recycling facility.
- ⚙️ Do not start the engine while the accessory drive belt is removed.
🔧 Required Tools
You'll need the following tools for this repair:
- 19mm lug-nut socket
- 10mm shallow socket
- 12mm shallow socket
- 19mm shallow socket
- 3/8-inch-drive ratchet
- 3/8-inch-drive breaker bar
- 3/8-inch-drive 3-inch extension
- 3/8-inch-drive torque wrench (5-100 ft-lbs range)
- Flat-blade trim-clip removal tool
- Plastic gasket scraper
- Nylon cleaning brush
- Cooling-system funnel kit (specialty)
- Large coolant drain pan (3-gallon minimum)
- Floor jack (rated 2-ton minimum)
- Jack stands (rated 2-ton minimum)
- Wheel chocks
- Nitrile mechanic gloves
- Safety glasses
- Shop towels
🔩 Required Parts
HowToo sells all the parts you need for this repair:
- Engine water pump - Qty: 1
- Water-pump gasket - Qty: 1
- Honda-compatible Type 2 blue premixed coolant - Qty: 2 gallons
- Accessory drive belt - Qty: 1 recommended
📋 Before You Begin
- 🅿️ Park your CR-V on level ground, select Park, apply the parking brake, and switch off the engine.
- 🧊 Wait until the engine and radiator are completely cold.
- 🛞 Place wheel chocks behind both rear wheels.
- 📦 Compare the replacement pump and gasket with the original before installation.
- 💧 Use only Honda-compatible Type 2 blue coolant. It is already mixed 50/50 with distilled water; do not dilute it.
- 📱 No infotainment service mode, scan-tool command, battery registration, or programming is required.
🔨 Step-by-Step Instructions
Follow these steps in order:
Step 1: Raise and Secure the Front Corner
- Use a 19mm lug-nut socket and 3/8-inch-drive breaker bar to loosen the right-front wheel nuts one-half turn.
- Use the 2-ton floor jack at the designated front lifting point, then place a 2-ton jack stand beneath the right-front reinforced support point.
- Remove the wheel with the 19mm lug-nut socket and 3/8-inch-drive ratchet.
- Gently shake the vehicle to verify that it is stable before working near the wheel opening.
Step 2: Remove the Right Splash Shield
- Use the flat-blade trim-clip removal tool to release the plastic retainers from the right-front lower splash shield.
- Use a 10mm socket, extension, and ratchet to remove any shield bolts.
- Move the shield aside to expose the crankshaft pulley, accessory belt, and water-pump area.
- A trim-clip tool lifts reusable plastic fasteners without damaging their heads.
Step 3: Drain the Engine Coolant
- Remove the radiator cap by hand only after confirming that the upper radiator hose is cold and soft.
- Position the 3-gallon drain pan beneath the radiator drain.
- Open the plastic radiator drain plug by hand. Do not force it with pliers or a socket.
- Allow the coolant to drain completely, then close the drain plug by hand until snug.
- Do not overtighten the plastic drain plug.
Step 4: Loosen the Water-Pump Pulley Bolts
- Locate the water-pump pulley on the passenger side of the engine.
- While the belt still holds the pulley, use a 10mm socket and 3/8-inch-drive ratchet to break the pulley bolts loose.
- Loosen each bolt only about one turn. Do not remove them yet.
- The installed belt keeps the pulley from spinning.
Step 5: Remove the Accessory Drive Belt
- Note or photograph the belt routing before removal.
- Place a 19mm socket and 3/8-inch-drive breaker bar on the automatic belt tensioner.
- Rotate the tensioner against spring pressure, then slip the belt off the water-pump pulley.
- Slowly release the tensioner. An automatic tensioner is the spring-loaded arm that maintains belt tension.
- Remove the belt and inspect it for cracks, glazing, frayed edges, or coolant contamination. Replace it if any damage is present.
Step 6: Remove the Water-Pump Pulley
- Use the 10mm socket and 3/8-inch-drive ratchet to remove the previously loosened pulley bolts.
- Support the pulley by hand as the final bolt is removed.
- Slide the pulley straight off the water-pump hub and set it aside.
Step 7: Remove the Old Water Pump
- Place the drain pan beneath the pump because additional coolant will escape.
- Use the 10mm socket, 3-inch extension, and 3/8-inch-drive ratchet to remove the water-pump mounting bolts.
- Record each bolt’s location as it is removed because bolt lengths may differ.
- Pull the pump straight away from the engine. Gently work it loose by hand if the gasket is stuck.
- Do not pry against the aluminum sealing surface with a metal screwdriver.
Step 8: Clean and Inspect the Mounting Surface
- Use the plastic gasket scraper and nylon cleaning brush to remove old gasket material.
- Use shop towels to wipe the sealing surface clean and dry.
- Keep debris out of the exposed coolant passage.
- Inspect the surface for deep corrosion, cracks, or damage before continuing.
- Do not apply silicone sealant unless the replacement pump manufacturer specifically requires it.
Step 9: Install the New Water Pump
- Fit the new water-pump gasket in its correct position on the replacement pump.
- Position the pump squarely against the engine without shifting or folding the gasket.
- Install every mounting bolt by hand first, returning each bolt to its original location.
- Use the 10mm socket and 3/8-inch-drive ratchet to tighten the bolts evenly in several passes.
- Use the 3/8-inch-drive torque wrench to tighten the water-pump mounting bolts to 12 Nm (9 ft-lbs).
Step 10: Reinstall the Pulley and Belt
- Place the pulley on the new pump hub and start all pulley bolts by hand.
- Use the 10mm socket and 3/8-inch-drive ratchet to tighten the bolts lightly and evenly.
- Route the accessory belt around every pulley, leaving the easiest upper pulley until last.
- Use the 19mm socket and 3/8-inch-drive breaker bar to rotate the tensioner, slip the belt into place, and slowly release the tensioner.
- Verify that every belt rib is centered in its pulley groove.
- Use the 10mm socket and 3/8-inch-drive torque wrench to tighten the water-pump pulley bolts to 12 Nm (9 ft-lbs).
Step 11: Refill and Bleed the Cooling System
- Attach the cooling-system funnel kit to the radiator filler neck.
- Slowly add Honda-compatible Type 2 blue premixed coolant until the radiator remains full.
- Fill the coolant reservoir to the MAX line.
- Set the cabin temperature to maximum heat and switch the blower to low.
- Start the engine and let it idle with the funnel installed.
- Add coolant as trapped air escapes and the level drops. Watch the temperature gauge continuously.
- Briefly hold the engine near 1,500 rpm in short intervals until the radiator fan cycles at least twice and cabin heat remains consistently hot.
- Stop the engine, allow it to cool completely, then top off the radiator and reservoir.
- Remove the funnel and reinstall the radiator cap fully.
Step 12: Reassemble the Wheel Area
- Use the 10mm socket and ratchet to reinstall the splash-shield bolts.
- Use the flat-blade trim-clip removal tool by hand to reinstall the shield retainers.
- Install the right-front wheel and start all wheel nuts by hand.
- Use the floor jack to remove the jack stand, then lower your CR-V to the ground.
- Use the 19mm lug-nut socket and 3/8-inch-drive torque wrench to tighten the wheel nuts in a crisscross pattern to 108 Nm (80 ft-lbs).
✅ After Repair
- 🔍 Start the engine and inspect the pump gasket, radiator drain, and hose connections for leaks.
- 🌡️ Confirm that the temperature gauge remains normal and that the heater produces steady hot air.
- 👀 With the engine off, inspect the belt to confirm it remains centered on every pulley.
- 🧊 After the engine becomes completely cold, recheck the radiator and reservoir levels. Add compatible premixed coolant if needed.
- 🚗 Take a short test drive, then inspect again for coolant leaks or abnormal belt noise.
- ♻️ Transfer used coolant into a sealed container and take it to an approved automotive-fluid recycling facility.
💰 DIY vs Shop Cost
Shop Cost: $650-$1,000 (parts + labor)
DIY Cost: $140-$280 (parts only)
You Save: $370-$860 by doing it yourself!
Shop labor rates vary but typically run $100-$150/hour. This repair takes a shop approximately 2.5-4 hours.
🎯 Ready to get started?
HowToo makes it easy: same-day/2-day shipping on every part, plus all the tools and specialty tools you need! Check out the parts and tools sections below to add everything to your cart.