


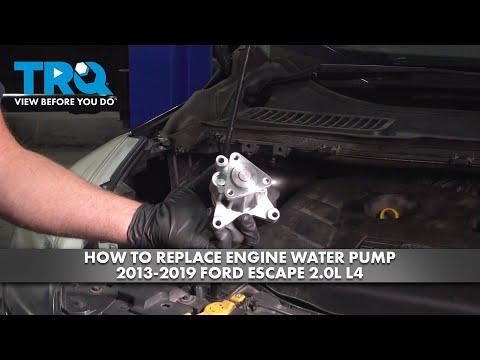







How to Replace the Water Pump on a 2017-2019 Ford Escape 2.0L EcoBoost (Trim: SE | Engine: Inline 4 2.0L)
Step-by-step DIY guide with required tools, parts, torque specs, and safety tips for 2017, 2018, 2019
How to Replace the Water Pump on a 2017-2019 Ford Escape 2.0L EcoBoost (Trim: SE | Engine: Inline 4 2.0L)
Step-by-step DIY guide with required tools, parts, torque specs, and safety tips for 2017, 2018, 2019


🔧 Escape - Water Pump Replacement
This is an advanced repair because the passenger-side engine mount must come out for access. You’ll drain the cooling system, support the engine, remove the accessory belt and pump pulley, then install the new pump and bleed out trapped air.
Difficulty Level: Advanced | Estimated Time: 4–6 hours for a first-time DIYer
Assumption: These instructions cover the belt-driven coolant pump on your 2.0L EcoBoost.
⚠️ Safety & Precautions
- ⚠️ Let the engine become completely cold before opening the coolant reservoir.
- ⚠️ Support the Escape with jack stands. Never work under a vehicle supported only by a jack.
- ⚠️ Support the engine before removing the passenger-side engine mount.
- ⚠️ Place a wide wood block between the jack and oil pan. Raise only enough to carry the engine’s weight.
- ⚠️ Disconnect the negative battery cable to prevent accidental cranking.
- ⚠️ Coolant is poisonous. Keep the drain pan away from children and animals.
- ⚠️ Do not run the engine with tools, hands, or clothing near the accessory belt.
🔧 Required Tools
You’ll need the following tools for this repair:
- Floor jack rated 2-ton minimum
- Jack stands rated 2-ton minimum
- Wheel chocks
- Safety glasses
- Nitrile mechanic’s gloves
- Drain pan rated 10-liter minimum
- 1/2-inch breaker bar
- 1/2-inch drive ratchet
- 3/8-inch drive ratchet
- 1/4-inch drive ratchet
- 1/2-inch drive torque wrench rated 40–150 ft-lbs
- 3/8-inch drive torque wrench rated 10–80 ft-lbs
- Inch-pound torque wrench rated 40–200 in-lbs
- 8mm socket
- 10mm socket
- 13mm socket
- 15mm socket
- 18mm socket
- 19mm deep socket
- Torx T25 socket
- 3-inch socket extension
- 6-inch socket extension
- Serpentine belt tool (specialty)
- Hose clamp pliers (specialty)
- Plastic trim clip remover (specialty)
- Plastic gasket scraper
- Small hook pick (specialty)
- Soft-face mallet
- Coolant funnel with adapter (specialty)
- Cooling-system pressure tester (specialty)
- Wide hardwood block
- Lint-free shop towels
🔩 Required Parts
HowToo sells all the parts you need for this repair:
- Engine water pump matched to the 2.0L EcoBoost - Qty: 1
- Water pump gasket or sealing O-ring - Qty: 1
- Accessory drive belt - Qty: 1 if worn, cracked, glazed, or coolant-soaked
- Ford-approved prediluted coolant meeting WSS-M97B44-D2 or WSS-M97B57-A2 - Qty: 9 liters for full-system capacity
- Coolant-safe surface cleaner - Qty: 1
Ford specifies approximately 8.5 liters for the 2019 cooling system. Purchase enough coolant for the complete capacity, although a normal pump drain usually removes less. Ford-approved yellow coolant meeting WSS-M97B57-A2 is compatible with the original orange specification. Avoid generic “universal” coolant. Coolant chemistry isn’t the place for creative mixing. fordservicecontent.com)
📋 Before You Begin
- Park on level pavement, select Park, apply the parking brake, and chock both rear wheels.
- Let the engine cool until the upper radiator hose feels cold.
- Photograph the accessory-belt routing before removing anything.
- Use the 10mm socket to disconnect the negative battery terminal.
- Loosen the right-front wheel nuts slightly with the 19mm socket before lifting the Escape.
- Organize the engine-mount fasteners by location. They must return to their original holes.
- No infotainment service mode or scan-tool command is required for this repair.
🔨 Step-by-Step Instructions
Follow these steps in order:
Step 1: Raise and secure the Escape
- Use the floor jack at the approved front lifting point.
- Place both jack stands beneath solid front support points and lower the vehicle onto them.
- Confirm stability before reaching underneath.
- Use the 19mm socket to remove the right-front wheel.
Step 2: Remove the lower shield and fender liner
- Use the 8mm socket and Torx T25 socket to remove the lower splash-shield fasteners.
- Use the plastic trim clip remover for the push clips.
- Remove or pull back the passenger-side fender liner to expose the belt area.
- Keep each group of fasteners with its panel.
Step 3: Drain the coolant
- Position the 10-liter drain pan beneath the radiator drain.
- Slowly loosen the coolant reservoir cap by hand.
- Open the radiator drain valve carefully by hand or with pliers if necessary.
- Allow the coolant to drain completely, then close the valve by hand without overtightening it.
Step 4: Loosen the water pump pulley bolts
- Locate the water pump pulley on the passenger side of the engine.
- While the belt still holds the pulley, use the 10mm socket and 3/8-inch ratchet to loosen each pulley bolt approximately one turn.
- Do not remove the bolts yet.
- The belt makes a handy pulley holder.
Step 5: Remove the accessory drive belt
- A belt tensioner is the spring-loaded arm that maintains belt tension.
- Use the serpentine belt tool with the appropriate socket to rotate the tensioner away from the belt.
- Slip the belt off one pulley, then slowly return the tensioner to its stop.
- Remove the belt and compare its routing with your photograph.
Step 6: Support the engine
- Place the wide hardwood block on the floor jack pad.
- Position the jack beneath the solid, flat portion of the oil pan.
- Raise the jack only until the wood contacts the pan and supports the engine.
- Do not dent the oil pan or lift the Escape off its stands.
Step 7: Remove the passenger-side engine mount
- Use the 15mm and 18mm sockets with the breaker bar to loosen the mount fasteners.
- Use the ratchet and extensions to remove the mount-to-body and mount-to-engine fasteners.
- Adjust the floor jack a few millimeters if a fastener binds.
- Lift the mount and bracket from the engine compartment.
- Do not use generic torque values during reassembly. Reinstall each fastener in its original location and use the Ford specification supplied with replacement mount hardware or current service information.
Step 8: Remove the water pump pulley
- Use the 10mm socket to remove the previously loosened pulley bolts.
- Remove the pulley without bending it.
- Inspect its grooves and mounting face for damage or heavy corrosion.
Step 9: Disconnect the water pump hoses
- Move the drain pan directly beneath the pump.
- Use the hose clamp pliers to compress each spring clamp and slide it away from the pump connection.
- Twist each hose gently by hand to break the seal, then pull it straight off.
- Use the small hook pick only between the rubber hose and fitting. Do not puncture the hose.
Step 10: Remove the old water pump
- Use the 10mm socket and extensions to remove the pump mounting bolts.
- Record every bolt location if their lengths differ.
- Pull the pump straight away from the engine.
- If stuck, tap the pump body gently with the soft-face mallet.
- Do not drive a screwdriver between the aluminum sealing surfaces.
Step 11: Prepare the sealing surface
- Remove the old gasket or O-ring with the small hook pick.
- Use the plastic gasket scraper and coolant-safe cleaner to clean the mating surface.
- Wipe the surface dry with lint-free shop towels.
- Keep debris and cleaner out of the open coolant passage.
- Do not apply RTV silicone unless the replacement pump instructions specifically require it.
Step 12: Install the new water pump
- Compare the new pump with the original before installation.
- Lightly wet a rubber sealing O-ring with approved coolant. Install a flat gasket dry unless its instructions say otherwise.
- Position the pump squarely and install every bolt finger-tight with the 10mm socket.
- Use the inch-pound torque wrench to tighten the bolts evenly in a crossing pattern.
- Torque the water pump mounting bolts to 10 Nm (89 in-lbs). howtoo.com
Step 13: Reconnect the coolant hoses
- Push each hose fully onto its pump fitting by hand.
- Use the hose clamp pliers to return each spring clamp to its original position.
- Confirm the clamp sits behind the raised bead on the fitting.
- Replace any swollen, cracked, or coolant-soaked hose.
Step 14: Install the pulley and belt
- Position the pulley and start all bolts by hand using the 10mm socket.
- Snug the pulley bolts evenly without fully tightening them.
- Route the accessory belt according to your photograph, leaving one accessible pulley until last.
- Use the serpentine belt tool to rotate the tensioner and slip the belt onto the final pulley.
- Verify every rib sits correctly inside every grooved pulley.
- Hold the pulley securely and use the 3/8-inch torque wrench.
- Torque the water pump pulley bolts to 25 Nm (18 ft-lbs). howtoo.com
Step 15: Reinstall the engine mount
- Use the floor jack and hardwood block to align the mount without forcing it.
- Install every mount fastener several turns by hand before tightening.
- Use the 15mm and 18mm sockets to tighten the fasteners to the applicable Ford service specification.
- Remove the floor jack only after the mount is fully secured.
- Do not guess engine-mount torque. Several fastener sizes and locations are used.
Step 16: Reassemble the wheel area
- Use the 8mm socket, Torx T25 socket, and trim clip remover to reinstall the fender liner and lower shield.
- Install the right-front wheel and run the nuts down by hand with the 19mm socket.
- Lower the Escape until the tire touches the ground.
- Use the 1/2-inch torque wrench and 19mm socket to tighten the wheel nuts in a star pattern.
- Torque the wheel nuts to 135 Nm (100 ft-lbs). openlaborproject.com
Step 17: Refill and bleed the cooling system
- Confirm the radiator drain is closed and every hose is connected.
- Install the coolant funnel on the reservoir.
- Slowly add approved 50/50 prediluted coolant until the level stabilizes near MAX.
- Reconnect the negative battery cable using the 10mm socket.
- Set the cabin temperature to full hot and the blower to low.
- Start the engine and let it idle while watching the coolant level and temperature gauge.
- Add coolant as trapped air leaves the system. Do not lean over the open reservoir.
- Once the upper radiator hose warms and cabin heat remains steady, install the reservoir cap.
- Stop immediately if the temperature rises abnormally or the heater suddenly blows cold.
✅ After Repair
- Inspect the pump gasket, hose connections, drain valve, and reservoir for leakage.
- Use the cooling-system pressure tester on a cold engine and pressure-test only to the pressure printed on the reservoir cap.
- Start the engine and confirm the pulley runs straight with no belt wandering or squealing.
- Take a short drive while monitoring the temperature gauge.
- Let the Escape cool completely, then adjust the coolant level to the COLD FILL range.
- Recheck the level and look for dried coolant residue over the next several drives.
- Dispose of old coolant through an approved recycling facility. Do not pour it onto the ground or into a drain.
💰 DIY vs Shop Cost
Shop Cost: $550–$950 equivalent, depending on local labor and coolant pricing
DIY Cost: $65–$170 equivalent for the pump, seal, coolant, and optional belt
You Save: Approximately $400–$780 by doing it yourself!
Labor rates vary by location. This repair generally takes a professional approximately 2–3 hours and a first-time DIYer 4–6 hours.
🎯 Ready to get started?
HowToo makes it easy: same-day/2-day shipping on every part, plus all the tools and specialty tools you need! Check out the parts and tools sections below to add everything to your cart.
