

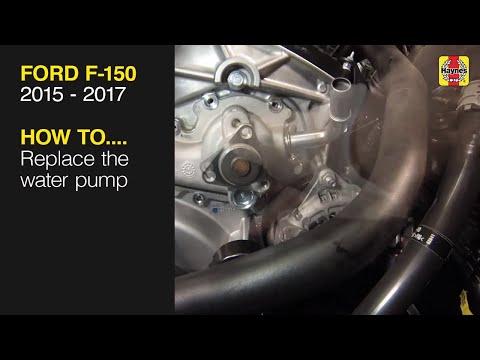




How to Replace the Water Pump on a 2016 Ford F-150 5.0L V8
Step-by-step DIY water pump replacement with tools, parts list, torque specs, and safety tips for your 2016 F-150 5.0L for 2011, 2012, 2013, 2014, 2015, 2016, 2017, 2018, 2019, 2020
How to Replace the Water Pump on a 2016 Ford F-150 5.0L V8
Step-by-step DIY water pump replacement with tools, parts list, torque specs, and safety tips for your 2016 F-150 5.0L for 2011, 2012, 2013, 2014, 2015, 2016, 2017, 2018, 2019, 2020


F-150 - Water Pump Replacement 🔧
Below is a beginner-friendly guide to replace the water pump on your 2016 F-150 5.0L. This engine uses a belt-driven mechanical water pump on the front of the engine.
Quick note: This job is very doable at home, but expect a half-day if it’s your first time.
Safety & Prep ⚠️
- ⚠️ Work on a cold engine only. Hot coolant can cause serious burns.
- ⚠️ Disconnect the negative battery cable to avoid accidental starts and shorts.
- ⚠️ Coolant is toxic. Keep away from kids, pets, and food areas; clean spills immediately.
Parts You’ll Need 📦
- 🧩 Water pump (for 2016 F-150 5.0L)
- 🧩 Water pump gasket (often included with pump; use new only)
- 🧩 Thermostat housing O-ring (optional but recommended if you disturb it)
- 🧩 Serpentine belt (strongly recommended if old or cracked)
- 🧩 Engine coolant: Motorcraft Orange (or equivalent meeting Ford WSS-M97B44-D spec), premixed 50/50 or concentrate + distilled water
- 🧩 RTV sealant (only if specified by pump manufacturer; OEM uses a gasket)
Tools You’ll Need 🛠️
- 🛠️ Socket set (metric):
- Common sizes used: 8mm, 10mm, 13mm, 15mm
- 🛠️ Ratchets:
- 3/8" drive ratchet (general use)
- 1/2" drive ratchet or breaker bar (for belt tensioner)
- 🛠️ Torque wrench (3/8" drive, range ~10–80 Nm / 7–60 lb-ft)
- 🛠️ Serpentine belt tool or long-handled ratchet (to rotate belt tensioner)
- 🛠️ Flat-blade screwdriver (for hose clamps and clips)
- 🛠️ Pliers (for spring hose clamps)
- 🛠️ Coolant drain pan (large, at least 10–12 liters)
- 🛠️ Plastic scraper (to clean gasket surfaces without scratching aluminum)
- 🛠️ Shop towels / rags
- 🛠️ Funnel
- 🛠️ Safety glasses and gloves
Serpentine belt tool = a long, flat bar with a socket end that gives extra leverage to move the belt tensioner.
Key Torque Specs 📏
- 🔩 Water pump bolts: 25 Nm (18 lb-ft)
- 🔩 Thermostat housing bolts (if removed): 10 Nm (89 in-lb)
- 🔩 Accessory bracket bolts (if removed): 35–40 Nm (26–30 lb-ft) – follow bracket spec if known
Step 1 – Get Access & Make It Safe 🧊
- 🧰 Park the truck on level ground, set the parking brake, and put the transmission in Park.
- 🧰 Let the engine cool completely (at least 1–2 hours if it was hot).
- 🧰 Disconnect the negative battery cable (10mm) at the battery.
- 🧰 Remove the engine cover if equipped (usually pulls up off rubber grommets).
Step 2 – Drain the Coolant 💧
- 💧 Place the drain pan under the radiator drain (petcock) on the lower passenger side of the radiator.
- 💧 Remove the coolant reservoir cap to let air in.
- 💧 Open the radiator drain (by hand or with pliers, depending on style) and let coolant drain.
- 💧 Close the drain once flow slows to a drip.
- 💧 You will still spill some coolant when removing hoses at the pump; keep the pan under the front of the engine.
Step 3 – Remove the Serpentine Belt 🔁
- 🔁 Take a picture of the belt routing or find the diagram sticker under the hood.
- 🔁 Locate the belt tensioner (spring-loaded pulley) on the front of the engine.
- 🔁 Use a 1/2" drive ratchet or belt tool in the tensioner square hole and rotate it to relieve tension (usually clockwise on this engine).
- 🔁 While holding tension off, slide the belt off one of the top pulleys, then slowly release the tensioner.
- 🔁 Remove the belt completely and set aside (or replace with new).
Step 4 – Remove Components Blocking the Pump 🧱
- 🧱 On the 5.0L, the water pump is on the front center of the engine with a pulley and several bolts around it.
- 🧱 Remove any plastic shrouds or intake ducting that block access:
- Loosen hose clamps with a screwdriver or 8mm socket.
- Unclip any electrical connectors or vacuum lines carefully.
- 🧱 If any accessory brackets (like power steering or idler brackets) partially cover the pump bolts, remove those bolts and move the bracket aside without stressing hoses/wires.
Step 5 – Disconnect Hoses from the Water Pump 🧵
- 🧵 Move the drain pan under the pump area.
- 🧵 Use pliers to squeeze the spring hose clamps and slide them back on the hose.
- 🧵 Twist the hose gently to break it free, then pull it off the pump. More coolant will drain.
- 🧵 Remove all hoses attached directly to the pump (usually lower radiator hose and one or more smaller hoses).
Step 6 – Remove the Water Pump 🔩
- 🔩 Remove the water pump pulley bolts (usually 4 small bolts, 10mm). If the pulley spins, hold it with your hand or a strap wrench while loosening.
- 🔩 Remove the pulley and set aside.
- 🔩 Remove all the water pump mounting bolts (various lengths; note where each one goes). Use an 8mm or 10mm socket depending on bolt size.
- 🔩 Gently tap the pump with a rubber mallet if it’s stuck; do not pry hard against the aluminum timing cover.
- 🔩 Pull the pump straight off the engine. More coolant may spill.
Step 7 – Clean the Gasket Surface 🧽
- 🧽 Use a plastic scraper to remove old gasket material from the engine’s mounting surface.
- 🧽 Do not gouge or scratch the aluminum; avoid metal scrapers if possible.
- 🧽 Wipe the surface with a clean rag. You can lightly use brake cleaner on the rag (not sprayed directly) to remove residue.
- 🧽 Make sure the surface is clean, smooth, and dry.
Step 8 – Prepare the New Water Pump 🆕
- 🆕 Install the new gasket on the pump:
- If it’s a paper or fiber gasket, you can use a very light spray of gasket adhesive to hold it in place (if recommended by manufacturer).
- If it’s a rubber/formed gasket, install it in the groove on the pump.
- 🆕 Do not use RTV unless the pump instructions specifically say to.
Step 9 – Install the New Water Pump 🔧
- 🔧 Position the new pump against the engine, aligning bolt holes and dowels (if present).
- 🔧 Install all bolts finger-tight first to avoid cross-threading.
- 🔧 Once all bolts are started, snug them in a crisscross pattern to seat the pump evenly.
- 🔧 Torque the water pump bolts to 25 Nm (18 lb-ft) in a crisscross pattern.
- 🔧 Reinstall the water pump pulley and its bolts finger-tight.
- 🔧 Hold the pulley and torque the pulley bolts to about 25 Nm (18 lb-ft) (or “snug plus a bit” if you lack exact spec, but do not over-tighten).
Step 10 – Reconnect Hoses & Reinstall Brackets 🧩
- 🧩 Reattach all hoses to the new pump fittings.
- 🧩 Slide the hose clamps back into place over the fittings and ensure they sit behind the raised bead on the neck.
- 🧩 Reinstall any accessory brackets or components you removed:
- Start bolts by hand.
- Tighten to about 35–40 Nm (26–30 lb-ft) unless you have a specific spec.
Step 11 – Reinstall the Serpentine Belt 🔁
- 🔁 Route the belt according to your picture or the under-hood diagram.
- 🔁 Leave it off one easy-to-reach top pulley.
- 🔁 Rotate the tensioner again with your ratchet/belt tool.
- 🔁 Slip the belt over the last pulley, then slowly release the tensioner.
- 🔁 Double-check that the belt is seated in all pulley grooves correctly.
Step 12 – Refill & Bleed the Cooling System 🌡️
- 🌡️ Make sure the radiator drain is closed.
- 🌡️ Mix coolant 50/50 with distilled water if not premixed.
- 🌡️ Slowly fill the coolant reservoir to the “MAX” line.
- 🌡️ Reinstall the reservoir cap loosely for now (or leave off until first warm-up, but be ready for splashes).
- 🌡️ Reconnect the negative battery cable.
- 🌡️ Start the engine and let it idle with the heater set to HOT and fan on low.
- 🌡️ Watch the coolant level in the reservoir; add as it drops.
- 🌡️ As the engine warms up and the thermostat opens, the upper radiator hose will get hot and the level may drop again—top up as needed.
- 🌡️ Once the engine reaches normal operating temperature and the level stabilizes, shut it off and let it cool completely.
- 🌡️ After it cools, recheck the level and top off to the “MAX” line.
Step 13 – Final Checks ✅
- ✅ Inspect around the water pump, hoses, and radiator for any leaks.
- ✅ Check belt alignment and listen for any squeaks or grinding noises.
- ✅ Take a short test drive, then recheck for leaks and coolant level once it cools again.
Tips & Tricks 💡
- 💡 If a hose is stuck, twist it gently instead of pulling straight—this breaks the seal without tearing it.
- 💡 Keep track of bolt lengths by pushing them into a cardboard template shaped like the pump.
- 💡 If you see any crusty white/green deposits on nearby fittings, consider replacing those hoses or clamps too.
HowToo makes it easy: below this guide you’ll see the correct water pump, gasket, serpentine belt, coolant, and any specialty tools for your F-150. You can add them to your cart directly from the tools and parts section for fast shipping.
If you’d like, tell me what tools you already have, and I can simplify the steps around what you’ve got. 🚚