


How to Replace the Water Pump on a 2016 Cadillac SRX 3.6L V6 (Timing Cover Removal)
Step-by-step internal pump replacement with required tools, parts list, timing-chain precautions, and torque spec guidance for 2011
How to Replace the Water Pump on a 2016 Cadillac SRX 3.6L V6 (Timing Cover Removal)
Step-by-step internal pump replacement with required tools, parts list, timing-chain precautions, and torque spec guidance for 2011
🔧 SRX - Water Pump Replacement
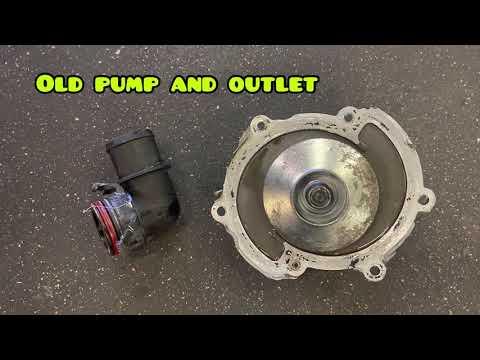
On your SRX’s 3.6L V6, the water pump is mounted behind the front (timing) cover and is driven by the timing chain. Replacing it is a major front-engine disassembly job, but it’s the correct fix for a leaking pump, bearing noise, or chronic overheating caused by internal pump failure.
Difficulty Level: Advanced | Estimated Time: 8-12 hours
Assumption: 3.6L V6 uses chain-driven internal water pump.
⚠️ Safety & Precautions
- ⚠️ Let the engine cool fully before opening the coolant tank.
- ⚠️ Disconnect the negative battery cable to prevent accidental cranking.
- ⚠️ Support the engine before removing the right engine mount (the mount helps hold the engine up).
- ⚠️ Keep timing components in order; incorrect timing can cause severe engine damage.
- ⚠️ Use jack stands on solid level ground; never rely on a jack alone.
- ⚠️ Coolant is toxic; capture and dispose of it properly.
🔧 Required Tools
You'll need the following tools for this repair:
- Floor jack (rated 3-ton minimum)
- Jack stands (rated 3-ton minimum)
- Wheel chocks
- Safety glasses
- Nitrile gloves
- Drain pan (10-quart minimum)
- Fender cover
- 3/8" drive ratchet
- 1/2" drive breaker bar
- Torque wrench (10-80 ft-lbs)
- Torque wrench (50-250 ft-lbs)
- Socket set 8mm-21mm
- Deep socket set 10mm-18mm
- Torx bit set E10-E18
- Torx bit set T20-T50
- Extensions set (3", 6", 12")
- Serpentine belt tool (15mm)
- Trim clip remover
- Pry bar (12")
- Hose clamp pliers
- Gasket scraper (plastic)
- Brake cleaner spray
- Shop rags
- Crankshaft balancer puller kit (specialty)
- Crankshaft balancer installer tool (specialty)
- Timing chain holding tool set for GM 3.6L (specialty)
- Engine support bar (specialty)
- Cooling system vacuum fill tool (specialty)
🔩 Required Parts
HowToo sells all the parts you need for this repair:
- Water pump - Qty: 1
- Front cover gasket set - Qty: 1
- Water pump gasket / seal - Qty: 1
- Crankshaft front oil seal - Qty: 1
- Engine coolant (Dex-Cool compatible) - Qty: 2-3 gallons
- RTV sealant (GM-spec equivalent) - Qty: 1
- Serpentine belt - Qty: 1
- Accessory drive belt tensioner - Qty: 1 (optional)
- Upper and lower radiator hoses - Qty: 2 (optional)
📋 Before You Begin
- Park on level ground, set the parking brake, and chock the rear wheels.
- Disconnect the negative battery cable using a 10mm socket.
- Raise the front of the SRX with a floor jack and support it on jack stands.
- Remove the right front wheel using a 19mm socket and set it aside.
- Plan your parts layout: use labeled bags for bolts (front cover bolts are different lengths).
- Take photos before each major removal.
🔨 Step-by-Step Instructions
Follow these steps in order:
Step 1: Drain the coolant
- Place a drain pan (10-quart minimum) under the radiator area.
- Slowly open the coolant surge tank cap (only when cool).
- Disconnect the lower radiator hose using hose clamp pliers and drain the coolant into the pan.
Step 2: Remove the right splash shields and access panels
- Remove the right inner fender liner and lower splash shield fasteners using a trim clip remover and 7mm socket.
- Set shields aside in order.
Step 3: Remove the serpentine belt
- Rotate the belt tensioner with a serpentine belt tool (15mm) and slip the belt off.
- If reusing the belt, note the routing or take a photo.
Step 4: Support the engine and remove the right engine mount
- Install the engine support bar (specialty) to hold the engine from above. (An engine support bar is a crossbar that spans the fenders and holds the engine with a hook/chain.)
- Remove mount fasteners using socket set 13mm-18mm and Torx bit set E10-E18 as equipped.
- Lift the engine slightly with the support bar to free the mount.
Step 5: Remove accessory components blocking the front cover
- Remove any brackets, the tensioner (if needed), and front accessories obstructing the cover using a socket set 10mm-15mm and Torx bit set.
- Unclip wiring harness retainers from the cover using a trim clip remover.
Step 6: Remove the crankshaft balancer
- Remove the crankshaft balancer bolt using a 1/2" drive breaker bar and appropriate socket.
- Use a crankshaft balancer puller kit (specialty) to pull the balancer off.
- Never pry on the balancer sealing surface.
Step 7: Set engine to timing position and lock timing components
- Rotate the engine by hand at the crank using a socket and breaker bar until timing marks align per GM procedure.
- Install the timing chain holding tool set for GM 3.6L (specialty) to keep the chains and cam phasers from moving.
- This holding tool prevents the chain from jumping teeth while the cover and pump are removed.
Step 8: Remove the front (timing) cover
- Remove all front cover bolts using a socket set 8mm-15mm and Torx bit set E10-E18.
- Carefully separate the cover using a pry bar (12") only at approved pry points.
- Clean old RTV/gasket material using a plastic gasket scraper, brake cleaner spray, and shop rags.
- Torque to OEM spec (varies by bolt location/length) when reinstalling.
Step 9: Remove and replace the water pump
- Remove the water pump fasteners using a socket set.
- Remove the pump and gasket/seal. Clean the mating surfaces with a plastic gasket scraper and brake cleaner spray.
- Install the new water pump with the new water pump gasket / seal.
- Torque to OEM spec for the water pump fasteners (do not guess; the 3.6L uses multiple fastener sizes).
Step 10: Replace the crankshaft front seal (recommended)
- Remove the old seal from the cover carefully using a pry bar (12") with light pressure.
- Install the new crankshaft front oil seal squarely (even depth) using the appropriate driver from your crankshaft balancer installer tool (specialty) kit.
Step 11: Reinstall the front cover with new gaskets and RTV
- Install the front cover gasket set and apply RTV sealant only at the GM-specified seam corners (typically where cover meets oil pan/head junctions).
- Set the cover in place and start all bolts by hand.
- Tighten in an even crisscross pattern using a torque wrench.
- Torque to OEM spec (multiple stages/fasteners).
Step 12: Reinstall the crankshaft balancer
- Install the balancer using a crankshaft balancer installer tool (specialty) (do not hammer it on).
- Install the balancer bolt and tighten using a torque wrench.
- Torque to OEM spec (this is a critical torque-angle fastener on many GM 3.6L applications).
Step 13: Reinstall engine mount, accessories, and belt
- Reinstall the right engine mount and brackets using a socket set and torque wrench.
- Torque to OEM spec for mount fasteners (mount fasteners are safety-critical).
- Reinstall accessories and wiring retainers using socket set and Torx bit set.
- Install the serpentine belt using a serpentine belt tool (15mm).
Step 14: Reinstall shields and wheel
- Reinstall the splash shields and fender liner using a 7mm socket and trim clip remover.
- Reinstall the wheel using a 19mm socket.
- Torque to 190 Nm (140 ft-lbs) for the wheel lug nuts using a torque wrench (50-250 ft-lbs).
Step 15: Refill coolant and bleed air
- Close/secure any hoses and clamps using hose clamp pliers.
- Refill with Dex-Cool compatible coolant at the surge tank.
- Best method: use a cooling system vacuum fill tool (specialty) to pull vacuum and refill (this reduces air pockets).
- If filling normally: fill slowly, squeeze upper radiator hose by hand, and top off as the level drops.
✅ After Repair
- Reconnect the battery negative cable using a 10mm socket.
- Start the engine and let it idle with the heater set to max heat (this helps purge air).
- Watch the temperature gauge and check for leaks around the front cover, hoses, and underneath.
- After the cooling fans cycle on/off, shut down and let it cool completely, then recheck coolant level and top off.
- Recheck for leaks again after a short test drive.
💰 DIY vs Shop Cost
Shop Cost: $1,200-$2,200 (parts + labor)
DIY Cost: $250-$650 (parts only)
You Save: $550-$1,950 by doing it yourself!
Shop labor rates vary but typically run $100-$150/hour. This repair takes a shop approximately 8-12 hours.
🎯 Ready to get started?
HowToo makes it easy: same-day/2-day shipping on every part, plus all the tools and specialty tools you need! Check out the parts and tools sections below to add everything to your cart.
