

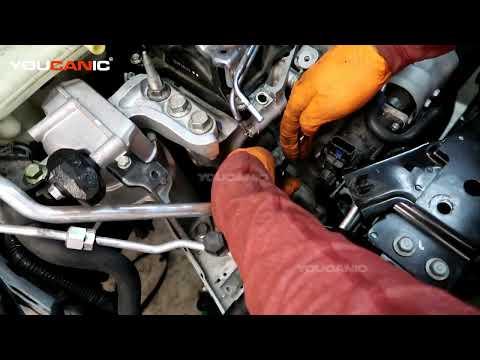




How to Replace the Water Pump on a 2016-2021 Honda Civic 1.5L Turbo (Trim: Si | Engine: Inline 4 1.5L)
Advanced step-by-step guide covering turbo removal, tools, parts, torque specs, and coolant bleeding for 2016, 2017, 2018
How to Replace the Water Pump on a 2016-2021 Honda Civic 1.5L Turbo (Trim: Si | Engine: Inline 4 1.5L)
Advanced step-by-step guide covering turbo removal, tools, parts, torque specs, and coolant bleeding for 2016, 2017, 2018


🔧 Civic - Water Pump Replacement
This is an advanced repair on your Civic. Honda’s factory procedure requires draining the cooling system, removing the drive belt and tensioner, and removing the turbocharger before the water pump. This isn’t a good first repair because mistakes can cause exhaust leaks, oil leaks, coolant leaks, or turbo damage.
Assumption: These instructions follow the factory-style procedure for the L15B7 turbo engine.
Difficulty Level: Advanced | Estimated Time: 7-10 hours
⚠️ Safety & Precautions
- ⚠️ Let the engine cool completely before opening the cooling system.
- ⚠️ Never remove the pressure cap from a hot engine. Scalding coolant can spray out.
- ⚠️ Support the Civic only at approved lifting points with jack stands.
- ⚠️ Disconnect the negative battery terminal before working near the starter, alternator, and turbocharger.
- ⚠️ The turbocharger uses engine oil and coolant. Cap every opened line immediately.
- ⚠️ Don’t allow dirt, gasket debris, or coolant into the turbo oil passages.
- ⚠️ Keep coolant away from children and animals. Its sweet smell makes spills especially dangerous.
- ⚠️ Don’t improvise around the turbo. Saving an hour isn’t a bargain if an oil-feed fitting gets damaged.
🔧 Required Tools
You'll need the following tools for this repair:
- 3/8-inch drive metric socket set, 8-19mm
- 1/4-inch drive metric socket set, 8-14mm
- 10mm deep socket
- 12mm deep socket
- 14mm socket
- 17mm socket
- 19mm socket
- 3/8-inch drive ratchet
- 1/4-inch drive ratchet
- 3/8-inch drive extensions, 3-inch and 6-inch
- 3/8-inch drive universal joint
- 3/8-inch drive torque wrench, 10-80 ft-lbs
- 1/4-inch drive inch-pound torque wrench, 20-200 in-lbs
- 17mm serpentine-belt wrench
- Metric combination wrench set, 8-19mm
- Hose-clamp pliers
- 90-degree pick tool
- Plastic gasket scraper
- Flat-blade screwdriver, 6-inch
- Trim-clip removal tool
- Coolant drain pan, 3-gallon minimum
- Spill-free coolant funnel (specialty)
- Cooling-system vacuum filler (specialty)
- Floor jack, rated 2-ton minimum
- Jack stands, rated 2-ton minimum
- Wheel chocks
- Fender cover
- Parts-cleaning brush, 1-inch
- Safety glasses
- Nitrile mechanic gloves
🔩 Required Parts
HowToo sells all the parts you need for this repair:
- Engine water pump with new sealing O-ring - Qty: 1
- Honda-compatible blue premixed coolant - Qty: 2 gallons
- Turbocharger mounting gasket set - Qty: 1
- Turbocharger oil-line sealing washers - Qty: As required
- Turbocharger coolant-line sealing washers - Qty: As required
- Exhaust flange hardware - Qty: As required
- Serpentine drive belt - Qty: 1 if worn or contaminated
Parts note: The current catalog results didn’t return a verified water pump for your Civic, so don’t substitute any unrelated item shown in the sidebar. Match the pump and turbo sealing parts specifically to the L15B7 Si application.
📋 Before You Begin
- 📋 Park on level ground, select first gear, apply the parking brake, and chock both rear wheels.
- 📋 Allow the engine to become completely cold.
- 📋 Record the serpentine-belt routing or take a clear photo.
- 📋 Label every turbo oil, coolant, intake, exhaust, electrical, and vacuum connection.
- 📋 Disconnect the negative battery cable using a 10mm socket.
- 📋 Raise the front of the Civic with a floor jack and support it securely on jack stands.
- 📋 Remove the lower engine splash shield with a trim-clip tool and appropriate metric sockets.
- 📋 Obtain the Honda torque diagram for the turbocharger fasteners before disassembly. Those fasteners have location-specific specifications.
🔨 Step-by-Step Instructions
Follow these steps in order:
Step 1: Drain the Engine Coolant
- Confirm the engine is cold before opening the pressure cap.
- Place the 3-gallon drain pan below the radiator drain.
- Open the radiator drain carefully by hand or with a flat-blade screwdriver, depending on the drain-plug design.
- Open the cooling-system pressure cap so coolant drains steadily.
- Drain the expansion tank as needed using hose-clamp pliers.
- Close the radiator drain gently after the flow stops. Don’t overtighten the plastic drain.
Step 2: Remove the Intake Components
- Use an 8mm socket or flat-blade screwdriver to loosen the intake hose clamps.
- Disconnect the electrical connectors by pressing their locking tabs, not by pulling the wires.
- Remove the air-cleaner housing and turbo inlet duct using the required 10mm socket.
- Cover the exposed turbo inlet with a clean, lint-free cover.
- Photograph each hose before disconnecting it.
Step 3: Remove the Serpentine Drive Belt
- Place the 17mm serpentine-belt wrench on the automatic tensioner.
- Rotate the tensioner slowly to release belt tension.
- Slide the belt off one pulley, then slowly return the tensioner to its stop.
- Remove the belt and inspect it for cracking, glazing, missing ribs, and coolant contamination.
Step 4: Remove the Drive-Belt Tensioner
- Use the appropriate 12mm or 14mm socket with extensions to remove the tensioner mounting bolts.
- Keep every bolt arranged by its original location.
- Remove the tensioner without forcing it against nearby coolant or air-conditioning lines.
- Do not guess the tensioner bolt torque during reassembly. Tighten it to the location-specific Honda specification.
Step 5: Disconnect the Turbocharger Connections
- Use hose-clamp pliers and metric wrenches to disconnect the turbo coolant hoses and lines.
- Use the correct metric wrench to disconnect the turbo oil-feed connection.
- Use the appropriate metric socket to remove the oil-return fasteners.
- Immediately cap every open oil and coolant passage.
- Disconnect the wastegate and sensor wiring without pulling on the harness.
- Remove the heat shields using the required 10mm and 12mm sockets.
- Expect additional coolant to drain when the turbo coolant lines are opened.
Step 6: Remove the Turbocharger
- Use the appropriate 12mm and 14mm sockets and extensions to remove the exhaust and turbo mounting hardware.
- Support the turbocharger before removing the final fastener.
- Lift the turbocharger away without bending the oil-feed or coolant pipes.
- Discard disturbed metal sealing washers and exhaust gaskets.
- Cover all exposed exhaust, intake, oil, and coolant openings immediately.
- Because the mounting torques vary by fastener position, reinstall these fasteners using the Honda torque diagram rather than a single universal value.
Step 7: Move the Wiring Harness Holder
- Use a 10mm socket to remove the harness-holder fasteners identified in the Honda water-pump procedure.
- Move the harness only far enough to expose the pump.
- Don’t stretch the wiring or leave it resting against sharp metal.
Step 8: Remove the Water Pump
- Place the drain pan beneath the water pump.
- Use a 10mm socket, extension, and universal joint to loosen the five water-pump bolts evenly.
- Rotate the pump pulley as needed to align its access openings with the hidden bolts.
- Pull the pump straight away from the engine. Don’t pry against the aluminum sealing surface.
- Remove the old O-ring using a 90-degree pick tool without scratching its groove.
Step 9: Prepare the Sealing Surface
- Use a plastic gasket scraper and parts-cleaning brush to clean the O-ring groove and engine mating surface.
- Wipe the area clean with a lint-free cloth.
- Inspect the sealing surface for corrosion, scratches, and old O-ring material.
- Do not use abrasive grinding discs or excessive sealant.
Step 10: Install the New Water Pump
- Lightly wet the new O-ring with fresh Honda-compatible coolant.
- Fit the O-ring squarely into the pump groove. Make sure it isn’t twisted.
- Position the pump straight against the engine without dragging the O-ring across the housing.
- Install all five bolts by hand before using a ratchet.
- Use a 10mm socket to tighten the bolts gradually in a crisscross pattern.
- Torque the water-pump bolts to 12 Nm (9 ft-lbs).
- Don’t add RTV silicone unless the replacement pump manufacturer specifically requires it.
Step 11: Reinstall the Turbocharger
- Install new turbocharger exhaust gaskets and new sealing washers on every disturbed banjo-style fluid connection.
- A banjo fitting is a hollow fluid fitting sealed by washers on both sides.
- Position the turbo without loading or bending its oil and coolant lines.
- Start every mounting fastener by hand.
- Use metric sockets, extensions, and a torque wrench to tighten each fastener to its position-specific Honda specification.
- Reconnect the oil-return, oil-feed, coolant, wastegate, sensor, exhaust, and intake connections.
- Reinstall the heat shields using the appropriate 10mm and 12mm sockets.
Step 12: Reinstall the Tensioner and Belt
- Install the automatic tensioner with its original bolts using the appropriate 12mm or 14mm socket.
- Tighten the tensioner fasteners to their location-specific Honda specifications.
- Route the serpentine belt exactly as recorded before removal.
- Use the 17mm serpentine-belt wrench to rotate the tensioner and slip the belt over the final pulley.
- Check that every belt rib sits correctly in every grooved pulley.
Step 13: Reassemble the Intake System
- Remove every temporary cap and cover from the intake openings.
- Reinstall the turbo inlet duct and air-cleaner housing using the 10mm socket.
- Tighten the intake clamps using an 8mm socket or flat-blade screwdriver.
- Reconnect every electrical connector, hose, vacuum line, and harness clip.
- Pull gently on each connector to confirm its lock engaged.
Step 14: Refill and Bleed the Cooling System
- Confirm the radiator drain is closed and every coolant hose is connected.
- Use a spill-free coolant funnel or cooling-system vacuum filler to add premixed Honda-compatible blue coolant.
- Fill slowly to prevent trapped air.
- Reconnect the negative battery terminal using a 10mm socket.
- Set the cabin temperature to maximum heat and turn the climate-control system off.
- Start the engine and let it idle while monitoring the coolant level and temperature gauge.
- Add coolant as trapped air escapes. Don’t rev a cold turbocharged engine.
- Continue until the radiator fan cycles and cabin heat remains consistently hot.
- Shut the engine off, allow it to cool completely, then recheck the expansion-tank level.
Step 15: Reinstall the Lower Cover
- Inspect the water pump, turbo oil lines, turbo coolant lines, hoses, and radiator drain for leaks.
- Reinstall the lower splash shield using the trim-clip tool and appropriate metric sockets.
- Lower the Civic from the jack stands with the floor jack.
✅ After Repair
- ✅ Let the engine idle while watching the temperature gauge. Shut it off immediately if the gauge rises abnormally.
- ✅ Confirm the heater produces steady hot air. Intermittent heat often means air remains trapped.
- ✅ Inspect for coolant, oil, intake, and exhaust leaks around the turbocharger and water pump.
- ✅ Listen for belt chirping, grinding, exhaust ticking, or turbo air leaks.
- ✅ Take a short, low-load road test after the engine reaches normal temperature.
- ✅ Let the engine cool completely and recheck the coolant level.
- ✅ Recheck all repaired areas after approximately 50 miles.
- ✅ Never continue driving if the temperature warning appears or coolant drops again.
💰 DIY vs Shop Cost
Shop Cost: $1,000-$1,800 equivalent, depending on local parts and labor pricing
DIY Cost: $250-$600 equivalent for the pump, coolant, gaskets, washers, and related supplies
You Save: Approximately $600-$1,200 by doing it yourself
Labor rates vary significantly by region. This repair takes a properly equipped shop approximately 6-9 hours.
🎯 Ready to get started?
HowToo makes it easy: same-day/2-day shipping on every part, plus all the tools and specialty tools you need! Check out the parts and tools sections below to add everything to your cart.