

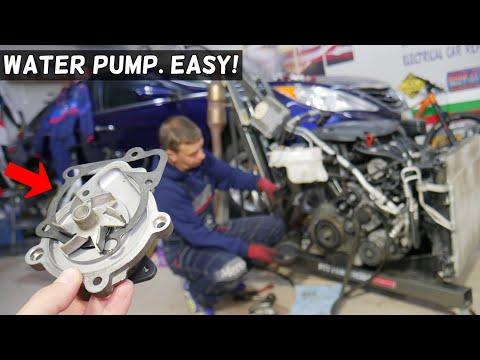






How to Replace the Water Pump on a 2015-2019 Hyundai Sonata 2.4L (Engine: Inline 4 2.4L)
Step-by-step DIY instructions with tools, parts, torque specs, and safety tips for 2015, 2016, 2017, 2018, 2019
How to Replace the Water Pump on a 2015-2019 Hyundai Sonata 2.4L (Engine: Inline 4 2.4L)
Step-by-step DIY instructions with tools, parts, torque specs, and safety tips for 2015, 2016, 2017, 2018, 2019


🔧 Sonata - Water Pump Replacement
The water pump circulates coolant through your Sonata’s 2.4L engine. Replacement requires draining the coolant, removing the accessory drive belt and water-pump pulley, then installing the new pump with a fresh gasket.
Difficulty Level: Intermediate | Estimated Time: 2.5-4 hours
⚠️ Safety & Precautions
- ⚠️ Let the engine cool completely before opening the cooling system. Hot coolant can cause severe burns.
- 🧤 Wear gloves and safety glasses. Coolant is poisonous and must be kept away from children and animals.
- 🛑 Support your Sonata only with jack stands. Never work beneath a vehicle supported solely by a floor jack.
- 🔋 Battery disconnection is not required, but keep the ignition switched off and the key away from the vehicle.
- ♻️ Collect all used coolant in a sealed container and take it to an approved recycling facility.
- 🚫 Do not allow coolant onto the accessory belt or pulleys.
🔧 Required Tools
You'll need the following tools for this repair:
- 3/8-inch drive ratchet
- 3/8-inch drive torque wrench (5-80 ft-lbs range)
- 3/8-inch drive 3-inch extension
- 10mm socket
- 12mm socket
- 17mm socket
- 17mm combination wrench
- Flat-blade screwdriver
- Plastic trim-clip removal tool
- Plastic gasket scraper
- Nylon cleaning brush
- Cooling-system funnel kit (specialty)
- Drain pan (2-gallon minimum)
- Floor jack (rated 2-ton minimum)
- Jack stands (rated 2-ton minimum)
- Wheel chocks
- Mechanic’s gloves
- Safety glasses
- Shop towels
🔩 Required Parts
HowToo sells all the parts you need for this repair:
- Engine water pump - Qty: 1
- Water-pump gasket - Qty: 1
- Hyundai-compatible phosphate-based long-life coolant concentrate - Qty: 1 gallon
- Distilled water - Qty: 1 gallon
Use premixed 50/50 coolant instead of concentrate and distilled water if preferred. Do not mix conventional green coolant with Hyundai long-life coolant.
📋 Before You Begin
- 📍 Park your Sonata on level ground, shift into Park, apply the parking brake, and let the engine become completely cold.
- 🛞 Place wheel chocks behind both rear wheels.
- 🧊 Set the cabin heater temperature to full hot before switching the ignition off.
- 🧪 Mix coolant concentrate and distilled water 50/50 in a clean container. Never use untreated tap water.
- 📱 Take a clear picture of the accessory-belt routing before removing it.
- 🔍 Verify that the new pump and gasket match the removed components before installation.
🔨 Step-by-Step Instructions
Follow these steps in order:
Step 1: Raise and Secure the Front
- Use the floor jack at the front-center lifting point to raise your Sonata.
- Position the jack stands beneath the reinforced front side support points, then lower the vehicle onto them.
- Gently push the vehicle to confirm it is stable before going underneath.
Step 2: Remove the Lower Engine Shield
- Use the 10mm socket and ratchet to remove the shield bolts.
- Use the plastic trim-clip removal tool or flat-blade screwdriver to release the plastic retainers.
- Lower the shield and arrange its fasteners in their original positions.
Step 3: Drain the Coolant
- Place the 2-gallon drain pan beneath the radiator drain fitting at the lower driver-side area of the radiator.
- Use your gloved hand to loosen the plastic drain fitting. If necessary, turn it gently with the flat-blade screwdriver; do not force it.
- Remove the radiator cap slowly only after confirming the engine is cold. This allows the coolant to drain faster.
- When draining stops, close the plastic fitting by hand until snug. Do not overtighten it.
Step 4: Loosen the Water-Pump Pulley Bolts
- Locate the water-pump pulley on the passenger side of the engine.
- While the accessory belt still holds the pulley, use the 10mm socket and ratchet to loosen each pulley bolt about one turn.
- Do not remove the bolts yet.
- The installed belt keeps the pulley from spinning.
Step 5: Remove the Accessory Drive Belt
- The belt tensioner is spring-loaded and automatically keeps the belt tight.
- Fit the 17mm socket and ratchet onto the tensioner hex and rotate the tensioner clockwise to release belt tension.
- Slide the belt off the water-pump pulley, then slowly release the tensioner.
- Remove the belt while comparing its routing with the picture taken earlier.
- Inspect the belt for cracks, missing ribs, fraying, or coolant contamination. Replace it if damaged.
Step 6: Remove the Water-Pump Pulley
- Use the 10mm socket and ratchet to remove the previously loosened pulley bolts.
- Support the pulley with your free hand as the final bolt comes out.
- Remove the pulley and set it on a clean surface.
Step 7: Remove the Old Water Pump
- Position the drain pan beneath the pump because additional coolant will escape.
- Use the 10mm socket, 3-inch extension, and ratchet to remove the water-pump mounting bolts.
- Note each bolt’s original location because bolt lengths may differ.
- Pull the pump straight away from the engine. If stuck, tap the pump body gently with the plastic handle of the flat-blade screwdriver.
- Do not pry between the aluminum sealing surfaces.
Step 8: Clean the Mounting Surface
- Stuff a clean shop towel loosely into the coolant opening to keep debris out.
- Use the plastic gasket scraper and nylon cleaning brush to remove all gasket residue.
- Do not use a metal scraper, power abrasive disc, or sandpaper on the aluminum surface.
- Remove the towel and wipe the surface clean with fresh shop towels.
- Confirm that no old gasket material or debris remains inside the opening.
Step 9: Install the New Water Pump
- Fit the new gasket to the new pump in the same orientation as the original.
- Do not apply silicone sealant unless the pump manufacturer specifically includes and requires it.
- Hold the pump squarely against the engine and start every bolt by hand.
- Use the 10mm socket and ratchet to tighten the bolts gradually in an alternating pattern.
- Use the torque wrench and 10mm socket to tighten the water-pump mounting bolts to 19.6-23.5 Nm (14-17 ft-lbs).
- Start every bolt by hand to prevent cross-threading.
Step 10: Reinstall the Water-Pump Pulley
- Place the pulley onto the pump hub and start all bolts by hand.
- Use the 10mm socket and ratchet to tighten the bolts lightly in a crossing pattern.
- Use the torque wrench and 10mm socket to tighten the pulley bolts to 9.8-11.8 Nm (87-104 in-lbs).
- Use the 17mm combination wrench on the pump hub only if counter-holding is necessary. Do not crush or distort the pulley.
Step 11: Reinstall the Accessory Drive Belt
- Route the belt according to the under-hood routing label and your reference picture, leaving the easiest pulley for last.
- Use the 17mm socket and ratchet to rotate the tensioner clockwise.
- Slide the belt over the final pulley and slowly release the tensioner.
- Use a flashlight to inspect every pulley. Each belt rib must sit fully inside its matching pulley groove.
Step 12: Refill and Bleed the Cooling System
- Confirm that the radiator drain fitting is closed.
- Install the cooling-system funnel kit at the radiator filler neck. The funnel helps trapped air escape while coolant is added.
- Pour the prepared 50/50 coolant slowly until the radiator remains full.
- Fill the coolant reservoir to the “F” or “MAX” mark.
- Leave the funnel installed and start the engine while keeping hands, tools, and clothing away from the moving belt and fans.
- Set the heater to maximum temperature and low fan speed.
- As the engine warms, add coolant with the cooling-system funnel whenever the level drops.
- Gently squeeze the upper radiator hose with your mechanic’s gloves to help release trapped air.
- Wait until the upper radiator hose becomes hot, the heater blows consistently warm air, and air bubbles stop appearing.
- Switch the engine off and allow it to cool completely before removing the funnel and installing the radiator cap.
Step 13: Check for Leaks and Reinstall the Shield
- Use the flashlight to inspect the pump gasket, radiator drain fitting, and surrounding area for coolant leaks.
- Position the lower engine shield and install its clips with the plastic trim-clip removal tool.
- Use the 10mm socket and ratchet to reinstall the shield bolts until snug.
- Use the floor jack to raise the vehicle, remove the jack stands, and lower your Sonata carefully.
✅ After Repair
- ✅ Start the engine and watch the water-pump pulley. Stop immediately if the belt wanders, squeals, or the pulley wobbles.
- 🌡️ Confirm that the temperature gauge remains in its normal range and the cabin heater produces steady heat.
- 🔍 Check for leaks after the engine reaches operating temperature.
- 🧊 After the engine cools completely, recheck the radiator and reservoir levels. Add the same 50/50 coolant mixture if necessary.
- 📅 Recheck the coolant level and pump area after the first drive and again the next morning.
- 🚨 Stop driving if the temperature rises above normal, the heater suddenly blows cold, or coolant leaks appear. These signs can indicate trapped air or a sealing problem.
💰 DIY vs Shop Cost
Shop Cost: $550-$850 (parts + labor)
DIY Cost: $100-$220 (parts only)
You Save: $330-$750 by doing it yourself!
Shop labor rates vary but typically run $100-$150/hour. This repair takes a shop approximately 2-3 hours.
🎯 Ready to get started?
HowToo makes it easy: same-day/2-day shipping on every part, plus all the tools and specialty tools you need! Check out the parts and tools sections below to add everything to your cart.