





How to Replace the Water Pump on a 2013-2025 Mazda CX-5 2.5L (Engine: Inline 4 2.5L)
Step-by-step instructions with required tools, parts, torque specs, and safety tips for 2013, 2014, 2015, 2016
How to Replace the Water Pump on a 2013-2025 Mazda CX-5 2.5L (Engine: Inline 4 2.5L)
Step-by-step instructions with required tools, parts, torque specs, and safety tips for 2013, 2014, 2015, 2016


🔧 CX-5 - Water Pump Replacement
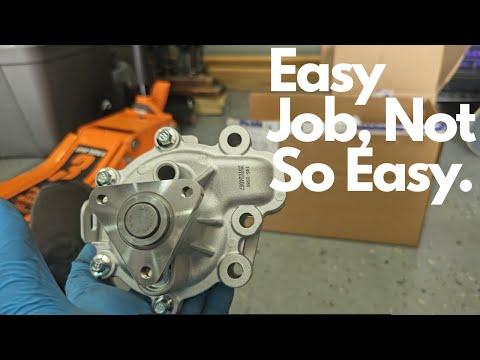
This is an advanced DIY repair. The pump is reached from underneath your CX-5, and Mazda requires removal of its separate stretch belt, pulley, and coolant-temperature sensor before the pump comes out. The AISIN OE Engineered Water Pump shown in the parts sidebar is my pick at $75.78.
Difficulty Level: Advanced | Estimated Time: 4-6 hours
Assumption: These instructions follow the naturally aspirated 2.5L cylinder-deactivation configuration used in this CX-5.
⚠️ Safety & Precautions
- ⚠️ Let the engine become completely cold before opening the cooling system. Hot coolant can cause severe burns.
- 🛑 Never work beneath a vehicle supported only by a floor jack. Use properly positioned jack stands.
- 🔋 Disconnect the negative battery terminal before unplugging the coolant-temperature sensor.
- 🐾 FL-22 coolant is poisonous. Keep it away from children and animals, and collect every spill.
- 🌡️ Stop the engine immediately if the temperature warning illuminates after the repair.
- 🔧 The small oil-control valve near the work area is fragile. Don’t use it as a handhold or pry against it.
🔧 Required Tools
You'll need the following tools for this repair:
- 10mm socket
- 12mm socket
- 14mm socket
- 19mm socket
- 3/8-inch ratchet
- 3/8-inch extension set
- 8-30 Nm inch-pound torque wrench
- 40-200 Nm foot-pound torque wrench
- M6 bolt approximately 70mm long
- Water pump stretch-belt removal and installation tool (specialty)
- Mazda ECT sensor box wrench 49 D015 001 (specialty)
- Flat-blade screwdriver
- Phillips screwdriver
- Trim-clip removal tool
- Plastic gasket scraper
- Coolant funnel
- Coolant drain pan rated 15 liters minimum
- Floor jack rated 2-ton minimum
- Jack stands rated 2-ton minimum
- Wheel chocks
- Nitrile gloves
- Safety glasses
- Shop light
🔩 Required Parts
HowToo sells all the parts you need for this repair:
- AISIN OE Engineered Engine Water Pump - Qty: 1
- Water pump gasket - Qty: 1
- Water inlet pipe O-ring - Qty: 1
- ECT sensor No.1 O-ring - Qty: 1
- Mazda FL-22 compatible premixed coolant - Qty: 8 liters minimum
- Water pump stretch belt - Qty: 1
Mazda specifies FL-22 coolant and warns that an incompatible coolant can damage the cooling system. mazdausa.com)
📋 Before You Begin
- 🚙 Park on level pavement, select Park, apply the parking brake, and chock the rear wheels.
- ❄️ Allow the engine to cool for several hours. The upper radiator hose should feel cold and soft.
- 📸 Photograph the belt routing and the locations of every splash-shield fastener.
- 🔋 Use a 10mm socket to disconnect the negative battery terminal and isolate it from the battery post.
- 🧰 A stretch belt has no conventional tensioner. It must be walked off and installed with the proper guide tool.
- 📱 No infotainment service mode, electronic parking-brake mode, battery registration, or coding is required.
🔨 Step-by-Step Instructions
Follow these steps in order:
Step 1: Raise and support the vehicle
- Use the 19mm socket to loosen the right-front wheel nuts one turn while the tire remains on the ground.
- Use the floor jack at the approved front lifting point, then lower your CX-5 securely onto jack stands.
- Remove the wheel using the 19mm socket.
- Use the 10mm socket, Phillips screwdriver, and trim-clip removal tool to remove front under-cover No.2 and the right splash shield.
Step 2: Drain the engine coolant
- Place the 15-liter drain pan beneath the radiator drain.
- Wrap the cooling-system cap with a thick cloth and loosen it slowly using your hand.
- Use the flat-blade screwdriver to open the radiator drain plug carefully.
- Drain the coolant completely, then close the plastic plug by hand until gently seated. Don’t muscle it. Plastic drain plugs remember every bad decision.
Step 3: Remove the water pump stretch belt
- Use the shop light to identify the short belt running between the crankshaft and water-pump pulleys.
- Fit the stretch-belt removal tool onto the pulley according to the tool instructions.
- Turn the crankshaft clockwise using the appropriate socket supplied with the stretch-belt tool while guiding the belt off.
- Leave the main generator serpentine belt installed. Mazda’s procedure removes only the water-pump drive belt for this job. charm.li
- Never cut a belt you intend to inspect.
Step 4: Remove ECT sensor No.1
- The ECT sensor measures engine coolant temperature for the engine computer.
- Press the connector lock and unplug the sensor without pulling on its wires.
- Use Mazda ECT sensor box wrench 49 D015 001 to remove sensor No.1 from underneath.
- Remove and discard the old sensor O-ring. Mazda specifies a new O-ring during reassembly. charm.li
- Protect the exposed sensor and opening from dirt.
Step 5: Loosen the water pump pulley
- Rotate the pulley until its access hole aligns with the locking hole in the pump housing.
- Insert the approximately 70mm-long M6 bolt through the aligned holes to hold the pulley stationary.
- Use the 10mm socket and ratchet to loosen and remove the pulley bolts.
- Remove the pulley, then remove the temporary locking bolt.
- Don’t clamp the pulley with locking pliers. Damage to its belt surface can quickly destroy the new stretch belt. charm.li
Step 6: Remove the old water pump
- Reposition the drain pan directly beneath the pump.
- Use the 12mm or 14mm socket matching the pump mounting bolts to loosen the three bolts slightly and evenly.
- Pause while the remaining coolant drains around the loosened pump.
- Remove the bolts completely, then pull the pump straight away from the engine.
- Remove the pump gasket and water-inlet-pipe O-ring.
- Do not pry against the aluminum sealing surface or the nearby oil-control valve.
Step 7: Clean and inspect the mounting area
- Use the plastic gasket scraper to remove residue without scratching the aluminum.
- Wipe the groove and sealing surface clean with a lint-free shop rag.
- Check the inlet pipe for corrosion, cracks, or a sharp edge that could cut the new O-ring.
- Compare the new and old pumps before installation. Verify the pulley flange, inlet location, and mounting holes match.
Step 8: Install the new seals and water pump
- Wet the new water-inlet-pipe O-ring with clean FL-22 coolant. Never coat it with engine oil or grease.
- Install the O-ring squarely on the inlet pipe without twisting it.
- Install the new water-pump gasket into the pump groove in the same direction as the original.
- Position the pump carefully and start every mounting bolt by hand.
- Use the socket and inch-pound torque wrench to tighten the mounting bolts evenly in stages.
- Torque the water pump bolts to 20-26 Nm (15-19 ft-lbs). charm.li
Step 9: Reinstall ECT sensor No.1
- Lubricate the new ECT sensor O-ring lightly with clean FL-22 coolant.
- Install the O-ring on the sensor and insert the sensor straight into its opening.
- Use Mazda ECT sensor box wrench 49 D015 001 to seat the sensor securely without overtightening it.
- Reconnect the electrical connector until its lock clicks.
- Confirm the wiring is routed away from the belt and pulley.
Step 10: Install the water pump pulley
- Position the pulley and start its bolts by hand using the 10mm socket.
- Align the pulley and pump locking holes again, then insert the approximately 70mm-long M6 bolt.
- Use the inch-pound torque wrench to tighten the pulley bolts evenly.
- Torque the water pump pulley bolts to 8-11 Nm (71-97 in-lbs). charm.li
- Remove the temporary locking bolt.
Step 11: Install the water pump stretch belt
- Fit the new belt around the crankshaft pulley and partly onto the water-pump pulley.
- Install the stretch-belt guide tool on the water-pump pulley.
- Use the appropriate socket to turn the crankshaft clockwise while the tool walks the belt completely onto the pulley.
- Remove the installation tool and rotate the crankshaft two full clockwise turns.
- Use the shop light to verify the belt sits centrally with no twisted ribs or damaged edges.
Step 12: Refill the cooling system
- Verify the radiator drain plug is closed.
- Use the coolant funnel to add premixed FL-22 coolant slowly through the cooling-system fill opening.
- Pause frequently so trapped air can escape, then fill the expansion reservoir to the FULL mark.
- Reconnect the negative battery terminal using the 10mm socket.
- Start the engine with the heater set to maximum heat and the blower on low.
- Watch the temperature warning display and check immediately for leaks.
- As the engine warms, gently squeeze the upper radiator hose using gloved hands only when it’s safe to touch.
- When cabin heat is steady and bubbling stops, install the cooling-system cap securely.
Step 13: Reassemble the wheel well
- Switch off the engine and inspect around the pump, sensor, drain plug, and inlet pipe with the shop light.
- Use the 10mm socket, Phillips screwdriver, and trim-clip tool to reinstall the splash shield and under-cover.
- Install the right-front wheel and snug the nuts with the 19mm socket.
- Lower the vehicle using the floor jack.
- Use the foot-pound torque wrench to tighten the wheel nuts in a crossing pattern.
- Torque the wheel nuts to 108-147 Nm (80-108 ft-lbs). Mazda specifies this range and warns against oiling the wheel studs. mazdausa.com
✅ After Repair
- ✅ Let the engine reach normal operating temperature while watching for leaks and warning lights.
- 🔥 Confirm the cabin heater produces steady hot air. Intermittent heat often means air remains trapped.
- 🚗 Take a gentle 10-minute test drive only after the temperature remains stable.
- ❄️ Let the engine cool completely, then recheck the reservoir and adjust it to the FULL mark with FL-22 coolant.
- 🔍 Reinspect the pump and ECT sensor after the first drive and again the following day.
- 🛑 If the temperature warning appears, the heater suddenly blows cold, or coolant pours out, stop the engine and allow it to cool.
💰 DIY vs Shop Cost
Shop Cost: $650-$1,050 (parts + labor)
DIY Cost: $130-$230 (parts and coolant)
You Save: $420-$920 by doing it yourself!
Local Sonīpat labor prices can differ considerably. This repair generally takes a workshop approximately 3-5 hours.
🎯 Ready to get started?
HowToo makes it easy: same-day/2-day shipping on every part, plus all the tools and specialty tools you need! Check out the parts and tools sections below to add everything to your cart.