

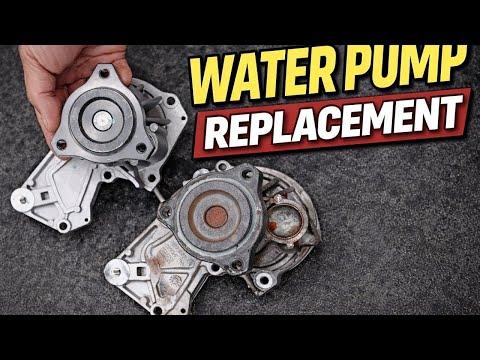





How to Replace the Water Pump on a 2013-2020 Ford Fusion (Engine: Inline 4 2.0L)
Step-by-step coolant pump repair guide with tools, parts, torque specs, and safety tips for 2013, 2014, 2015, 2016, 2017, 2018, 2019, 2020
How to Replace the Water Pump on a 2013-2020 Ford Fusion (Engine: Inline 4 2.0L)
Step-by-step coolant pump repair guide with tools, parts, torque specs, and safety tips for 2013, 2014, 2015, 2016, 2017, 2018, 2019, 2020


🔧 Fusion - Water Pump Replacement
Replacing the water pump on your Fusion requires draining the cooling system, removing the drive belt, unbolting the pump from the front of the engine, and installing a new pump with a fresh gasket. The water pump circulates coolant through the engine and radiator; if it leaks, makes noise, or causes overheating, it should be replaced promptly.
Difficulty Level: Intermediate | Estimated Time: 2.5-4 hours
⚠️ Safety & Precautions
- ⚠️ Let the engine cool completely before opening the cooling system. Hot coolant can cause severe burns.
- ⚠️ Disconnect the negative battery cable before working near the belt and pulleys.
- ⚠️ Support your Fusion securely with jack stands if you raise the front. Never rely on a floor jack alone.
- ⚠️ Keep coolant away from pets and children. It is toxic and tastes sweet.
- ⚠️ Dispose of used coolant properly according to local rules in Panipat, Haryana.
🔧 Required Tools
You'll need the following tools for this repair:
- 8mm socket
- 10mm socket
- 13mm socket
- 15mm wrench
- 3/8-inch drive ratchet
- 3/8-inch drive extension set
- Serpentine belt tool (specialty)
- Flat-blade screwdriver
- Plastic scraper
- Drain pan, 2-gallon minimum
- Funnel
- Coolant hydrometer or refractometer (specialty)
- Torque wrench, inch-pound range
- Torque wrench, foot-pound range
- Floor jack, rated 2-ton minimum
- Jack stands, rated 2-ton minimum
- Wheel chocks
- Nitrile gloves
- Safety glasses
- Shop towels
🔩 Required Parts
HowToo sells all the parts you need for this repair:
- Engine water pump - Qty: 1
- Water pump gasket - Qty: 1
- Motorcraft Yellow-compatible prediluted coolant - Qty: 2 gallons
- Serpentine belt - Qty: 1
- Coolant drain plug seal, if damaged - Qty: 1
📋 Before You Begin
- 🅿️ Park your Fusion on a flat surface, shift to Park, and set the parking brake.
- 🧊 Let the engine sit until it is fully cold. The upper radiator hose should feel cool to the touch.
- 🔋 Use a 10mm socket to disconnect the negative battery cable. The negative cable is usually marked with a minus symbol.
- 🚗 Place wheel chocks behind the rear wheels before lifting the front.
- 🧰 A serpentine belt tool is a long, thin wrench that gives extra reach to move the belt tensioner safely.
- ♻️ Have a clean drain pan ready so old coolant can be collected and recycled.
🔨 Step-by-Step Instructions
Follow these steps in order:
Step 1: Raise and Secure the Front
- Use a floor jack rated 2-ton minimum to lift the front of your Fusion at the proper front jacking point.
- Place jack stands rated 2-ton minimum under the approved support points.
- Gently lower the vehicle onto the jack stands and give the vehicle a light shake to confirm it is stable.
- Put on safety glasses and nitrile gloves.
Step 2: Remove the Lower Splash Shield
- Use a 7mm or 8mm socket, depending on fastener style, to remove the lower splash shield screws.
- If push clips are fitted, use a flat-blade screwdriver to lift the center pin, then pull the clip out.
- Set the splash shield aside with its fasteners.
- Keep fasteners grouped by location.
Step 3: Drain the Coolant
- Place a drain pan, 2-gallon minimum, under the radiator drain area.
- Slowly loosen the coolant reservoir cap by hand to release any leftover pressure.
- Use a flat-blade screwdriver or your fingers, depending on drain plug style, to open the radiator drain plug.
- Let the coolant drain until the flow slows to a drip.
- Close the radiator drain plug by hand. Do not overtighten plastic drain parts.
Step 4: Remove the Serpentine Belt
- Take a photo of the belt routing before removing it.
- Use a 15mm wrench or serpentine belt tool to rotate the belt tensioner. The tensioner is the spring-loaded pulley that keeps the belt tight.
- Slide the belt off one smooth pulley first, then slowly release the tensioner.
- Remove the belt from the remaining pulleys.
- If the belt has cracks, glazing, or frayed ribs, replace it now.
Step 5: Remove Components Blocking the Water Pump
- Use an 8mm socket or 10mm socket to remove any small brackets or shields blocking water pump access.
- Use a 3/8-inch drive ratchet and extension set for tight spaces around the pump.
- Move hoses gently by hand as needed, but do not force old plastic fittings.
- Take photos before removing brackets.
Step 6: Remove the Water Pump Pulley
- If the pulley bolts are accessible, use a 10mm socket to loosen the water pump pulley bolts before fully removing the pulley.
- If the pulley spins, reinstall the old belt temporarily to help hold it, then use the 10mm socket to loosen the bolts.
- Remove the pulley bolts and lift off the pulley.
- Set the pulley aside and inspect it for bends or cracks.
Step 7: Remove the Old Water Pump
- Place shop towels below the water pump to catch leftover coolant.
- Use an 8mm socket or 10mm socket to remove the water pump mounting bolts.
- Note bolt locations if different lengths are used.
- Pull the water pump straight away from the engine.
- If it sticks, gently tap the pump body by hand or use a plastic scraper at the edge. Do not gouge the aluminum sealing surface.
Step 8: Clean the Sealing Surface
- Use a plastic scraper to remove old gasket material from the engine surface.
- Use shop towels to wipe the area clean and dry.
- Do not use metal scrapers or abrasive discs on the aluminum surface.
- Make sure no gasket pieces fall into the coolant passages.
Step 9: Install the New Water Pump
- Place the new water pump gasket onto the new water pump.
- Hold the pump squarely against the engine and start all bolts by hand first.
- Use an 8mm socket or 10mm socket to snug the bolts evenly in a crisscross pattern.
- Use an inch-pound torque wrench to tighten the water pump bolts to Torque to 10 Nm (89 in-lbs).
- Even tightening prevents leaks.
Step 10: Reinstall the Water Pump Pulley
- Set the water pump pulley onto the new pump.
- Start the pulley bolts by hand.
- Use a 10mm socket to snug the bolts evenly.
- Use a torque wrench to tighten the pulley bolts to Torque to 25 Nm (18 ft-lbs).
Step 11: Reinstall the Serpentine Belt
- Route the belt around the pulleys using your photo as a guide.
- Use the 15mm wrench or serpentine belt tool to rotate the tensioner.
- Slide the belt over the final smooth pulley, then slowly release the tensioner.
- Check that the belt ribs sit fully inside each grooved pulley.
Step 12: Reinstall Shields and Brackets
- Use an 8mm socket or 10mm socket to reinstall any brackets or shields removed earlier.
- Use a 7mm or 8mm socket to reinstall the lower splash shield fasteners.
- Tighten small splash shield screws snug only. Do not strip the plastic retainers.
Step 13: Refill the Cooling System
- Make sure the radiator drain plug is closed.
- Use a funnel to fill the coolant reservoir with Motorcraft Yellow-compatible prediluted coolant.
- Fill to the cold fill mark on the reservoir.
- Reconnect the negative battery cable using a 10mm socket.
- Tighten the battery terminal to Torque to 5 Nm (44 in-lbs).
Step 14: Bleed Air from the Cooling System
- Leave the coolant reservoir cap off.
- Start the engine and set the heater to full hot with the fan on low.
- Let the engine idle and watch the coolant level in the reservoir.
- Add coolant with the funnel as the level drops.
- When warm air comes from the vents and bubbles stop appearing, install the reservoir cap by hand.
- Watch the temperature gauge. Shut the engine off if it rises above normal.
Step 15: Final Leak Check
- Use a flashlight to inspect around the water pump, hoses, drain plug, and lower splash shield area.
- Look for drips, wet trails, or coolant smell.
- Use the floor jack to lift the vehicle slightly, remove the jack stands, and lower your Fusion carefully.
- After the first test drive, let the engine cool and recheck the coolant level.
✅ After Repair
- ✅ Drive gently for 10-15 minutes while watching the temperature gauge.
- ✅ Let the engine cool fully, then recheck the coolant reservoir level and top off if needed.
- ✅ Check under your Fusion for coolant drips after the first drive and again the next morning.
- ✅ Use a coolant hydrometer or refractometer to confirm the coolant freeze and boil protection if you mixed coolant yourself.
- ✅ If overheating continues, do not keep driving. The thermostat, radiator fan, trapped air, or head gasket may need diagnosis.
💰 DIY vs Shop Cost
Shop Cost: $450-$750 USD equivalent (parts + labor)
DIY Cost: $120-$260 USD equivalent (parts only)
You Save: $330-$490 USD equivalent by doing it yourself!
Shop labor rates vary but typically run $100-$150/hour. This repair takes a shop approximately 2-3 hours.
🎯 Ready to get started?
HowToo makes it easy: same-day/2-day shipping on every part, plus all the tools and specialty tools you need! Check out the parts and tools sections below to add everything to your cart.