


How to Replace the Water Pump on a 2013-2020 Ford Fusion 2.0L (Engine: Inline 4 2.0L)
Step-by-step DIY guide with tools, coolant bleeding, torque specs, and safety tips for 2013, 2014, 2015, 2016, 2017, 2018, 2019, 2020
How to Replace the Water Pump on a 2013-2020 Ford Fusion 2.0L (Engine: Inline 4 2.0L)
Step-by-step DIY guide with tools, coolant bleeding, torque specs, and safety tips for 2013, 2014, 2015, 2016, 2017, 2018, 2019, 2020
🔧 Fusion - Water Pump Replacement
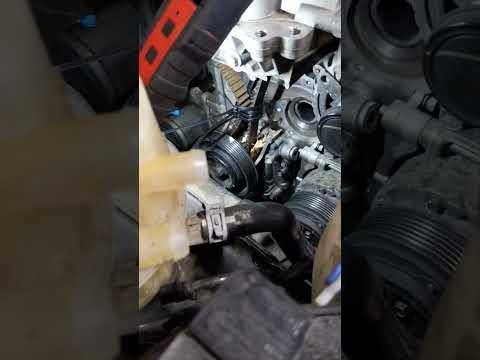
Replacing the engine water pump on your Fusion restores proper coolant flow through the 2.0L engine. The job involves draining coolant, removing the accessory belt and pump pulley, swapping the pump and seal, then refilling and bleeding the cooling system.
Difficulty Level: Intermediate | Estimated Time: 2.5-4 hours
⚠️ Safety & Precautions
- ⚠️ Let the engine cool completely before opening the cooling system. Hot coolant can burn you badly.
- ⚠️ Your Fusion is a plug-in hybrid. Do not touch orange high-voltage cables or high-voltage components.
- ⚠️ Disconnect the 12V battery negative cable before working around the belt area.
- ⚠️ Use jack stands any time the front of the car is lifted. Never work under a vehicle supported only by a jack.
- ⚠️ Collect and dispose of used coolant safely. Coolant is poisonous to people and animals.
🔧 Required Tools
You'll need the following tools for this repair:
- 8mm socket
- 10mm socket
- 13mm socket
- 15mm wrench
- 3/8-inch drive ratchet
- 3/8-inch drive extension set
- Torque wrench 5-50 Nm
- Flat-blade screwdriver
- Trim clip removal tool
- Drain pan 2-gallon minimum
- Coolant funnel kit
- Floor jack rated 2-ton minimum
- Jack stands rated 2-ton minimum
- Wheel chocks
- Safety glasses
- Nitrile gloves
- Shop towels
🔩 Required Parts
HowToo sells all the parts you need for this repair:
- Engine water pump - Qty: 1
- Water pump gasket or seal - Qty: 1
- Motorcraft Yellow-compatible premixed coolant 50/50 - Qty: 2 gallons
- Accessory drive belt - Qty: 1
📋 Before You Begin
- 🅿️ Park your Fusion on level ground, shift to Park, and set the parking brake.
- 🧊 Wait until the engine is completely cool. Overnight cooling is safest.
- 🔋 Open the trunk and use a 10mm socket to disconnect the 12V battery negative cable.
- 🛞 Place wheel chocks behind the rear wheels before lifting the front.
- 🧰 A torque wrench tightens bolts to an exact tightness so parts do not crack or loosen.
- 🧰 A trim clip removal tool is a small pry tool for removing plastic clips without breaking them.
🔨 Step-by-Step Instructions
Follow these steps in order:
Step 1: Raise and Support the Front
- Use wheel chocks behind both rear wheels.
- Use a floor jack rated 2-ton minimum to lift the front of your Fusion at the front jacking point.
- Place jack stands rated 2-ton minimum under the front side support points.
- Lower the car gently onto the jack stands.
- Shake the vehicle lightly to confirm it is stable before going underneath.
- Never trust a jack alone.
Step 2: Remove the Lower Splash Shield
- Put on safety glasses and nitrile gloves.
- Use an 8mm socket to remove the lower splash shield screws.
- Use a trim clip removal tool to remove the plastic push clips.
- Set the shield and fasteners aside together.
Step 3: Release Cooling System Pressure
- Confirm the engine is cool by touching the upper radiator hose carefully by hand.
- Slowly loosen the coolant reservoir cap by hand.
- Wait for any pressure hiss to stop.
- Remove the cap fully by hand.
- Open slowly to avoid spray.
Step 4: Drain the Coolant
- Place a drain pan 2-gallon minimum under the radiator drain area.
- Use a flat-blade screwdriver to carefully open the radiator drain valve, if equipped.
- If the drain valve is not accessible, use the flat-blade screwdriver only to help loosen the lower splash area access, then drain from the lowest coolant hose connection carefully by hand.
- Let the coolant drain until it slows to a drip.
- Close the drain valve by hand, then lightly snug it with the flat-blade screwdriver.
Step 5: Remove the Accessory Drive Belt
- Take a clear photo of the belt routing before removing it.
- Use a 15mm wrench on the belt tensioner. The tensioner is the spring-loaded arm that keeps the belt tight.
- Rotate the tensioner to release belt tension.
- Slide the belt off the water pump pulley by hand.
- Slowly release the tensioner back to its resting position.
- Remove the belt from the remaining pulleys by hand.
Step 6: Remove the Water Pump Pulley
- Use a 10mm socket with a 3/8-inch drive ratchet to loosen the water pump pulley bolts.
- If the pulley spins, hold the pulley steady with a shop towel while loosening the bolts.
- Remove the pulley bolts with the 10mm socket.
- Pull the pulley off by hand and set it aside.
- Keep bolts with the part.
Step 7: Remove the Old Water Pump
- Place the drain pan 2-gallon minimum below the water pump area.
- Use a 10mm socket, 3/8-inch drive extension set, and 3/8-inch drive ratchet to remove the water pump mounting bolts.
- Pull the water pump straight away from the engine by hand.
- If it sticks, wiggle it gently by hand. Do not pry hard against the aluminum engine surface.
- Remove the old gasket or seal by hand.
Step 8: Clean the Mounting Surface
- Use shop towels to wipe the pump mounting surface clean and dry.
- If old gasket material remains, use a flat-blade screwdriver very gently to lift it away.
- Do not scratch the aluminum surface.
- The sealing surface must be smooth before installing the new pump.
Step 9: Install the New Water Pump
- Place the new water pump gasket or seal on the new pump.
- Position the pump against the engine by hand.
- Start all mounting bolts by hand first.
- Use a 10mm socket and 3/8-inch drive ratchet to snug the bolts evenly in a crisscross pattern.
- Use a torque wrench 5-50 Nm with a 10mm socket to tighten the water pump bolts to Torque to 10 Nm (89 in-lbs).
- Start bolts by hand first.
Step 10: Reinstall the Water Pump Pulley
- Place the pulley onto the new water pump by hand.
- Start the pulley bolts by hand.
- Use a 10mm socket and 3/8-inch drive ratchet to snug the bolts.
- Use a torque wrench 5-50 Nm with a 10mm socket to tighten the pulley bolts to Torque to 25 Nm (18 ft-lbs).
Step 11: Install the Accessory Drive Belt
- Route the belt around the pulleys using your photo as a guide.
- Use a 15mm wrench to rotate the belt tensioner.
- Slide the belt over the final pulley by hand.
- Slowly release the tensioner.
- Check that every belt rib sits fully inside every pulley groove.
- Check every pulley twice.
Step 12: Refill the Coolant
- Install a coolant funnel kit onto the coolant reservoir. This funnel helps trapped air escape while you fill.
- Slowly add Motorcraft Yellow-compatible premixed coolant 50/50 until the reservoir reaches the MAX line.
- Pause often and let air bubbles rise through the funnel.
- Keep some coolant in the funnel during the bleeding step.
Step 13: Reconnect the 12V Battery
- Use a 10mm socket to reconnect the 12V battery negative cable.
- Tighten the terminal until it does not twist by hand.
- Make sure tools are clear of the engine bay before starting.
Step 14: Bleed the Cooling System
- Leave the coolant funnel kit installed with coolant in the funnel.
- Start your Fusion.
- Set the heater to full hot and the fan to low using the climate controls.
- Let the engine run while watching the funnel for bubbles.
- Add Motorcraft Yellow-compatible premixed coolant 50/50 as the level drops.
- Wait until the upper radiator hose gets warm and cabin heat is steady.
- Turn the engine off and let it cool fully.
- Remove the coolant funnel kit and install the coolant reservoir cap by hand.
Step 15: Reinstall the Lower Splash Shield
- Position the lower splash shield under your Fusion.
- Use the trim clip removal tool by hand to reinstall the plastic clips if needed.
- Use an 8mm socket to reinstall the splash shield screws.
- Snug the screws only. Do not overtighten plastic fasteners.
Step 16: Lower the Vehicle
- Use the floor jack rated 2-ton minimum to lift the front slightly off the jack stands.
- Remove the jack stands rated 2-ton minimum.
- Lower your Fusion slowly to the ground.
- Remove the wheel chocks.
✅ After Repair
- ✅ After the engine cools, check the coolant reservoir level and top off to the MAX line.
- ✅ Inspect around the new water pump for any wet spots or drips.
- ✅ Start the vehicle and listen for belt squeal or pulley wobble.
- ✅ Take a short test drive and watch for overheating warnings.
- ✅ Recheck coolant level again after one full drive and cool-down cycle.
💰 DIY vs Shop Cost
Shop Cost: $550-$900 (parts + labor)
DIY Cost: $120-$280 (parts only)
You Save: $430-$620 by doing it yourself!
Shop labor rates vary but typically run $100-$150/hour. This repair takes a shop approximately 2-3 hours.
🎯 Ready to get started?
HowToo makes it easy: same-day/2-day shipping on every part, plus all the tools and specialty tools you need! Check out the parts and tools sections below to add everything to your cart.
