


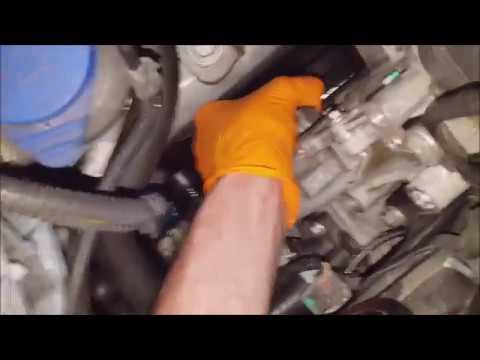




How to Replace the Water Pump on a 2013-2019 Ford Escape 2.5L (Engine: Inline 4 2.5L)
Step-by-step instructions with tools, parts, torque specs, coolant bleeding, and safety tips for 2013, 2014, 2015, 2016, 2017, 2018, 2019
How to Replace the Water Pump on a 2013-2019 Ford Escape 2.5L (Engine: Inline 4 2.5L)
Step-by-step instructions with tools, parts, torque specs, coolant bleeding, and safety tips for 2013, 2014, 2015, 2016, 2017, 2018, 2019


🔧 Escape - Water Pump Replacement
This is a manageable intermediate repair, and thankfully your Escape’s 2.5L water pump is external rather than buried behind the timing cover. You’ll drain the coolant, remove the accessory belt and pulley, replace the pump and O-ring, then refill and bleed the cooling system.
Difficulty Level: Intermediate | Estimated Time: 2.5-4 hours
Assumption: These steps cover the stock 2.5L naturally aspirated engine.
⚠️ Safety & Precautions
- ⚠️ Work only with a completely cold engine. Hot coolant can cause severe burns.
- 🧤 Wear gloves and safety glasses when draining coolant.
- 🚗 Support your Escape with jack stands. Never work beneath a vehicle supported only by a jack.
- 🐾 Keep drained coolant away from children and animals. It is poisonous.
- 🔋 Disconnecting the battery is recommended because your hands will work near the belt drive.
- 🧊 Do not mix different coolant types or colors. Ford warns that incompatible coolant can damage the cooling system. fordservicecontent.com
🔧 Required Tools
You'll need the following tools for this repair:
- 8mm socket
- 10mm socket
- 13mm socket
- 19mm socket
- 3/8-inch drive ratchet
- 3-inch socket extension
- 6-inch socket extension
- 13mm serpentine belt tool (specialty)
- 1/4-inch drive torque wrench rated 5-25 Nm
- 3/8-inch drive torque wrench rated 10-80 Nm
- Plastic gasket scraper
- Plastic trim clip removal tool
- Long-reach pliers
- Coolant drain pan rated 12-quart minimum
- Spill-free coolant funnel (specialty)
- Floor jack rated 2-ton minimum
- Jack stands rated 2-ton minimum
- Wheel chocks
- LED work light
- Nitrile gloves
- Safety glasses
🔩 Required Parts
HowToo sells all the parts you need for this repair:
- Engine water pump - Qty: 1
- Water pump O-ring seal - Qty: 1
- Ford-specification prediluted engine coolant - Qty: 2 gallons
- Accessory drive belt - Qty: 1 if cracked, glazed, stretched, or coolant-soaked
- Shop towels - Qty: 1 pack
The current parts sidebar didn’t return a trustworthy vehicle-specific water pump listing, so don’t substitute one of the unrelated items shown there. The pump must be cataloged specifically for the 2.5L engine.
📋 Before You Begin
- Park your Escape on level pavement and allow the engine to become completely cold.
- Set the parking brake and place wheel chocks behind both rear wheels.
- Photograph the accessory belt routing before removing the belt.
- Turn the climate controls off. No infotainment service mode or scan tool is required.
- Use a 10mm socket to disconnect the negative battery terminal and position it away from the battery post.
- Check the new pump before disassembly. Confirm that its pulley flange, bolt holes, and O-ring match the old pump.
🔨 Step-by-Step Instructions
Follow these steps in order:
Step 1: Raise and Secure the Vehicle
- Use the floor jack at the approved front lifting point to raise your Escape.
- Place both jack stands beneath approved support points, then lower the vehicle gently onto them.
- Give the vehicle a light push before going underneath. It must remain completely stable.
Step 2: Remove the Lower Splash Shield
- Use the 8mm socket and ratchet to remove the shield screws.
- Use the plastic trim clip removal tool for any push-pin retainers.
- Lower the shield and arrange its fasteners so they return to their original positions.
Step 3: Drain the Cooling System
- Place the 12-quart drain pan beneath the radiator drain area.
- Slowly loosen the coolant reservoir cap to confirm there is no trapped pressure.
- Use the 19mm socket if your radiator drain fitting uses a removable plug. Turn it carefully because the radiator tank is plastic.
- Allow the coolant to drain until the flow stops.
- Reinstall the drain plug by hand first, then tighten it gently with the 19mm socket. Do not force a plastic drain fitting.
- Plastic drains need snug, not heroic.
Step 4: Loosen the Water Pump Pulley Bolts
- Locate the water pump pulley on the passenger side of the engine.
- While the belt still holds the pulley, use the 8mm socket, extension, and ratchet to loosen the three pulley bolts approximately one turn.
- Do not remove the bolts yet.
Step 5: Remove the Accessory Drive Belt
- Confirm that your belt-routing photograph is clear.
- Use the 13mm serpentine belt tool to rotate the automatic tensioner and release belt tension.
- A tensioner is the spring-loaded arm that keeps the belt tight.
- Slip the belt off the water pump pulley, then slowly return the tensioner to its resting position.
- Remove the belt and inspect every rib. Replace it if coolant has soaked into it.
- Never release the tensioner suddenly because it can damage the stop or your fingers.
Step 6: Remove the Water Pump Pulley
- Use the 8mm socket and ratchet to remove the three loosened pulley bolts.
- Hold the pulley with a gloved hand if it tries to rotate.
- Remove the pulley and place it somewhere clean.
Step 7: Remove the Old Water Pump
- Move the drain pan directly beneath the pump because additional coolant will escape.
- Use the 8mm socket, extension, and ratchet to remove the three water pump mounting bolts.
- Keep track of each bolt position.
- Pull and gently twist the pump away from the engine.
- If it sticks, tap the pump body lightly by hand. Do not drive a screwdriver between the pump and aluminum engine surface.
- Remove and discard the old O-ring seal.
Step 8: Clean and Inspect the Mounting Area
- Use the plastic gasket scraper to remove deposits without scratching the aluminum.
- Wipe the mounting bore and sealing surface with shop towels.
- Keep debris out of the open coolant passage.
- Check the old pump for shaft looseness, rough bearings, dried coolant trails, or leakage from its vent hole.
Step 9: Install the New Water Pump
- Wet the new O-ring with clean, correct engine coolant. Do not install it dry.
- Fit the O-ring into the proper groove on the new pump.
- Push the pump squarely into the engine until it is fully seated. Ford cautions that tightening a pump that isn’t seated can damage it. charm.li
- Start all three mounting bolts by hand to prevent crossed threads.
- Use the 8mm socket to tighten the bolts evenly in stages.
- Use the 1/4-inch torque wrench and torque the water pump bolts to 10 Nm (89 in-lbs). howtoo.com)
Step 10: Install the Water Pump Pulley
- Place the pulley over the new pump flange.
- Start all three bolts by hand.
- Use the 8mm socket to snug the bolts evenly.
- Hold the pulley steady and use the torque wrench to torque the pulley bolts to 25 Nm (18 ft-lbs). howtoo.com
Step 11: Reinstall the Accessory Drive Belt
- Route the belt around each pulley using your photograph.
- Leave an easy-to-reach smooth pulley for last.
- Use the 13mm serpentine belt tool to rotate the tensioner.
- Slip the belt over the final pulley and slowly release the tensioner.
- Use the LED work light to confirm every belt rib sits inside its matching pulley groove.
Step 12: Reinstall the Splash Shield
- Position the lower shield beneath your Escape.
- Install the push clips by hand.
- Use the 8mm socket and ratchet to reinstall the shield screws until snug.
- Use the floor jack to raise the vehicle, remove the jack stands, and lower it fully.
Step 13: Refill and Bleed the Cooling System
- Use the 10mm socket to reconnect the negative battery terminal.
- Install the spill-free funnel on the coolant reservoir.
- Slowly add compatible prediluted Ford-specification coolant to the cold-fill mark.
- Set the cabin heater to maximum heat with the fan on low.
- Start the engine and allow it to idle while watching the coolant level and pump area.
- Add coolant as the level drops. Do not allow the reservoir to run empty.
- Once warm air flows from the vents and the coolant level stabilizes, switch the engine off.
- Let the engine cool completely, remove the funnel, and adjust the reservoir to the cold-fill mark.
✅ After Repair
- 🔍 Inspect around the water pump and radiator drain for fresh coolant.
- 🌡️ Confirm the temperature gauge remains in its normal range during a 10-15 minute test drive.
- 🔥 Verify the heater produces steady heat. Intermittent cold air can indicate trapped air or low coolant.
- 🧊 Let the engine cool completely, then recheck the reservoir level.
- 🛠️ Recheck the coolant level for the next three cold starts and inspect beneath the vehicle for drips.
- ♻️ Transfer old coolant into sealed containers and take it to an approved recycling or hazardous-waste facility.
💰 DIY vs Shop Cost
Shop Cost: $450-$750 USD (parts + labor)
DIY Cost: $100-$220 USD (parts and coolant)
You Save: $250-$550 USD by doing it yourself!
Labor rates vary by region. This repair typically takes a shop approximately 2-3 hours.
🎯 Ready to get started?
HowToo makes it easy: same-day/2-day shipping on every part, plus all the tools and specialty tools you need! Check out the parts and tools sections below to add everything to your cart.
