

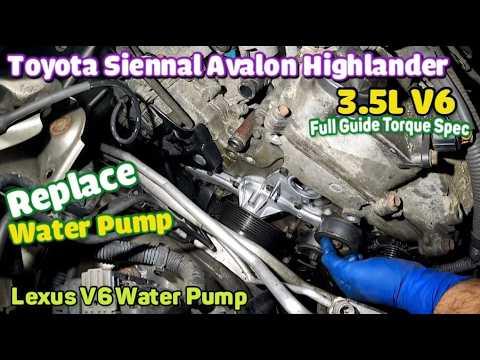




How to Replace the Water Pump on a 2013-2018 Toyota Avalon 3.5L V6 (Engine: V6 3.5L)
Advanced step-by-step guide with tools, parts, torque specs, and safety tips for 2013, 2014, 2015, 2016, 2017, 2018
How to Replace the Water Pump on a 2013-2018 Toyota Avalon 3.5L V6 (Engine: V6 3.5L)
Advanced step-by-step guide with tools, parts, torque specs, and safety tips for 2013, 2014, 2015, 2016, 2017, 2018


🔧 Avalon - Water Pump Replacement
The water pump on your Avalon is mounted low on the passenger side of the V6 and is driven by the serpentine belt. Replacement requires draining the cooling system, supporting and repositioning the engine, removing the passenger-side engine mount, and working in a very confined area.
Difficulty Level: Advanced | Estimated Time: 7-10 hours
Assumption: This procedure is for the original U.S.-market 3.5L V6 installation.
⚠️ Safety & Precautions
- ⚠️ Let the engine become completely cold before opening the cooling system. Hot coolant can cause severe burns.
- ⚠️ Support the engine with an engine support bar before removing the passenger-side engine mount. Never rely on a hydraulic jack alone.
- ⚠️ Place the Avalon on level, solid ground and support it with correctly positioned jack stands.
- ⚠️ Disconnect the negative battery terminal before removing the alternator or working near its electrical connections.
- ⚠️ Keep coolant away from children and animals. Toyota coolant is poisonous.
- ⚠️ Do not rotate or pry against the water-pump pulley with the serpentine belt removed.
- ⚠️ Engine-mount fasteners are safety-critical. Final torque must match the Toyota fastener-location diagram because several similar-looking bolts use different specifications.
🔧 Required Tools
You'll need the following tools for this repair:
- 1/4-inch drive metric socket set, 8mm-14mm
- 3/8-inch drive metric socket set, 10mm-19mm
- 1/2-inch drive metric socket set, 14mm-21mm
- 10mm combination wrench
- 12mm combination wrench
- 14mm combination wrench
- 3/8-inch drive ratchet
- 1/2-inch drive breaker bar, 18-inch minimum
- 3/8-inch drive extensions, 3-inch and 6-inch
- 3/8-inch drive universal joint
- Serpentine-belt tool, 14mm low-profile (specialty)
- Torque wrench, 3-30 Nm
- Torque wrench, 20-150 Nm
- Engine support bar, 500kg minimum (specialty)
- Floor jack, rated 2-ton minimum
- Jack stands, rated 2-ton minimum
- Wheel chocks, 2-piece
- Trim-clip removal tool
- Flat-blade screwdriver, 6mm tip
- Hose-clamp pliers (specialty)
- Plastic gasket scraper
- Plastic dead-blow mallet, 16-ounce
- Cooling-system vacuum filler (specialty)
- Cooling-system pressure tester with Toyota adapter (specialty)
- Drain pan, 15-liter minimum
- Funnel with spill-free radiator adapter
- Paint marker, oil-resistant
- Parts-cleaning brush, 25mm
- Shop light, rechargeable LED
- Safety glasses, ANSI Z87.1
- Nitrile gloves, chemical-resistant
- Mechanic gloves, impact-resistant
🔩 Required Parts
HowToo sells all the parts you need for this repair:
- Engine water pump - Qty: 1
- Water-pump formed gasket - Qty: 1
- Water-pump O-ring set - Qty: 1
- Serpentine drive belt - Qty: 1
- Toyota Super Long Life Coolant, pink 50/50 premix - Qty: 8 liters
- Radiator drain-cock O-ring - Qty: 1
- Engine-mount fasteners designated non-reusable by Toyota - Qty: 1 set
📋 Before You Begin
- Park on level ground, select Park, apply the parking brake, and chock both rear wheels.
- Allow the engine to cool for at least four hours. The upper radiator hose should feel cold and soft.
- Photograph the serpentine-belt routing and each bracket before removal.
- Use a paint marker to label bolts by location. Water-pump and engine-mount bolts are not all interchangeable.
- Obtain the Toyota repair-manual engine-mount torque diagram before beginning. Do not estimate mount-fastener torque.
- Save radio presets if desired. No battery registration or electronic coding is required afterward.
- A cooling-system vacuum filler removes trapped air by pulling a vacuum before drawing coolant into the engine.
🔨 Step-by-Step Instructions
Follow these steps in order:
Step 1: Raise and secure the vehicle
- Use the floor jack at the front-center jacking point and raise the Avalon.
- Place both jack stands under the reinforced front side support points, then lower the vehicle onto them.
- Use the 21mm socket and breaker bar to loosen the passenger-front wheel nuts before raising the wheel completely.
- Remove the wheel with the 21mm socket. When installed later, torque the wheel nuts to 103 Nm (76 ft-lbs) in a star pattern.
Step 2: Disconnect the battery
- Open the trunk and lift the right-side luggage trim to reach the battery.
- Use the 10mm wrench to loosen the negative-terminal clamp.
- Remove and isolate the negative cable so it cannot spring back onto the terminal.
Step 3: Drain the cooling system
- Position the 15-liter drain pan beneath the radiator drain cock.
- Remove the radiator cap only after confirming the engine is cold.
- Use the flat-blade screwdriver to open the plastic drain cock gently. Do not force it.
- Drain the coolant completely, close the drain cock by hand, and install a new drain-cock O-ring if seepage is visible.
- Never reuse coolant containing dirt or metal.
Step 4: Remove the splash shields and fender liner
- Use the 10mm socket and trim-clip removal tool to remove the passenger-side lower splash shield.
- Use the trim-clip removal tool to release the front portion of the passenger-side fender liner.
- Store clips and bolts in labeled groups.
Step 5: Remove upper access components
- Use the 10mm socket to remove the upper engine appearance cover fasteners, if equipped, and lift off the cover.
- Use hose-clamp pliers to release the reservoir-hose clamp where access requires reservoir removal.
- Use the 10mm socket to remove the coolant-reservoir fasteners, then move the reservoir aside without sharply bending its hose.
- Use the 10mm socket and trim-clip removal tool to remove any air-intake ducting obstructing the passenger-side engine mount.
Step 6: Support the engine
- Install the 500kg engine support bar across the reinforced upper body rails according to the support-bar instructions.
- Attach its chain to the factory engine lifting eye and remove slack with the support-bar screw.
- Raise the engine only enough to take its weight off the passenger-side mount.
- Do not place a jack directly beneath the aluminum oil pan.
Step 7: Remove the serpentine belt
- Use the 14mm low-profile serpentine-belt tool on the automatic tensioner and rotate the tensioner slowly to release belt tension.
- Slide the belt off one smooth pulley, then release the tensioner slowly.
- Remove the belt and compare its routing with your photograph.
- Do not allow the tensioner to snap against its stop.
Step 8: Loosen the water-pump pulley
- Use the 10mm socket to loosen the water-pump pulley bolts while holding the pulley steady by hand with mechanic gloves.
- Remove the bolts and pulley after the belt has been removed.
- During assembly, tighten the pulley bolts evenly in stages to 21 Nm (15 ft-lbs).
Step 9: Remove the passenger-side engine mount
- Use the 14mm, 17mm, and 19mm sockets with the ratchet and extensions to remove the mount brackets obstructing the pump area.
- Use the paint marker to identify every bolt and its original hole before removal.
- Adjust the engine support bar only a few millimeters at a time until each bolt slides out without binding.
- Keep mount-to-body, mount-to-engine, and bracket bolts separated.
- During installation, use the torque wrench and Toyota fastener-location diagram for every mount fastener. Do not apply one generic torque to all of them.
Step 10: Remove obstructing belt-drive components
- Use the 14mm socket, extensions, and universal joint to remove the idler pulley and belt-tensioner assembly where they overlap the water-pump fasteners.
- Keep each pulley spacer and washer in its original direction.
- Use the torque wrench during installation and tighten the tensioner and idler fasteners to the Toyota specification assigned to their exact bolt locations.
- Spin each pulley by hand. Replace any pulley that feels rough, loose, or noisy.
Step 11: Move the alternator for clearance
- Confirm the negative battery cable remains disconnected.
- Use the 10mm socket to remove the alternator output-terminal cover and retaining nut, then disconnect the output cable.
- Press the connector lock by hand and unplug the alternator electrical connector.
- Use the 12mm and 14mm sockets with extensions to remove the alternator fasteners.
- Move the alternator out through the available upper or wheel-well opening as clearance permits.
- Record each fastener location and use the Toyota torque diagram during reassembly because alternator fastener torque differs by position.
Step 12: Remove the old water pump
- Place the drain pan beneath the pump because additional coolant will escape.
- Use the 10mm and 12mm sockets with extensions and the universal joint to remove the water-pump fasteners.
- Arrange the fasteners on cardboard in the same pattern as the pump. Several lengths may be used.
- Tap the pump lightly with the 16-ounce plastic dead-blow mallet to break the gasket seal.
- Do not drive a metal screwdriver between the pump and aluminum engine surface.
- Remove the pump and all old formed-gasket and O-ring material.
Step 13: Clean and inspect the sealing surface
- Use the plastic gasket scraper and 25mm parts-cleaning brush to clean the aluminum mating surface.
- Keep debris out of the exposed coolant passages.
- Inspect the surface with the LED shop light for corrosion, scratches, or leftover gasket material.
- Do not use abrasive discs. They can remove aluminum and create future leaks.
Step 14: Install the new water pump
- Fit the new formed gasket and O-rings to the new pump exactly as supplied. Do not add silicone sealant unless the pump instructions specifically require it.
- Position the pump squarely against the engine without dislodging the gasket.
- Install every fastener by hand for several turns before using a ratchet.
- Use the 10mm and 12mm sockets to tighten the fasteners gradually in a crossing pattern.
- For the small water-pump-to-engine fasteners identified by Toyota as the standard pump bolts, torque to 9.1 Nm (81 in-lbs).
- Use the Toyota fastener-location diagram for any stud, nut, larger bolt, or coolant-pipe fastener; those do not automatically use the 9.1 Nm specification.
- Stop immediately if a bolt feels like it is stretching.
Step 15: Reassemble the belt-drive area
- Use the 12mm and 14mm sockets to reinstall the alternator, idler pulley, and tensioner in their recorded locations.
- Use both torque wrenches and tighten each fastener to its location-specific Toyota specification.
- Reconnect the alternator plug by hand, then use the 10mm socket to secure the output cable and refit its protective cap.
- Use the 10mm socket to install the water-pump pulley and torque its bolts to 21 Nm (15 ft-lbs) evenly.
Step 16: Reinstall the engine mount
- Use the engine support bar to align the engine with the mount holes. Never pull the parts together using the bolts.
- Start every mount fastener by hand.
- Use the 14mm, 17mm, and 19mm sockets with the torque wrench to tighten each fastener according to the Toyota mount-fastener diagram.
- Release the engine support bar only after all mount fasteners have received their final torque.
Step 17: Install the new serpentine belt
- Route the new belt around every pulley according to the under-hood routing label and your photograph.
- Use the 14mm low-profile serpentine-belt tool to rotate the tensioner.
- Slip the belt over the final smooth pulley, then release the tensioner slowly.
- Use the LED shop light to verify every belt rib sits fully inside every grooved pulley.
Step 18: Reinstall shields and reconnect the battery
- Use the 10mm socket and trim-clip removal tool to reinstall the reservoir, intake ducting, fender liner, and lower splash shield.
- Install the passenger-front wheel with the 21mm socket.
- Lower the Avalon with the floor jack and torque the wheel nuts to 103 Nm (76 ft-lbs) in a star pattern.
- Use the 10mm wrench to reconnect the negative battery terminal securely.
Step 19: Refill and bleed the cooling system
- Connect the cooling-system vacuum filler to the radiator neck and draw the specified vacuum according to the tool instructions.
- Confirm the vacuum holds. A falling reading indicates a leak that must be corrected before filling.
- Use the vacuum filler to draw Toyota pink 50/50 premixed coolant into the system.
- If no vacuum filler is available, use the spill-free funnel and add coolant slowly. Massage the upper radiator hose by hand to release trapped air.
- Fill the reservoir to the FULL mark and install the radiator cap.
- Do not mix Toyota pink coolant with green universal coolant or undiluted concentrate.
✅ After Repair
- Use the cooling-system pressure tester to pressurize the cold system to the pressure printed on the radiator cap. Do not exceed that rating.
- Inspect the pump seam, drain area, hose joints, and radiator drain cock with the LED shop light.
- Start the engine and immediately watch the serpentine belt. Shut it off if the belt walks sideways or makes abnormal noise.
- Set the cabin temperature to maximum heat and allow the engine to reach normal operating temperature.
- Confirm warm air comes from the vents and the cooling fans cycle normally.
- Shut the engine off if the temperature gauge rises above its normal position or the heater suddenly blows cold.
- Allow the engine to cool completely, then recheck the radiator and reservoir levels. Add only Toyota pink 50/50 premixed coolant.
- Inspect again after the first drive and the next morning for pink residue, drips, belt noise, or coolant odor.
- No scan-tool reset, battery registration, or coding is normally required.
💰 DIY vs Shop Cost
Shop Cost: ₹65,000-₹120,000, approximately $780-$1,440 (parts + labor)
DIY Cost: ₹18,000-₹40,000, approximately $215-$480 (parts only)
You Save: ₹47,000-₹80,000, approximately $565-$960, by doing it yourself!
Imported-part pricing and labor rates around Sonīpat can vary considerably. This repair takes a shop approximately 7-9 hours.
🎯 Ready to get started?
HowToo makes it easy: same-day/2-day shipping on every part, plus all the tools and specialty tools you need! Check out the parts and tools sections below to add everything to your cart.