

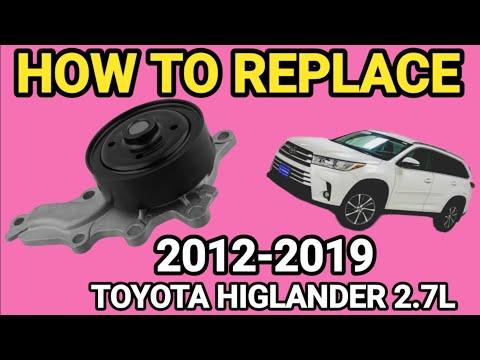




How to Replace the Water Pump on a 2009-2019 Toyota Highlander 2.7L (Engine: Inline 4 2.7L)
Step-by-step 1AR-FE guide with tools, parts, torque specs, coolant bleeding, and safety tips for 2009, 2010, 2011, 2012, 2013, 2014, 2015, 2016, 2017, 2018, 2019
How to Replace the Water Pump on a 2009-2019 Toyota Highlander 2.7L (Engine: Inline 4 2.7L)
Step-by-step 1AR-FE guide with tools, parts, torque specs, coolant bleeding, and safety tips for 2009, 2010, 2011, 2012, 2013, 2014, 2015, 2016, 2017, 2018, 2019


🔧 Highlander - Water Pump Replacement
The 2.7L engine uses a mechanically driven water pump on the passenger side of the engine. Replacement requires draining the coolant, removing the drive belt and water-pump pulley, then carefully installing the new pump and bleeding air from the cooling system.
Difficulty Level: Advanced | Estimated Time: 4-6 hours
Assumption: This procedure applies to the stock 2.7L 1AR-FE engine.
⚠️ Safety & Precautions
- ⚠️ Let the engine cool completely before opening the cooling system. Hot coolant can cause severe burns.
- ⚠️ Disconnect the negative battery terminal because you will work near electrical components.
- ⚠️ Support your Highlander with jack stands. Never work beneath a vehicle supported only by a jack.
- ⚠️ Toyota Super Long Life Coolant is poisonous. Keep it away from children and animals.
- ⚠️ Do not allow coolant to contact the drive belt or pulley surfaces.
- ⚠️ Never rotate or pry against the plastic radiator fan.
🔧 Required Tools
You'll need the following tools for this repair:
- 10mm socket
- 12mm socket
- 14mm socket
- 19mm socket
- 3/8-inch drive ratchet
- 1/2-inch drive breaker bar
- 3-inch socket extension
- Torque wrench rated 5-30 Nm
- Torque wrench rated 20-150 Nm
- Serpentine-belt tool with 14mm socket (specialty)
- Plastic trim-clip removal tool
- Hose-clamp pliers
- Plastic gasket scraper
- Cooling-system funnel kit (specialty)
- Drain pan rated 15 litres minimum
- Floor jack rated 2-ton minimum
- Jack stands rated 2-ton minimum
- Wheel chocks
- Work light
- Nitrile gloves
- Safety glasses
🔩 Required Parts
HowToo sells all the parts you need for this repair:
- Engine water pump - Qty: 1
- Water-pump gasket - Qty: 1
- Toyota Super Long Life Coolant, pink 50/50 premix - Qty: 8 litres
- Serpentine drive belt - Qty: 1 if cracked, glazed, contaminated, or worn
- Right-front splash-shield clips - Qty: As needed
📋 Before You Begin
- 📍 Park your Highlander on level ground, select Park, apply the parking brake, and allow the engine to become completely cold.
- 🔋 Open the hood and disconnect the negative battery terminal before removing engine-side components.
- 🛞 Chock the rear wheels before raising the right-front corner.
- 📷 Photograph the drive-belt routing before removal. A routing label may also be present under the hood.
- 🧊 Use only Toyota-compatible pink Super Long Life Coolant. Do not mix it with green universal coolant.
🔨 Step-by-Step Instructions
Follow these steps in order:
Step 1: Disconnect the Battery
- Use a 10mm socket and ratchet to loosen the negative battery-terminal clamp.
- Lift the terminal from the battery post and position it where it cannot spring back into contact.
Step 2: Raise and Support the Vehicle
- Use a 19mm socket and breaker bar to loosen the right-front wheel nuts one turn while the tire is still on the ground.
- Use the 2-ton floor jack at the specified front jacking point and place a 2-ton jack stand beneath the right-front support point.
- Use the 19mm socket to remove the wheel nuts and right-front wheel.
Step 3: Remove the Lower Access Panels
- Use a 10mm socket and plastic trim-clip removal tool to remove the fasteners securing the lower engine cover and right-front splash shield.
- Set each fastener aside in its original position because clip and bolt lengths can differ.
Step 4: Drain the Engine Coolant
- Place the 15-litre drain pan beneath the radiator drain.
- Remove the radiator cap by hand only after confirming the upper radiator hose is cold and soft.
- Open the radiator drain cock by hand and allow the coolant to drain completely.
- Close the drain cock by hand until snug. Do not overtighten the plastic fitting.
Step 5: Loosen the Water-Pump Pulley Bolts
- Use a 12mm socket, extension, and ratchet to loosen each water-pump pulley bolt approximately one turn while the drive belt still holds the pulley.
- Do not remove the bolts yet.
- Loosen pulley bolts before removing the belt.
Step 6: Remove the Serpentine Drive Belt
- Fit the serpentine-belt tool with 14mm socket onto the automatic tensioner. The tensioner is the spring-loaded pulley that keeps the belt tight.
- Rotate the tensioner slowly to release belt tension, then slide the belt off the water-pump pulley.
- Release the tensioner slowly. Do not allow it to snap back.
- Remove the belt and inspect it for cracks, missing ribs, shiny glazing, or coolant contamination.
Step 7: Remove the Water-Pump Pulley
- Use the 12mm socket, extension, and ratchet to remove the previously loosened pulley bolts.
- Remove the pulley through the available space. Do not bend or pry on it.
Step 8: Disconnect Obstructing Brackets
- Use a 10mm socket or 12mm socket, as fitted, to release wiring retainers or brackets crossing the water-pump area.
- Use hose-clamp pliers only if a coolant-hose clamp prevents access. Twist the hose gently to release it rather than prying against an aluminium fitting.
- Do not disconnect air-conditioning refrigerant lines.
Step 9: Remove the Old Water Pump
- Place the 15-litre drain pan beneath the pump because additional coolant will escape.
- Use a 10mm socket and ratchet to remove the water-pump retaining bolts.
- Note the location of every bolt as it comes out; different positions may use different bolt lengths.
- Pull the pump straight away from the engine. If stuck, tap it gently by hand rather than wedging a metal tool between the sealing surfaces.
Step 10: Clean and Inspect the Mounting Surface
- Use a plastic gasket scraper to remove gasket residue without scratching the aluminium mounting surface.
- Use the work light to check that no old gasket material remains and no debris enters the coolant passages.
- Clean away spilled coolant with a lint-free cloth. Do not use abrasive discs or powered wire brushes.
Step 11: Install the New Water Pump
- Fit the new water-pump gasket in its correct orientation. Install it dry unless the replacement pump manufacturer specifically supplies sealant instructions.
- Position the pump squarely against the engine and install every bolt by hand first.
- Use the torque wrench rated 5-30 Nm with a 10mm socket to tighten the pump bolts evenly in several passes.
- Torque the water-pump bolts to 9 Nm (80 in-lbs).
- Do not overtighten the bolts; the aluminium threads can be damaged easily.
Step 12: Install the Water-Pump Pulley
- Place the pulley onto the pump flange and start all pulley bolts by hand.
- Use the 12mm socket and ratchet to tighten them lightly and evenly.
- Final tightening will be completed after the drive belt is installed.
Step 13: Reinstall the Drive Belt
- Route the belt around each pulley according to your photograph or the under-hood routing label.
- Use the serpentine-belt tool with 14mm socket to rotate the tensioner and slip the belt over the final pulley.
- Release the tensioner slowly, then use the work light to confirm every belt rib is fully seated in every grooved pulley.
Step 14: Tighten the Pulley Bolts
- Use the torque wrench rated 5-30 Nm and 12mm socket to tighten the water-pump pulley bolts evenly.
- Torque the water-pump pulley bolts to 21 Nm (15 ft-lbs).
Step 15: Reconnect Brackets and Hoses
- Use the appropriate 10mm socket or 12mm socket to reinstall every bracket and wiring retainer removed for access.
- Use hose-clamp pliers to return any removed hose clamp to its original position behind the hose fitting bead.
Step 16: Fill and Bleed the Cooling System
- Attach the cooling-system funnel kit to the radiator filler neck.
- Add Toyota Super Long Life Coolant slowly until the radiator remains full, then fill the expansion reservoir to the FULL mark.
- Use a 10mm socket to reconnect the negative battery terminal. Tighten it securely without crushing the clamp.
- Start the engine with the funnel installed and set the cabin temperature to maximum heat.
- Allow the engine to idle. Add coolant as trapped air leaves the system and the level drops.
- Watch the temperature gauge continuously and shut the engine off immediately if it rises above normal.
- When the upper radiator hose becomes hot, cabin heat is steady, and bubbles stop, switch off the engine and let it cool completely.
- Remove the funnel by hand, top off the radiator, and install the radiator cap securely.
Step 17: Check for Leaks and Reassemble
- Use the work light to inspect the pump gasket, hose connections, and radiator drain for coolant leaks.
- Use the 10mm socket and plastic trim-clip removal tool to reinstall the splash shield and lower engine cover.
- Install the right-front wheel and snug the wheel nuts with the 19mm socket.
- Use the 2-ton floor jack to remove the jack stand and lower your Highlander.
- Use the torque wrench rated 20-150 Nm and 19mm socket to tighten the wheel nuts in a crisscross pattern.
- Torque the wheel nuts to 103 Nm (76 ft-lbs).
✅ After Repair
- ✅ Run the engine until it reaches normal operating temperature and verify the temperature gauge remains stable.
- ✅ Confirm that the cabin heater produces steady hot air. Intermittent heat can indicate trapped air.
- ✅ Inspect beneath the pump and around the radiator drain for leaks while the engine is running.
- ✅ After the engine becomes completely cold, recheck the radiator and reservoir levels. Add premixed coolant if necessary.
- ✅ Recheck for leaks and verify the coolant level again after two or three normal driving cycles.
- ✅ Dispose of old coolant through an approved recycling facility. Never pour it onto the ground or into a drain.
💰 DIY vs Shop Cost
Shop Cost: ₹25,000-₹45,000 (parts + labor)
DIY Cost: ₹10,000-₹20,000 (parts only)
You Save: ₹15,000-₹25,000 by doing it yourself!
Panipat-area labor and imported part prices vary. This repair takes a shop approximately 3-5 hours.
🎯 Ready to get started?
HowToo makes it easy: same-day/2-day shipping on every part, plus all the tools and specialty tools you need! Check out the parts and tools sections below to add everything to your cart.