

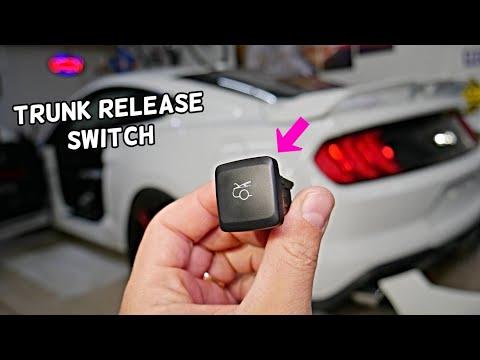






How to Replace the Trunk Latch Actuator on a 2016-2025 Ford Mustang
Step-by-step DIY guide with tools, parts, torque specs, testing, and safety tips for 2016, 2017, 2018, 2019, 2020, 2021, 2022, 2023, 2024, 2025
How to Replace the Trunk Latch Actuator on a 2016-2025 Ford Mustang
Step-by-step DIY guide with tools, parts, torque specs, testing, and safety tips for 2016, 2017, 2018, 2019, 2020, 2021, 2022, 2023, 2024, 2025


🔧 Mustang - Rear Door Lock Actuator Replacement
Your Mustang coupe does not have rear doors, so there is no rear door lock actuator to replace. If you are dealing with a lock problem at the back of your Mustang, the likely repair is the trunk latch/lock actuator instead.
Difficulty Level: Beginner | Estimated Time: 0.5-1.0 hour
⚠️ Safety & Precautions
- ⚠️ Disconnect the negative battery cable before unplugging the trunk latch electrical connector.
- ⚠️ Keep your key or fob outside the trunk area so you do not accidentally lock it inside.
- ⚠️ Do not close the trunk until you test the new latch/actuator while the trunk is open.
- ⚠️ Be careful around sheet metal edges inside the trunk. Wear gloves to protect your hands.
🔧 Required Tools
You'll need the following tools for this repair:
- 10mm wrench
- 10mm socket
- 1/4-inch ratchet
- Trim clip removal tool
- Plastic panel pry tool
- Small flat-blade screwdriver
- Torque wrench 5-50 Nm
- Flashlight
- Nitrile gloves
- Safety glasses
🔩 Required Parts
HowToo sells all the parts you need for this repair:
- Trunk latch and lock actuator assembly - Qty: 1
- Trunk trim retaining clips - Qty: As needed
📋 Before You Begin
- Park your Mustang on level ground and set the parking brake.
- Open the trunk fully and make sure it is stable.
- Keep the key fob in your pocket, not inside the trunk.
- A trim clip removal tool is a small fork-shaped pry tool used to remove plastic clips without breaking them.
🔨 Step-by-Step Instructions
Follow these steps in order:
Step 1: Disconnect The Battery
- Use a 10mm wrench to loosen the negative battery cable clamp.
- Lift the negative cable off the battery post and move it aside so it cannot touch the terminal.
Step 2: Remove The Trunk Lid Trim Panel
- Use a trim clip removal tool to remove the plastic push clips from the trunk lid liner.
- Use a plastic panel pry tool to gently release any trim edges that are still clipped in place.
- Lower the liner away from the trunk lid and set it aside.
- Work slowly to save clips.
Step 3: Locate The Trunk Latch/Actuator
- Use a flashlight to find the latch assembly at the center lower edge of the trunk lid.
- Look for the electrical connector and the latch hook that grabs the striker on the body.
Step 4: Disconnect The Electrical Connector
- Press the connector release tab by hand.
- Use a small flat-blade screwdriver only if the tab is stuck.
- Pull the connector straight off the latch/actuator assembly.
Step 5: Remove The Trunk Latch/Actuator
- Support the latch with one hand.
- Use a 10mm socket and 1/4-inch ratchet to remove the latch mounting bolts.
- Lift the latch/actuator assembly away from the trunk lid.
Step 6: Install The New Trunk Latch/Actuator
- Position the new trunk latch and lock actuator assembly onto the trunk lid by hand.
- Start the mounting bolts by hand first to avoid cross-threading.
- Use a 10mm socket and torque wrench 5-50 Nm to tighten the latch bolts to Torque to 10 Nm (89 in-lbs).
Step 7: Reconnect The Electrical Connector
- Push the electrical connector into the latch until it clicks.
- Use a flashlight to confirm the connector is fully seated.
Step 8: Reconnect The Battery For Testing
- Use a 10mm wrench to reconnect the negative battery cable temporarily.
- Tighten it enough that it does not move by hand.
Step 9: Test The Latch Before Closing The Trunk
- Use a small flat-blade screwdriver to gently push the latch claw closed while the trunk remains open.
- Press the trunk release button on the key fob or inside the cabin.
- Confirm the latch pops open.
- Repeat this test 3 times before closing the trunk.
- If it does not release, stop and recheck the connector and latch position.
Step 10: Reinstall The Trunk Lid Trim Panel
- Use a trim clip removal tool to remove any broken clip pieces from the trunk lid.
- Hold the trunk lid liner in place by hand.
- Press the plastic clips into their holes by hand.
- Replace damaged clips with trunk trim retaining clips.
Step 11: Final Battery Tightening
- Use a 10mm wrench to fully tighten the negative battery cable clamp.
- Make sure the cable does not rotate on the battery post.
✅ After Repair
- Close the trunk gently the first time and verify it latches securely.
- Test trunk release from the key fob, interior release switch, and exterior release pad if equipped.
- Check that the trunk-open warning turns off on the instrument cluster.
- Listen for rattles from the trunk lid trim while driving.
💰 DIY vs Shop Cost
Shop Cost: $250-$450 (parts + labor)
DIY Cost: $80-$180 (parts only)
You Save: $170-$270 by doing it yourself!
Shop labor rates vary but typically run $100-$150/hour. This repair takes a shop approximately 0.5-1.0 hour.
🎯 Ready to get started?
HowToo makes it easy: same-day/2-day shipping on every part, plus all the tools and specialty tools you need! Check out the parts and tools sections below to add everything to your cart.