

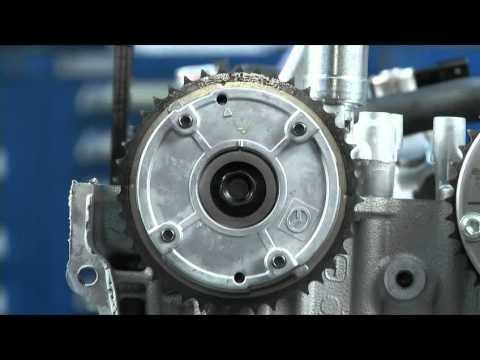






How to Replace the Timing Chain on a 2019 Mazda CX-5 (Engine: Inline 4 2.5L)
Step-by-step guide clarifying no timing belt, with tools, parts, safety tips, and checks for 2019
How to Replace the Timing Chain on a 2019 Mazda CX-5 (Engine: Inline 4 2.5L)
Step-by-step guide clarifying no timing belt, with tools, parts, safety tips, and checks for 2019


🔧 CX-5 - Timing Drive Inspection
Your CX-5 does not use a rubber timing belt. It uses an internal timing chain, which is designed to last much longer and normally is not replaced as routine maintenance.
Replacing the timing chain is an advanced engine repair that involves removing front engine covers, setting valve timing, and resealing the engine. If you meant the visible belt on the front of the engine, that is the serpentine drive belt, not the timing belt.
Difficulty Level: Advanced | Estimated Time: 8-12 hours
⚠️ Safety & Precautions
- ⚠️ Do not rotate the crankshaft or camshafts independently once the timing chain is removed, or engine damage can occur.
- ⚠️ Let the engine cool completely before working near the turbocharger, exhaust, coolant, or front engine cover.
- ⚠️ Disconnect the negative battery cable before removing engine electrical connectors.
- ⚠️ Support your CX-5 securely with jack stands if raising the vehicle. Never rely on a floor jack alone.
- ⚠️ Timing work requires exact alignment. One tooth off can cause rough running, no-start, or internal engine damage.
🔧 Required Tools
You'll need the following tools for this repair:
- Metric socket set 8mm-22mm
- Metric wrench set 8mm-19mm
- 1/2-inch drive breaker bar
- 1/2-inch drive torque wrench 20-250 Nm
- 3/8-inch drive torque wrench 5-80 Nm
- Crankshaft pulley holding tool (specialty)
- Crankshaft pulley puller (specialty)
- Engine support bar (specialty)
- Floor jack rated 3-ton minimum
- Jack stands rated 3-ton minimum
- Plastic trim clip remover
- Serpentine belt tool
- Gasket scraper plastic
- Razor blade scraper
- Sealant applicator gun
- Drain pan 10-quart minimum
- Paint marker
- Shop light
- Safety glasses
- Nitrile gloves
🔩 Required Parts
HowToo sells all the parts you need for this repair:
- Timing chain - Qty: 1
- Timing chain tensioner - Qty: 1
- Timing chain guide set - Qty: 1
- Front crankshaft seal - Qty: 1
- Front engine cover RTV sealant - Qty: 1
- Valve cover gasket set - Qty: 1
- Engine oil 5W-30 full synthetic - Qty: 5.1 quarts
- Engine oil filter - Qty: 1
- Engine coolant compatible with Mazda FL22 - Qty: As needed
- Serpentine drive belt - Qty: 1
- Crankshaft pulley bolt - Qty: 1
📋 Before You Begin
- ✅ Park your CX-5 on level ground, set the parking brake, and let the engine cool fully.
- ✅ A timing chain is a metal chain inside the engine that keeps the crankshaft and camshafts moving in exact sync.
- ✅ Take photos before removing hoses, brackets, and connectors. This helps during reassembly.
- ✅ Disconnect the negative battery cable using a 10mm socket.
- ✅ Raise the front of your CX-5 with a floor jack rated 3-ton minimum and support it with jack stands rated 3-ton minimum.
- ✅ Drain engine oil into a drain pan 10-quart minimum.
- ✅ If coolant hoses or the water outlet are removed, drain coolant into a drain pan 10-quart minimum.
🔨 Step-by-Step Instructions
Follow these steps in order:
Step 1: Remove Upper Engine Covers And Intake Parts
- Use your hands to lift off the plastic engine cover.
- Use an 8mm socket to loosen the intake hose clamps.
- Use a plastic trim clip remover to release any air duct clips.
- Unplug the mass airflow sensor by pressing the connector tab and pulling straight back.
- Remove the intake duct and air box pieces as needed for access.
- Take photos before unplugging connectors.
Step 2: Remove The Right Front Wheel And Splash Shield
- Use a 21mm socket to loosen the right front wheel lug nuts before lifting.
- Raise your CX-5 with a floor jack rated 3-ton minimum.
- Place jack stands rated 3-ton minimum under the proper front support points.
- Use a 21mm socket to remove the right front wheel.
- Use a plastic trim clip remover and 10mm socket to remove the right splash shield and lower engine cover fasteners.
- When reinstalling the wheel later, Torque lug nuts to 108-147 Nm (80-108 ft-lbs).
Step 3: Remove The Serpentine Drive Belt
- The serpentine belt is the visible belt that drives accessories like the alternator and A/C compressor.
- Use a serpentine belt tool on the belt tensioner to rotate the tensioner and release belt tension.
- Slide the belt off the pulleys and remove it from the engine bay.
- Inspect pulleys by spinning them by hand. They should feel smooth and quiet.
- Draw the belt path before removal.
Step 4: Support The Engine
- Install an engine support bar across the upper body support points.
- Attach the support chain to a secure engine lifting point.
- Apply light tension only. Do not lift the vehicle by the engine.
- This is needed because the right engine mount must be removed for front cover access.
Step 5: Remove The Right Engine Mount
- Use 14mm and 17mm sockets to remove the right engine mount fasteners.
- Keep the bolts organized by location because they may be different lengths.
- Lift the mount out carefully.
- During reassembly, tighten mount fasteners to factory specification by location. If exact service data is unavailable, do not guess on critical mount torque.
Step 6: Remove The Crankshaft Pulley
- Install a crankshaft pulley holding tool (specialty) to keep the pulley from turning.
- Use a 1/2-inch drive breaker bar and correct-size socket from your metric socket set 8mm-22mm to loosen the crankshaft pulley bolt.
- Remove the pulley bolt and washer.
- Use a crankshaft pulley puller (specialty) if the pulley does not slide off by hand.
- Do not pry against the front cover sealing surface.
Step 7: Remove Valve Cover And Front Engine Cover
- Use an 8mm socket and 10mm socket to remove ignition coil fasteners, brackets, and valve cover bolts.
- Lift the valve cover off gently. If stuck, tap lightly by hand; do not gouge the aluminum surface.
- Use 10mm, 12mm, and 14mm sockets to remove front engine cover bolts.
- Use a gasket scraper plastic to separate the front cover from the engine.
- Use a razor blade scraper only on flat metal surfaces and keep it shallow to avoid scratches.
- Scratches can cause oil leaks.
Step 8: Set Engine To Top Dead Center
- Top Dead Center means cylinder 1 is at the top of its compression stroke and timing marks line up.
- Use a socket from your metric socket set 8mm-22mm on the crankshaft bolt location to rotate the engine clockwise only.
- Line up the crankshaft and camshaft timing marks according to the chain colored links and sprocket marks.
- Use a paint marker to mark the old chain and sprockets before removal as a backup reference.
- Do not rotate the engine counterclockwise unless the service procedure specifically calls for it.
Step 9: Remove Timing Chain Tensioner, Guides, And Chain
- The tensioner is a spring/hydraulic part that keeps the chain tight.
- Use a 10mm socket to remove the timing chain tensioner bolts.
- Use a 10mm socket and 12mm socket to remove the timing chain guides.
- Remove the timing chain from the sprockets without turning the camshafts or crankshaft.
- If anything moves, stop and realign the timing marks before continuing.
Step 10: Install New Timing Chain And Guides
- Place the new timing chain onto the crankshaft and camshaft sprockets with the colored chain links aligned to the timing marks.
- Install the new chain guides using a 10mm socket and 12mm socket.
- Install the new timing chain tensioner using a 10mm socket.
- Release the tensioner only after the chain and guides are fully seated.
- Use a 3/8-inch drive torque wrench 5-80 Nm for guide and tensioner fasteners. Use the exact Mazda fastener torque by bolt location.
Step 11: Verify Timing By Hand
- Use a socket from your metric socket set 8mm-22mm to rotate the crankshaft clockwise two full turns.
- Stop immediately if you feel hard resistance.
- Recheck that the crankshaft and camshaft timing marks return to their correct positions.
- The colored chain links may not line up again after rotation; the sprocket timing marks are what matter after the first rotation.
- Never force engine rotation.
Step 12: Clean And Reseal The Front Cover
- Use a gasket scraper plastic to remove old sealant from the front cover and engine block.
- Use a razor blade scraper carefully on flat metal only.
- Wipe the sealing surfaces clean and dry.
- Use a sealant applicator gun to apply the correct RTV sealant bead to the front cover.
- Install the front cover before the sealant skins over.
- Use a 3/8-inch drive torque wrench 5-80 Nm to tighten front cover bolts in an even pattern to Mazda specification by bolt size and location.
Step 13: Install New Front Crankshaft Seal And Pulley
- Install the new front crankshaft seal squarely into the front cover.
- Slide the crankshaft pulley onto the crankshaft.
- Install a new crankshaft pulley bolt.
- Use the crankshaft pulley holding tool (specialty) to hold the pulley.
- Use a 1/2-inch drive torque wrench 20-250 Nm to tighten the crankshaft pulley bolt to Mazda specification.
- Because this bolt is critical to engine timing and pulley retention, do not reuse a damaged or stretched bolt.
Step 14: Reinstall Valve Cover And Engine Mount
- Install the new valve cover gasket into the valve cover groove.
- Use an 8mm socket and 10mm socket to reinstall the valve cover bolts evenly.
- Use 14mm and 17mm sockets to reinstall the right engine mount.
- Use the engine support bar to slightly adjust engine height if bolt holes do not line up.
- Use a 3/8-inch drive torque wrench 5-80 Nm and 1/2-inch drive torque wrench 20-250 Nm as needed for mount bolts.
Step 15: Reinstall Belt, Shields, Wheel, Oil, And Coolant
- Use the serpentine belt tool to rotate the tensioner and install the new serpentine drive belt.
- Use a 10mm socket and plastic trim clip remover to reinstall the splash shield and lower engine cover.
- Use a 21mm socket to reinstall the right front wheel.
- Use a 1/2-inch drive torque wrench 20-250 Nm to tighten lug nuts to 108-147 Nm (80-108 ft-lbs).
- Refill engine oil with 5W-30 full synthetic and install a new oil filter.
- Refill coolant if drained, using coolant compatible with Mazda FL22.
Step 16: First Start Check
- Reconnect the negative battery cable using a 10mm socket.
- Before starting, use a shop light to inspect for leftover tools, loose connectors, and fluid leaks.
- Start the engine and let it idle.
- Listen for rattling, knocking, or abnormal chain noise. Shut off immediately if you hear loud mechanical noise.
- Check oil level and coolant level after the engine reaches operating temperature and cools back down.
✅ After Repair
- ✅ Let the engine idle and watch for oil leaks around the front cover, valve cover, and crankshaft pulley seal.
- ✅ Confirm the serpentine belt runs straight on every pulley.
- ✅ Road test gently for 10-15 minutes, then recheck for leaks.
- ✅ Recheck engine oil level after the first drive.
- ✅ Recheck coolant level after the engine fully cools if coolant was drained.
- ✅ If the check engine light comes on, scan for trouble codes before driving further.
💰 DIY vs Shop Cost
Shop Cost: $1,800-$3,200 (parts + labor)
DIY Cost: $350-$850 (parts only)
You Save: $1,000-$2,350 by doing it yourself!
Shop labor rates vary but typically run $100-$150/hour. This repair takes a shop approximately 8-12 hours.
🎯 Ready to get started?
HowToo makes it easy: same-day/2-day shipping on every part, plus all the tools and specialty tools you need! Check out the parts and tools sections below to add everything to your cart.