



How to Replace the Timing Chain on a 2017-2019 Ford F-150 3.5L EcoBoost (Trim: Limited | Engine: V6 3.5L)
Advanced step-by-step guide covering diagnosis, specialty tools, parts, timing, and safety for 2017, 2018, 2019
How to Replace the Timing Chain on a 2017-2019 Ford F-150 3.5L EcoBoost (Trim: Limited | Engine: V6 3.5L)
Advanced step-by-step guide covering diagnosis, specialty tools, parts, timing, and safety for 2017, 2018, 2019


🔧 F-150 - Timing Chain Replacement
Your F-150 doesn’t have a timing belt. Its 3.5L EcoBoost uses timing chains. There’s no scheduled timing-belt replacement to perform. Timing-chain work is only justified after diagnosing chain wear, tensioner failure, cam timing faults, or cold-start rattle.
This is an engine-timing repair, not a beginner maintenance job. Ford’s related cam-phaser procedure allows approximately 9.6 shop hours and directs technicians to the factory Workshop Manual. fordservicecontent.com
Difficulty Level: Advanced | Estimated Time: 12-18 hours for an experienced DIYer
⚠️ Safety & Precautions
- ⚠️ Incorrect camshaft timing can cause severe internal engine damage.
- ⚠️ The direct-injection fuel system remains under very high pressure after shutdown.
- ⚠️ Never loosen a high-pressure fuel fitting until pressure is safely relieved.
- ⚠️ Support the vehicle only with correctly rated jack stands.
- ⚠️ Disconnect the negative battery terminal before removing electrical or fuel-system components.
- ⚠️ Do not rotate the crankshaft or camshafts independently after removing the chains.
- ⚠️ Keep every timing component assigned to its original bank and position.
🔧 Required Tools
You'll need the following tools for this repair:
- Ford 3.5L EcoBoost camshaft holding tool set (specialty)
- Ford 3.5L EcoBoost crankshaft positioning tool (specialty)
- Crankshaft pulley holding tool (specialty)
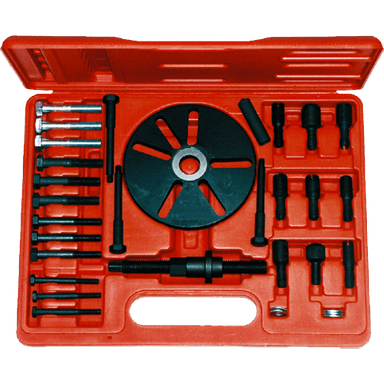
- Two-jaw harmonic balancer puller (specialty)
- Fuel pressure gauge and relief adapter (specialty)
- Engine support bar rated 1,000-pound minimum
- 3/8-inch drive metric socket set, 7mm-18mm
- 1/2-inch drive metric socket set, 10mm-24mm
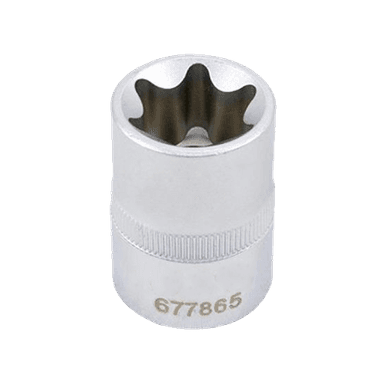
- External Torx socket set, E6-E14
- Torx bit set, T20-T55
- 1/4-inch drive torque wrench, 2-25 Nm
- 3/8-inch drive torque wrench, 10-100 Nm
- 1/2-inch drive torque wrench, 50-250 Nm
- Digital torque-angle gauge
- 24-inch breaker bar
- Plastic gasket scraper
- Hose-clamp pliers
- Fuel-line disconnect tool set (specialty)
- Cooling-system vacuum filler (specialty)
- OBD-II bidirectional scan tool (specialty)
- Drain pan, 15-quart minimum
- Floor jack rated 3-ton minimum
- Jack stands rated 3-ton minimum
- Wheel chocks
- Safety glasses
- Nitrile gloves
🔩 Required Parts
HowToo sells the timing-component aisles for your F-150, but the failed components must be identified before ordering:
- Complete engine timing chain kit - Qty: 1
- Timing chain guides and tensioners - Replace as a complete matched set
- Timing cover gasket set - Qty: 1
- Valve cover gasket sets - Qty: 2
- Front crankshaft seal - Qty: 1
- Torque-to-yield fasteners specified by Ford - Qty: As required
- High-pressure fuel tube - Qty: 1 if previously reused or damaged
- Engine oil and oil filter - Qty: 1 complete service
- Ford-approved engine coolant - Qty: As required
- Ford-specified RTV silicone sealant - Qty: 1
Important: Don’t automatically replace the chains because of a brief cold-start rattle. Ford documented worn variable camshaft timing units, commonly called cam phasers, as a possible cause on certain 2017-2020 3.5L EcoBoost F-150s. fordservicecontent.com
📋 Before You Begin
- Park your F-150 on level ground, select Park, set the parking brake, and chock the rear wheels.
- Read all diagnostic trouble codes with an OBD-II bidirectional scan tool before disconnecting the battery.
- Record whether the noise occurs only during the first two to five seconds after a cold soak.
- Relieve fuel pressure using the factory scan-tool routine and approved pressure-relief equipment.
- Allow the engine to become completely cold before draining coolant.
- Disconnect the negative battery terminal and isolate it from the battery post.
- Obtain Ford Workshop Manual Section 303-01 instructions for the exact removal sequence, timing marks, tightening stages, and reusable-fastener rules.
🔨 Step-by-Step Instructions
Follow these steps in order:
Step 1: Diagnose the Fault Before Disassembly
- Use an OBD-II bidirectional scan tool to check for cam-to-crank correlation, variable cam timing, oil-pressure, and misfire faults.
- Check engine-oil level and condition before condemning mechanical timing components.
- Listen at the upper front timing cover after an overnight cold soak.
- A two-to-five-second cold-start rattle may point toward the documented VCT-unit condition rather than worn chains alone. fordservicecontent.com
Step 2: Strip the Front and Top of the Engine
- Use the metric socket set and hose-clamp pliers to remove the intake ducting, cooling fan assembly, upper intake components, ignition components, valve covers, accessory belt, and obstructing hoses.
- Use the drain pan to capture coolant and engine oil.
- Label every connector, hose, and fastener location during removal.
- Cardboard bolt maps prevent expensive guessing later.
Step 3: Safely Disconnect the Fuel System
- After confirming zero residual pressure, use the fuel-line disconnect tool set to disconnect the required low-pressure connection.
- Use the correct metric flare-nut wrench from the tool set on the high-pressure tube fittings.
- Cap every open fuel connection immediately to prevent contamination.
- If Ford’s applicable repair procedure permits reuse of an undamaged, never-previously-reused tube, tighten its flare nuts to 32 ± 2 Nm (24 ± 1.5 ft-lbs). fordservicecontent.com
Step 4: Position and Lock the Engine
- Use the 24-inch breaker bar and crankshaft socket to rotate the engine clockwise to Ford’s specified timing position.
- Install the crankshaft positioning tool and camshaft holding tool set exactly as directed by Ford.
- Confirm all timing references before removing any chain or VCT-unit fastener.
- Never use the camshaft holding tools as counter-hold tools for breaking excessively tight bolts loose.
Step 5: Remove the Crank Pulley and Timing Cover
- Use the crankshaft pulley holding tool, breaker bar, and correct socket to remove the crankshaft bolt.
- Use the harmonic balancer puller to remove the pulley without prying against the aluminum cover.
- Use the metric socket set to remove the timing-cover bolts in a recorded pattern.
- Use the plastic gasket scraper to separate the cover without gouging its sealing surfaces.
Step 6: Remove the Timing Components
- Verify the crankshaft and all four camshafts remain locked.
- Use the required metric sockets to unload and remove the chain tensioners, guides, chains, and diagnosed VCT units.
- Keep the left-bank and right-bank components separated.
- Do not release hydraulic tensioners until they’re installed in their final positions.
Step 7: Install and Verify the New Timing Components
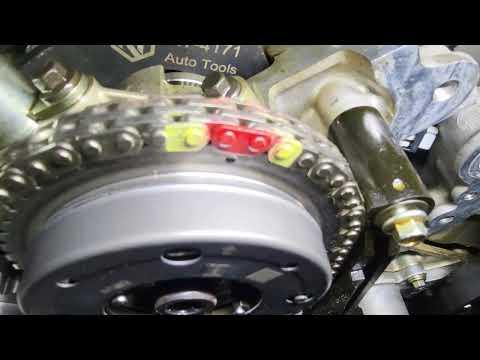
- Install the new guides, chains, tensioners, and any diagnosed VCT units using the colored chain links and Ford timing references.
- Use the torque wrenches and torque-angle gauge for every fastener stage listed in Workshop Manual Section 303-01.
- Do not reuse any bolt Ford identifies as torque-to-yield. A torque-to-yield bolt permanently stretches during installation.
- Remove the locking tools, then use the breaker bar to rotate the crankshaft clockwise through two complete revolutions.
- Return it to the timing position and confirm that the locking tools reinstall without forcing them.
- Stop immediately if the crankshaft binds or the tools don’t align.
Step 8: Reseal and Reassemble the Engine
- Use the plastic gasket scraper and approved cleaner to prepare the timing-cover and valve-cover sealing surfaces.
- Apply Ford-specified RTV only at the factory-designated joints and corners.
- Install a new front crankshaft seal with the appropriate seal installer.
- Reinstall the timing cover, crank pulley, valve covers, intake components, fuel system, cooling system, fan, and accessory belt.
- Use the torque wrenches and exact Workshop Manual tightening sequence for every fastener.
Step 9: Refill and Prime the Engine
- Install a new oil filter and refill with the specified engine oil.
- Use the cooling-system vacuum filler to refill the cooling system and reduce trapped air.
- Disable fuel delivery with the OBD-II bidirectional scan tool or Ford-approved procedure.
- Crank the engine in short intervals to build oil pressure before allowing it to start.
✅ After Repair
- Start the engine and shut it down immediately if there’s continuous rattling, knocking, low oil pressure, or a fuel leak.
- Inspect the high-pressure fuel connections with the engine running. Never use your fingers to check for leaks.
- Monitor cam timing data, coolant temperature, misfire counts, and fault codes with the scan tool.
- Allow the engine to cool completely, then recheck oil and coolant levels.
- Perform a second cold-start test after the truck sits for at least six hours.
- Recheck the timing cover, valve covers, cooling connections, and fuel fittings for leakage.
💰 DIY vs Shop Cost
Shop Cost: $3,000-$5,500 equivalent, depending on diagnosis, parts availability, and local labor
DIY Cost: $700-$2,000 equivalent for parts, fluids, seals, and specialty tools
You Save: Approximately $1,000-$3,000 by doing it yourself, provided no timing error or engine damage occurs.
Ford lists approximately 9.6 shop hours for the related four-phaser repair. Independent labor rates and regional pricing vary substantially. fordservicecontent.com
🎯 Ready to get started?
The first move is diagnosis, not ordering a “timing belt.” The timing-chain, tensioner, guide, and cover-gasket aisles are now open for your F-150. For a first-time wrench, I’d have an experienced engine technician handle the locking, timing, and final torque stages. One tooth wrong can turn a parts-saving weekend into an engine replacement, and that’s lousy shop math.
HowToo makes it easy: same-day/2-day shipping on every part, plus all the tools and specialty tools you need! Check out the parts and tools sections below to add everything to your cart.