

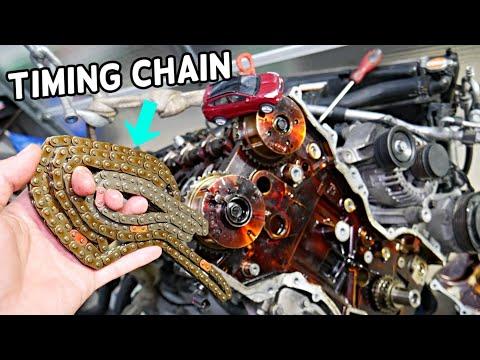







How to Replace the Timing Chain on a 2016-2021 Hyundai Tucson 2.0L (Trim: SE | Engine: Inline 4 2.0L | Body: Sport Utility)
Step-by-step guide explaining why there is no timing belt, with tools, parts, torque specs, and safety tips for 2016, 2017, 2018
How to Replace the Timing Chain on a 2016-2021 Hyundai Tucson 2.0L (Trim: SE | Engine: Inline 4 2.0L | Body: Sport Utility)
Step-by-step guide explaining why there is no timing belt, with tools, parts, torque specs, and safety tips for 2016, 2017, 2018


🔧 Tucson - Timing Component Replacement
Your Tucson does not use a timing belt. The 2.0L gasoline engine uses a timing chain, which is inside the engine and is not a routine maintenance item like a belt.
This repair covers timing chain replacement. It is only normally done if there is chain stretch, timing-related fault codes, rattle on startup, guide failure, or internal engine repair.
Difficulty Level: Advanced | Estimated Time: 8-12 hours
⚠️ Safety & Precautions
- ⚠️ This is an advanced internal engine repair. Incorrect timing can cause engine damage.
- ⚠️ Disconnect the negative battery cable before starting to prevent accidental cranking.
- ⚠️ Support the engine before removing the right-side engine mount.
- ⚠️ Do not rotate the crankshaft or camshafts independently after the chain is removed.
- ⚠️ Work only on a completely cool engine to avoid burns from coolant, oil, and exhaust parts.
- ⚠️ Keep the work area very clean. Dirt inside the engine can cause serious damage.
🔧 Required Tools
You'll need the following tools for this repair:
- Metric socket set 8mm-22mm
- Metric wrench set 8mm-19mm
- 3/8-inch drive ratchet
- 1/2-inch drive breaker bar
- 1/2-inch drive torque wrench
- 3/8-inch drive torque wrench
- 10mm socket
- 12mm socket
- 14mm socket
- 17mm socket
- 22mm socket
- Socket extensions 3-inch and 6-inch
- Serpentine belt tool
- Harmonic balancer puller (specialty)
- Engine support bar (specialty)
- Floor jack rated 3-ton minimum
- Jack stands rated 3-ton minimum
- Wheel chocks
- Plastic trim clip remover
- Flat-blade screwdriver
- Gasket scraper plastic
- Drain pan 2-gallon minimum
- Funnel
- Paint marker
- Shop towels
- Nitrile gloves
- Safety glasses
🔩 Required Parts
HowToo sells all the parts you need for this repair:
- Timing chain - Qty: 1
- Timing chain tensioner - Qty: 1
- Timing chain guide set - Qty: 1
- Front timing cover gasket set - Qty: 1
- Valve cover gasket - Qty: 1
- Crankshaft front oil seal - Qty: 1
- Engine mount bolts - Qty: 1 set
- Crankshaft pulley bolt - Qty: 1
- RTV engine sealant - Qty: 1 tube
- Engine oil 5W-20 synthetic blend or full synthetic - Qty: 5 quarts
- Oil filter - Qty: 1
- Coolant concentrate or premixed compatible coolant - Qty: As needed
- Serpentine belt - Qty: 1
📋 Before You Begin
- Park your Tucson on level ground, shift to Park, and apply the parking brake.
- Place wheel chocks behind the rear wheels. Wheel chocks are blocks that stop the vehicle from rolling.
- Let the engine cool completely before opening the cooling system or removing covers.
- Use a 10mm socket to disconnect the negative battery cable.
- Use a floor jack rated 3-ton minimum and jack stands rated 3-ton minimum if raising the front of the vehicle.
- Take photos before removing hoses, brackets, and connectors. This helps during reassembly.
- Mark bolts by location. Hyundai uses different bolt lengths on the timing cover.
- Assumption: This procedure is for the 2.0L gasoline timing chain system, not a timing belt.
🔨 Step-by-Step Instructions
Follow these steps in order:
Step 1: Disconnect Battery and Remove Upper Covers
- Use a 10mm socket to loosen the negative battery terminal and move the cable aside.
- Pull the plastic engine cover upward by hand to release it from its rubber mounts.
- Use safety glasses and nitrile gloves before working around oil and coolant.
- Take photos before unplugging connectors.
Step 2: Raise and Support the Front of the Vehicle
- Use a floor jack rated 3-ton minimum to lift the front of your Tucson at the front lift point.
- Place jack stands rated 3-ton minimum under the proper front support points.
- Gently lower the vehicle onto the stands and shake the vehicle lightly to confirm it is stable.
- Use a plastic trim clip remover to remove the right front splash shield clips.
Step 3: Drain Engine Oil and Coolant
- Place a drain pan 2-gallon minimum under the engine oil drain plug.
- Use a 17mm socket to remove the oil drain plug and drain the oil.
- Reinstall the drain plug with a 17mm socket and torque to 39-44 Nm (29-32 ft-lbs).
- Move the drain pan 2-gallon minimum under the radiator drain area and drain the coolant as needed.
- Use shop towels to clean spills right away.
Step 4: Remove the Serpentine Belt
- Use a serpentine belt tool to rotate the belt tensioner and release belt tension. A tensioner is a spring-loaded pulley that keeps the belt tight.
- Slide the belt off the pulleys by hand.
- Inspect the belt path before removal or take a photo.
- Replace the belt if cracked, glazed, noisy, or oil-soaked.
Step 5: Support the Engine
- Install an engine support bar across the upper engine bay. An engine support bar holds the engine from above when a mount is removed.
- Lightly tension the support bar until the engine weight is supported.
- Do not lift the engine hard. Just support it.
Step 6: Remove the Right Engine Mount
- Use a 14mm socket and 17mm socket to remove the right-side engine mount fasteners.
- Remove the mount and bracket from the timing cover area.
- Keep the bolts organized by location.
- During reassembly, install new mount bolts and torque mount-to-body bolts to 59-73 Nm (44-54 ft-lbs).
- During reassembly, torque mount-to-engine bracket bolts to 78-98 Nm (58-72 ft-lbs).
Step 7: Remove the Valve Cover
- Unplug ignition coil connectors by hand and move the harness aside.
- Use a 10mm socket to remove ignition coil bolts, then pull the coils straight up.
- Use a 10mm socket to remove valve cover bolts.
- Lift the valve cover off carefully. If stuck, use a plastic trim clip remover to gently work the edge loose.
- Do not pry against the aluminum sealing surfaces with metal tools.
- During reassembly, torque valve cover bolts to 8-10 Nm (71-89 in-lbs).
Step 8: Remove the Crankshaft Pulley
- Use a 22mm socket and 1/2-inch drive breaker bar to loosen the crankshaft pulley bolt.
- Use a harmonic balancer puller to remove the crankshaft pulley. A harmonic balancer puller safely pulls the crank pulley without damaging it.
- Discard the crankshaft pulley bolt if it is a torque-to-yield style replacement bolt supplied in the kit.
- During reassembly, use the new bolt and follow the bolt instructions supplied with the part kit if provided.
Step 9: Remove the Front Timing Cover
- Use 10mm socket, 12mm socket, and 14mm socket to remove the timing cover bolts.
- Note bolt length and location. Some bolts are longer than others.
- Use a plastic gasket scraper to carefully separate the cover from the engine.
- Do not gouge the aluminum engine block or cover.
- Clean old RTV sealant with a plastic gasket scraper and shop towels.
Step 10: Set Engine to Top Dead Center
- Use a 22mm socket on the crankshaft bolt location to rotate the engine clockwise only.
- Align the crankshaft and camshaft timing marks to the factory timing positions.
- Top Dead Center means cylinder number 1 is at the top of its compression stroke.
- Use a paint marker to mark the current chain-to-sprocket positions before removal.
- Clockwise only prevents chain slack errors.
Step 11: Remove Timing Chain Tensioner and Guides
- Use a 10mm socket or 12mm socket to remove the timing chain tensioner bolts.
- Remove the chain guides using the matching 10mm socket or 12mm socket.
- A guide is a plastic-faced rail that keeps the chain running straight.
- Do not rotate the crankshaft or camshafts after the tensioner and chain are loose.
Step 12: Remove the Timing Chain
- Lift the timing chain off the camshaft sprockets and crankshaft sprocket by hand.
- Compare the old chain to the new chain on a clean work surface.
- Make sure the new timing chain has the same number of links and marked links.
Step 13: Install the New Timing Chain
- Place the new chain over the crankshaft sprocket and camshaft sprockets by hand.
- Align the colored chain links with the timing marks on the sprockets.
- Use the paint marker only as a helper mark, not as a replacement for factory timing marks.
- Confirm the chain is tight on the non-tensioner side before installing the tensioner.
Step 14: Install New Guides and Tensioner
- Use a 10mm socket or 12mm socket to install the new timing chain guides.
- Use a 3/8-inch drive torque wrench to torque guide bolts to 10-12 Nm (89-106 in-lbs).
- Install the new timing chain tensioner with a 10mm socket or 12mm socket.
- Use a 3/8-inch drive torque wrench to torque tensioner bolts to 10-12 Nm (89-106 in-lbs).
- Release the tensioner pin only after the chain and guides are correctly installed.
Step 15: Verify Timing by Hand
- Use a 22mm socket and 1/2-inch drive breaker bar to rotate the engine clockwise two full turns.
- Stop if you feel a hard lock. Do not force it.
- Recheck that the timing marks return to the correct positions.
- If timing marks do not line up correctly, remove the tensioner and reset the chain.
Step 16: Reseal and Install the Timing Cover
- Use a plastic gasket scraper and shop towels to clean the timing cover and engine sealing surfaces.
- Apply RTV engine sealant in the original bead pattern around the cover.
- Install a new crankshaft front oil seal into the cover if not preinstalled.
- Set the timing cover in place without smearing the sealant.
- Use a 10mm socket, 12mm socket, and 14mm socket to install cover bolts finger-tight first.
- Use a 3/8-inch drive torque wrench to torque small timing cover bolts to 9-11 Nm (80-97 in-lbs).
- Use a 3/8-inch drive torque wrench to torque larger timing cover bolts to 18-25 Nm (13-18 ft-lbs).
Step 17: Reinstall Crankshaft Pulley
- Slide the crankshaft pulley onto the crankshaft by hand.
- Install the new crankshaft pulley bolt by hand first to avoid cross-threading.
- Use a 22mm socket and 1/2-inch drive torque wrench to tighten the crankshaft pulley bolt.
- If your replacement bolt includes a specific angle-tighten instruction, follow the bolt kit instructions exactly.
Step 18: Reinstall Valve Cover and Engine Mount
- Install the new valve cover gasket into the valve cover by hand.
- Use a 10mm socket to install the valve cover bolts.
- Use a 3/8-inch drive torque wrench and torque valve cover bolts to 8-10 Nm (71-89 in-lbs).
- Reinstall ignition coils with a 10mm socket and torque coil bolts to 8-10 Nm (71-89 in-lbs).
- Use a 14mm socket and 17mm socket to reinstall the right engine mount and bracket.
- Use a 1/2-inch drive torque wrench and torque mount-to-body bolts to 59-73 Nm (44-54 ft-lbs).
- Use a 1/2-inch drive torque wrench and torque mount-to-engine bracket bolts to 78-98 Nm (58-72 ft-lbs).
Step 19: Install Serpentine Belt and Splash Shield
- Route the new serpentine belt over the pulleys using your photo or belt routing diagram.
- Use the serpentine belt tool to rotate the tensioner and slip the belt onto the final pulley.
- Confirm the belt ribs sit fully in every pulley groove.
- Use a plastic trim clip remover by hand to reinstall the right splash shield clips.
Step 20: Refill Oil and Coolant
- Install a new oil filter by hand until snug, then tighten according to the filter instructions.
- Use a funnel to add the correct amount of 5W-20 engine oil.
- Use a funnel to refill the cooling system with compatible coolant.
- Use a 10mm socket to reconnect the negative battery cable.
✅ After Repair
- Before starting, crank the engine briefly and listen for abnormal knocking or binding.
- Start the engine and let it idle. It may rattle briefly while oil pressure builds, but it should quiet quickly.
- Check for oil leaks around the valve cover, timing cover, oil filter, and drain plug.
- Check for coolant leaks and monitor coolant level as air bleeds out.
- Watch the temperature gauge during warm-up. Shut the engine off if it overheats.
- After the first test drive, recheck oil level, coolant level, and all visible sealing areas.
- If the check engine light comes on, scan for timing or cam/crank correlation codes before driving further.
💰 DIY vs Shop Cost
Shop Cost: $1,400-$2,400 (parts + labor)
DIY Cost: $250-$650 (parts only)
You Save: $1,000-$1,750 by doing it yourself!
Shop labor rates vary but typically run $100-$150/hour. This repair takes a shop approximately 8-12 hours.
🎯 Ready to get started?
HowToo makes it easy: same-day/2-day shipping on every part, plus all the tools and specialty tools you need! Check out the parts and tools sections below to add everything to your cart.