

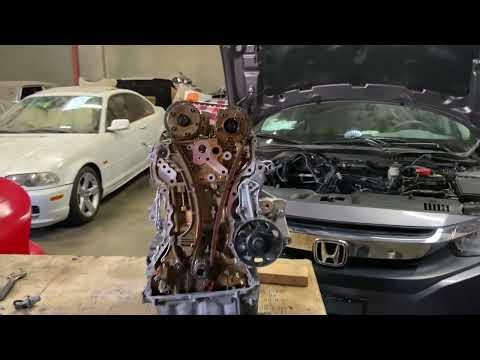




How to Replace the Timing Chain on a 2016-2019 Honda Civic (Trim: Type R | Engine: Inline 4 2.0L | Body: Hatchback)
Step-by-step guide with tools, parts, torque specs, safety tips, and cost estimates for 2016, 2017, 2018
How to Replace the Timing Chain on a 2016-2019 Honda Civic (Trim: Type R | Engine: Inline 4 2.0L | Body: Hatchback)
Step-by-step guide with tools, parts, torque specs, safety tips, and cost estimates for 2016, 2017, 2018


🔧 Civic - Timing Chain Replacement
Your Civic uses a timing chain, not a timing belt. The timing chain keeps the crankshaft and camshafts synchronized so the valves and pistons move at the correct time. Replacing it is a major engine repair that requires precise cam/crank alignment and should only be done if diagnosis confirms chain stretch, guide failure, tensioner failure, or related timing faults.
Difficulty Level: Advanced | Estimated Time: 8-12 hours
⚠️ Safety & Precautions
- ⚠️ Disconnect the negative battery cable before removing engine covers, wiring brackets, or the starter-area splash shields.
- ⚠️ Let the engine cool completely before draining coolant or working near the turbocharger and exhaust area.
- ⚠️ Support your Civic securely with jack stands. Never work under a vehicle held only by a floor jack.
- ⚠️ The right-side engine mount must be removed. The engine must be supported from below before removing it.
- ⚠️ Do not rotate the crankshaft or camshafts independently with the chain removed. Engine damage can occur.
- ⚠️ This engine is interference-style, meaning pistons and valves can contact each other if timing is incorrect.
- ⚠️ Use new sealant where required. Oil leaks are common if timing cover sealing surfaces are rushed or dirty.
🔧 Required Tools
You'll need the following tools for this repair:
- 10mm socket
- 12mm socket
- 14mm socket
- 17mm socket
- 19mm socket
- 24mm socket
- 3/8-inch ratchet
- 1/2-inch breaker bar
- 3/8-inch extension set
- 1/2-inch extension set
- Torque wrench rated 5-80 Nm
- Torque wrench rated 40-250 Nm
- Crankshaft pulley holder tool (specialty)
- Crankshaft pulley removal tool (specialty)
- Engine support bar rated 500 lb minimum
- Floor jack rated 2-ton minimum
- Jack stands rated 2-ton minimum
- Wood block 12-inch minimum
- Trim clip removal tool
- Plastic scraper
- Razor scraper
- Brake cleaner aerosol
- Drain pan 10-quart minimum
- Coolant funnel kit
- Serpentine belt tool
- Paint marker
- Feeler gauge set
- Straightedge ruler
- Safety glasses
- Mechanic gloves
🔩 Required Parts
HowToo sells all the parts you need for this repair:
- Timing chain - Qty: 1
- Timing chain tensioner - Qty: 1
- Timing chain guide set - Qty: 1
- Crankshaft front oil seal - Qty: 1
- Valve cover gasket set - Qty: 1
- Timing cover sealant - Qty: 1
- Engine oil (0W-20 full synthetic) - Qty: 5 quarts
- Engine oil filter - Qty: 1
- Honda-compatible premixed coolant - Qty: 1 gallon
- Serpentine belt - Qty: 1, recommended if worn
- Crankshaft pulley bolt - Qty: 1, recommended
- Engine mount bolts - Qty: As needed if stretched, damaged, or corroded
📋 Before You Begin
- Park your Civic on level ground, set the parking brake, and chock the rear wheels.
- A timing chain is a metal chain inside the engine that keeps valve timing correct.
- A tensioner is a spring/oil-pressure device that keeps the timing chain tight.
- Top dead center, or TDC, means piston number 1 is at the top of its travel and timing marks are aligned.
- Plan for the vehicle to be down at least one full day. Cleanliness and timing alignment matter more than speed.
- Drain engine oil and coolant only after the engine is fully cool.
🔨 Step-by-Step Instructions
Follow these steps in order:
Step 1: Disconnect the Battery
- Use a 10mm socket or 10mm wrench to loosen the negative battery terminal.
- Remove the negative cable and position it away from the battery post.
- Black cable comes off first.
Step 2: Raise and Support the Civic
- Use a floor jack rated 2-ton minimum at the front center jacking point.
- Place jack stands rated 2-ton minimum under the front support points.
- Lower the vehicle gently onto the stands and confirm it is stable.
- Wear safety glasses and mechanic gloves.
Step 3: Remove the Lower Splash Shield
- Use a trim clip removal tool to remove the plastic clips.
- Use a 10mm socket and 3/8-inch ratchet to remove the splash shield bolts.
- Lower the shield and set it aside.
Step 4: Drain Engine Oil and Coolant
- Place a drain pan 10-quart minimum under the engine oil drain plug.
- Use a 17mm socket and 3/8-inch ratchet to remove the oil drain plug.
- Drain the engine oil fully, then reinstall the drain plug with a new washer if available.
- Use a torque wrench rated 5-80 Nm to tighten the oil drain plug to Torque to 40 Nm (30 ft-lbs).
- Move the drain pan 10-quart minimum under the radiator drain area and drain coolant carefully.
Step 5: Remove the Engine Cover and Intake Ducting
- Lift the engine cover upward by hand from its rubber grommets.
- Use a 10mm socket to loosen intake duct fasteners and clamps as needed.
- Move the intake ducting aside to clear the top and front of the engine.
Step 6: Remove the Serpentine Belt
- Use a serpentine belt tool on the belt tensioner to relieve belt tension.
- Slide the belt off the pulleys and slowly release the tensioner.
- Use a paint marker to mark belt direction if reusing the belt.
- Replace the belt if cracked.
Step 7: Support the Engine
- Position an engine support bar rated 500 lb minimum across the upper body support points, or use a floor jack rated 2-ton minimum with a wood block 12-inch minimum under the oil pan.
- If using a jack, raise it only until it lightly supports the engine. Do not lift the vehicle by the oil pan.
- The wood block spreads the load so the oil pan is not dented.
Step 8: Remove the Right Engine Mount
- Use a 14mm socket and 17mm socket with a 3/8-inch ratchet to remove the right-side engine mount fasteners.
- Remove the mount bracket carefully once the engine is supported.
- Keep bolts organized by location.
- During installation, tighten the mount-to-body bolts to Torque to 54 Nm (40 ft-lbs).
- During installation, tighten the mount bracket bolts to Torque to 64 Nm (47 ft-lbs).
Step 9: Remove the Crankshaft Pulley
- Install the crankshaft pulley holder tool (specialty) into the pulley to keep it from turning.
- Use a 19mm socket, 1/2-inch breaker bar, and 1/2-inch extension set to loosen the crankshaft pulley bolt.
- If the pulley is stuck, use the crankshaft pulley removal tool (specialty) to remove it evenly.
- Do not hammer the pulley.
Step 10: Remove the Valve Cover
- Use a 10mm socket to remove ignition coil cover hardware if equipped.
- Use a 10mm socket to remove the ignition coil bolts and move the coils aside.
- Use a 10mm socket to remove valve cover bolts in a loose, even pattern.
- Lift the valve cover off carefully.
- Remove the old valve cover gasket set from the cover.
Step 11: Remove the Timing Cover
- Use 10mm socket, 12mm socket, and 14mm socket sizes as needed to remove timing cover bolts.
- Use a plastic scraper at the cover edges to gently separate the timing cover from the engine.
- Do not drive a metal screwdriver between sealing surfaces.
- Remove the timing cover and set it on a clean surface.
Step 12: Set Cylinder Number 1 to TDC
- Use a 19mm socket and 1/2-inch breaker bar on the crankshaft bolt area to rotate the engine clockwise only.
- Align the crankshaft timing mark with its reference mark.
- Confirm the camshaft timing marks line up with the cylinder head reference plane.
- Use a straightedge ruler to help visually confirm the cam marks are level.
- Use a paint marker to mark the current chain-to-sprocket positions before removal.
Step 13: Remove the Timing Chain Tensioner
- Use a 10mm socket to remove the timing chain tensioner bolts.
- Remove the timing chain tensioner from the engine.
- The chain may become loose after the tensioner is removed, so do not rotate the engine.
Step 14: Remove the Timing Chain Guides and Chain
- Use a 10mm socket and 12mm socket to remove the timing chain guide bolts.
- Remove the fixed and movable guides.
- Lift the timing chain off the camshaft sprockets and crankshaft sprocket.
- Do not rotate the camshafts or crankshaft with the chain removed.
Step 15: Install the New Timing Chain and Guides
- Position the new timing chain with its colored links aligned to the crankshaft and camshaft timing marks.
- Install the new timing chain guide set.
- Use a torque wrench rated 5-80 Nm to tighten guide bolts to Torque to 12 Nm (9 ft-lbs), unless the included guide kit specifies otherwise.
- Confirm the chain is seated fully on all sprockets.
Step 16: Install the New Timing Chain Tensioner
- Install the new timing chain tensioner in its compressed/locked position.
- Use a 10mm socket to install the tensioner bolts by hand first.
- Use a torque wrench rated 5-80 Nm to tighten the tensioner bolts to Torque to 12 Nm (9 ft-lbs).
- Release the tensioner lock so it applies pressure to the chain guide.
Step 17: Verify Timing by Hand
- Use a 19mm socket and 1/2-inch breaker bar to rotate the crankshaft clockwise two full turns.
- Stop at TDC again and recheck camshaft and crankshaft timing marks.
- If marks do not align, remove the tensioner and reset the chain. Do not start the engine.
- Use a feeler gauge set only if checking related valve clearance during this service.
- Hand-rotate before starting.
Step 18: Clean Timing Cover Sealing Surfaces
- Use a plastic scraper to remove old sealant from the timing cover and engine block.
- Use a razor scraper carefully only on stubborn flat metal areas.
- Use brake cleaner aerosol on a clean rag to wipe sealing surfaces dry.
- Do not let old sealant fall into the engine.
Step 19: Install the Front Crankshaft Seal
- Remove the old crankshaft front oil seal from the timing cover carefully.
- Press the new seal in squarely using an appropriate flat driver or seal installer if available.
- Lightly oil the seal lip with clean engine oil before installation.
Step 20: Reinstall the Timing Cover
- Apply timing cover sealant in a continuous bead following the original sealing path.
- Install the timing cover within the sealant working time.
- Use 10mm socket, 12mm socket, and 14mm socket sizes to install bolts by hand first.
- Use a torque wrench rated 5-80 Nm to tighten small timing cover bolts to Torque to 12 Nm (9 ft-lbs).
- Use a torque wrench rated 5-80 Nm to tighten larger timing cover bolts to Torque to 24 Nm (18 ft-lbs).
Step 21: Reinstall the Valve Cover
- Install the new valve cover gasket set into the valve cover grooves.
- Place the valve cover onto the cylinder head without pinching the gasket.
- Use a 10mm socket to install bolts by hand first.
- Use a torque wrench rated 5-80 Nm to tighten valve cover bolts to Torque to 10 Nm (7 ft-lbs).
Step 22: Reinstall the Crankshaft Pulley
- Slide the crankshaft pulley onto the crankshaft nose by hand.
- Install the crankshaft pulley bolt.
- Use the crankshaft pulley holder tool (specialty) to hold the pulley.
- Use a 19mm socket and torque wrench rated 40-250 Nm to tighten the crankshaft pulley bolt to Torque to 245 Nm (181 ft-lbs).
Step 23: Reinstall the Right Engine Mount
- Position the engine mount and bracket by hand.
- Use a 14mm socket and 17mm socket to start all mount bolts before tightening.
- Use a torque wrench rated 40-250 Nm to tighten mount-to-body bolts to Torque to 54 Nm (40 ft-lbs).
- Use a torque wrench rated 40-250 Nm to tighten mount bracket bolts to Torque to 64 Nm (47 ft-lbs).
- Remove the engine support bar rated 500 lb minimum or lower the floor jack rated 2-ton minimum slowly.
Step 24: Reinstall the Serpentine Belt
- Route the serpentine belt around the pulleys following the under-hood belt routing diagram.
- Use the serpentine belt tool to move the tensioner.
- Slide the belt onto the last pulley and slowly release the tensioner.
- Check that the belt ribs sit fully in every pulley groove.
Step 25: Refill Oil and Coolant
- Install the new engine oil filter by hand until the gasket touches, then tighten another 3/4 turn.
- Add engine oil (0W-20 full synthetic) through the oil fill cap.
- Use a coolant funnel kit to refill with Honda-compatible premixed coolant.
- Check for leaks before starting.
Step 26: Reconnect the Battery
- Use a 10mm socket or 10mm wrench to reconnect the negative battery terminal.
- Tighten the terminal until secure, but do not crush it.
Step 27: First Start
- Before starting, crank the engine briefly and listen for abnormal clanking or binding.
- Start the engine and let it idle.
- Watch the oil pressure warning light. Shut the engine off if it does not go out quickly.
- Check the timing cover, valve cover, oil drain plug, oil filter, and coolant areas for leaks.
✅ After Repair
- Let the engine reach operating temperature while monitoring coolant level in the funnel.
- Turn the heater to warm and confirm heat output after the coolant begins circulating.
- Shut the engine off, let it cool, and top off coolant if needed.
- Check engine oil level with the dipstick and top off as needed.
- Scan for engine codes if the check engine light appears.
- Recheck for oil or coolant leaks after the first short drive.
- Reset the Maintenance Minder oil life if oil was changed: Home > Settings > Vehicle > Maintenance Info > Oil Life > Reset.
💰 DIY vs Shop Cost
Shop Cost: $1,800-$3,200 (parts + labor)
DIY Cost: $350-$900 (parts only)
You Save: $1,450-$2,300 by doing it yourself!
Shop labor rates vary but typically run $100-$150/hour. This repair takes a shop approximately 8-12 hours.
🎯 Ready to get started?
HowToo makes it easy: same-day/2-day shipping on every part, plus all the tools and specialty tools you need! Check out the parts and tools sections below to add everything to your cart.