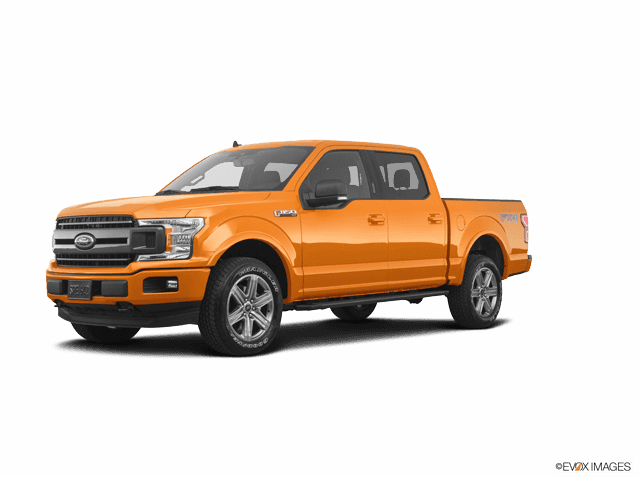




How to Replace the Timing Chain on a 2015-2019 Ford F-150 2.7L EcoBoost (Engine: V6 2.7L)
Step-by-step guide explaining why there is no timing belt, with tools, parts, safety tips, and timing chain service basics for 2015, 2016, 2017, 2018, 2019
How to Replace the Timing Chain on a 2015-2019 Ford F-150 2.7L EcoBoost (Engine: V6 2.7L)
Step-by-step guide explaining why there is no timing belt, with tools, parts, safety tips, and timing chain service basics for 2015, 2016, 2017, 2018, 2019


🔧 F-150 - Timing Drive Inspection
Your F-150 with the 2.7L EcoBoost does not use a timing belt. It uses an internal timing chain, which runs inside the engine and is lubricated by engine oil.
Because this is a chain-driven engine, there is no scheduled timing belt replacement like on belt-equipped engines. Timing chain service is an advanced repair that requires major engine front-cover disassembly and precise cam/crank timing alignment.
Difficulty Level: Advanced | Estimated Time: 10-14 hours
⚠️ Safety & Precautions
- ⚠️ Do not attempt to “replace a timing belt” on your F-150; there is no timing belt to access or replace.
- ⚠️ Timing chain service can cause severe engine damage if the camshafts or crankshaft move out of time.
- ⚠️ Disconnect the negative battery cable before any front engine disassembly.
- ⚠️ Allow the engine to cool fully before working near the turbochargers, coolant system, or front cover.
- ⚠️ This engine uses precise sealing surfaces; improper sealant use can cause oil or coolant leaks.
🔧 Required Tools
You'll need the following tools for this repair:
- 10mm socket
- 8mm socket
- 13mm socket
- 15mm socket
- 18mm socket
- 21mm socket
- 1/2-inch drive breaker bar
- 1/2-inch drive torque wrench
- 3/8-inch drive torque wrench
- Fuel line disconnect tool set (specialty)
- Harmonic balancer puller (specialty)
- Camshaft holding tool set (specialty)
- Crankshaft positioning tool (specialty)
- Timing chain wedge tool (specialty)
- Serpentine belt tool (specialty)
- Plastic trim removal tool
- Gasket scraper plastic
- Drain pan 10-quart
- Floor jack rated 3-ton minimum
- Jack stands rated 3-ton minimum
- Wheel chocks
- Safety glasses
- Nitrile gloves
🔩 Required Parts
HowToo sells all the parts you need for this repair:
- Timing chain kit - Qty: 1
- Timing chain tensioners - Qty: 1 set
- Timing chain guides - Qty: 1 set
- Front engine cover gasket set - Qty: 1
- Crankshaft front seal - Qty: 1
- Valve cover gasket set - Qty: 1
- Engine oil 5W-30 full synthetic - Qty: 6 quarts
- Engine oil filter - Qty: 1
- Engine coolant - Qty: As needed
- Motorcraft-compatible RTV silicone sealant - Qty: 1 tube
- Torque-to-yield bolts - Qty: As required
📋 Before You Begin
- 📋 Park your F-150 on level ground, set the parking brake, and place wheel chocks behind the rear wheels.
- 📋 Let the engine sit until it is completely cool.
- 📋 Disconnect the negative battery cable using a 10mm socket.
- 📋 A torque-to-yield bolt is a one-time-use bolt that stretches when tightened and should not be reused.
- 📋 A harmonic balancer is the large crankshaft pulley at the front of the engine.
- 📋 If you only asked because of maintenance mileage, no timing belt service is needed. Replace the timing chain only if diagnosis confirms chain stretch, guide failure, tensioner failure, or related timing faults.
🔨 Step-by-Step Instructions
Follow these steps in order:
Step 1: Confirm This Is Not a Timing Belt Job
- Use a flashlight if needed and look at the front of the engine area.
- Your F-150 has an external serpentine belt for accessories, but the valve timing is controlled by an internal timing chain.
- If the belt you see is cracked or noisy, that is the serpentine belt, not a timing belt.
- Do not open the engine unless diagnosed.
Step 2: Check for Timing Chain Symptoms
- Use an OBD-II scan tool to check for cam/crank correlation or variable cam timing codes.
- Common signs include cold-start rattle, rough running, check engine light, or cam timing-related fault codes.
- If there are no symptoms or fault codes, timing chain replacement is not normal maintenance.
Step 3: Disconnect Power
- Use a 10mm socket to loosen the negative battery terminal.
- Move the cable away from the battery post so it cannot spring back into contact.
Step 4: Raise and Support the Front
- Use a floor jack rated 3-ton minimum at the proper front lifting point.
- Place jack stands rated 3-ton minimum under the frame.
- Gently lower the truck onto the stands and shake the truck lightly to confirm it is stable.
Step 5: Drain Fluids as Needed
- Place a 10-quart drain pan under the engine.
- Use the correct socket from the listed set to remove the engine oil drain plug.
- Drain coolant as needed before removing front-cover-related coolant connections.
- Reinstall the oil drain plug and Torque to 27 Nm (20 ft-lbs).
Step 6: Remove Front Engine Accessories
- Use a serpentine belt tool to release belt tension and remove the accessory drive belt.
- Use 8mm, 10mm, 13mm, and 15mm sockets to remove obstructing brackets, shields, and accessory fasteners as needed.
- Label connectors with tape so they return to the same locations.
- Take photos before unplugging connectors.
Step 7: Remove Valve Covers and Front Cover
- Use 8mm and 10mm sockets to remove ignition coil, harness, and valve cover fasteners.
- Use a plastic trim removal tool to gently release clips without breaking them.
- Use a gasket scraper plastic only; do not gouge aluminum sealing surfaces.
- Front cover fastener torque varies by location, so record bolt locations during removal.
Step 8: Remove the Harmonic Balancer
- Use a 1/2-inch drive breaker bar and correct socket to loosen the crankshaft pulley bolt.
- Use a harmonic balancer puller to remove the balancer straight off the crankshaft.
- Do not pry behind the balancer with a screwdriver.
Step 9: Lock Engine Timing
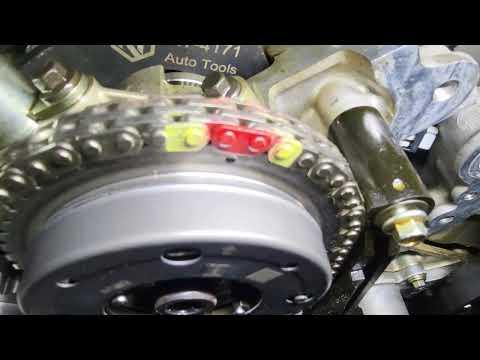
- Use the crankshaft positioning tool to hold the crankshaft in the correct service position.
- Use the camshaft holding tool set to secure the camshafts before removing chains.
- A camshaft opens and closes the engine valves; if it moves out of position, the engine can be damaged.
- Do not rotate the crankshaft or camshafts once the chain is removed.
Step 10: Replace Timing Chains, Guides, and Tensioners
- Use the proper sockets to remove timing chain guide and tensioner fasteners.
- Install the new timing chains with timing marks aligned exactly as specified by the service procedure.
- Use the timing chain wedge tool where required to keep chain tension controlled.
- Install new guides and tensioners from the timing chain kit.
- Torque specifications vary by fastener size and location; use the service-data torque chart for your F-150 before tightening final hardware.
Step 11: Reseal the Front Cover
- Use a gasket scraper plastic to clean the front cover and engine block sealing surfaces.
- Apply Motorcraft-compatible RTV silicone sealant only at the specified joints and seams.
- Install the front cover carefully without smearing the sealant bead.
- Use a 3/8-inch drive torque wrench and tighten bolts in the proper sequence.
Step 12: Reinstall Covers, Balancer, and Accessories
- Use 8mm and 10mm sockets to reinstall valve covers with new gaskets.
- Use the proper installer method to reinstall the harmonic balancer; do not hammer it on.
- Use a 1/2-inch drive torque wrench for crankshaft pulley fastener tightening.
- Reinstall accessories and brackets using the sockets listed above.
Step 13: Refill Oil and Coolant
- Install the new engine oil filter by hand until the gasket contacts, then tighten an additional 3/4 turn.
- Add 5W-30 full synthetic engine oil to the correct level.
- Refill the cooling system with compatible coolant.
- Use nitrile gloves and wipe spilled fluids immediately.
Step 14: Reconnect Battery and Initial Start
- Use a 10mm socket to reconnect the negative battery cable.
- Start the engine and listen for abnormal rattles, knocks, or misfires.
- Shut the engine off immediately if it runs rough or makes metallic noise.
✅ After Repair
- ✅ Check engine oil level and coolant level after the first warm-up cycle.
- ✅ Inspect the front cover, valve covers, coolant connections, and oil filter area for leaks.
- ✅ Use an OBD-II scan tool to clear any stored codes and check for returning cam/crank timing faults.
- ✅ Road test gently for 10-15 minutes, then recheck fluid levels.
- ✅ If the check engine light returns, stop driving and recheck timing correlation before continuing.
💰 DIY vs Shop Cost
Shop Cost: $2,500-$4,500 (parts + labor)
DIY Cost: $450-$1,100 (parts only)
You Save: $2,000-$3,400 by doing it yourself!
Shop labor rates vary but typically run $100-$150/hour. This repair takes a shop approximately 10-14 hours.
🎯 Ready to get started?
HowToo makes it easy: same-day/2-day shipping on every part, plus all the tools and specialty tools you need! Check out the parts and tools sections below to add everything to your cart.