

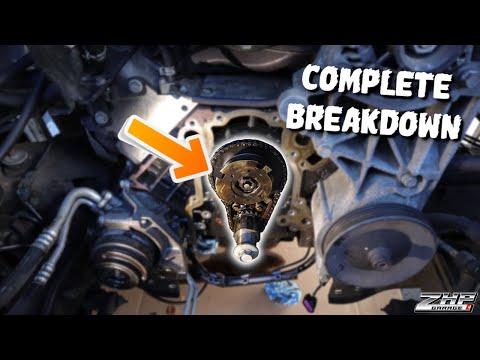






How to Replace the Timing Chain on a 2014-2023 Chevrolet Silverado 1500 6.2L V8 (Trim: High Country | Engine: V8 5.3L)
Advanced step-by-step guide covering tools, parts, timing marks, torque specs, and safety for 2014, 2015, 2016, 2017, 2018, 2019, 2020, 2021, 2022, 2023
How to Replace the Timing Chain on a 2014-2023 Chevrolet Silverado 1500 6.2L V8 (Trim: High Country | Engine: V8 5.3L)
Advanced step-by-step guide covering tools, parts, timing marks, torque specs, and safety for 2014, 2015, 2016, 2017, 2018, 2019, 2020, 2021, 2022, 2023


🔧 Silverado 1500 - Timing Chain Replacement
Your Silverado doesn’t have a timing belt. Its 6.2L V8 uses a timing chain. The chain normally isn’t replaced at a scheduled mileage. Replacement is appropriate when testing confirms excessive chain wear, incorrect cam-to-crank timing, tensioner trouble, or internal engine damage.
This is major engine surgery, not a first-time DIY project. One misplaced timing mark can let a piston contact a valve. That gets expensive before the coffee gets cold.
Difficulty Level: Advanced | Estimated Time: 12-18 hours
Important assumption: This outline covers the stock 6.2L V8, but final fastener torques and angle stages must come from current GM service information for the exact engine build.
⚠️ Safety & Precautions
- ⚠️ Disconnect the negative battery cable before removing electrical connectors or the starter.
- ⚠️ Let the engine cool completely before draining coolant.
- ⚠️ Support your Silverado with properly rated jack stands. Never work beneath a vehicle supported only by a jack.
- ⚠️ Recover refrigerant professionally if an air-conditioning line must be opened. Venting refrigerant is dangerous and unlawful in many locations.
- ⚠️ Do not rotate the crankshaft or camshaft independently after removing the chain.
- ⚠️ Replace any GM torque-to-yield fastener identified by the service procedure. These bolts stretch during tightening and may not be reusable.
- ⚠️ Disable accidental starting by keeping the battery disconnected until reassembly is complete.
🔧 Required Tools
You'll need the following tools for this repair:
- Metric socket set, 7mm-24mm
- Metric wrench set, 8mm-24mm
- Torx socket set, T20-T50
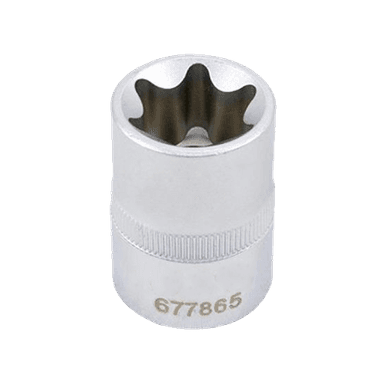
- E-Torx socket set, E6-E18
- 3/8-inch drive ratchet
- 1/2-inch drive breaker bar, 24-inch minimum
- 1/2-inch drive torque wrench, 20-250 ft-lbs
- 3/8-inch drive torque wrench, 10-100 ft-lbs
- Torque-angle gauge, 1/2-inch drive
- Harmonic-balancer puller compatible with GM LS-based V8 (specialty)
- Harmonic-balancer installation tool compatible with GM LS-based V8 (specialty)
- Flywheel holding tool compatible with GM V8 (specialty)
- Engine support fixture rated 1,000 pounds minimum (specialty)
- Floor jack rated 3-ton minimum
- Jack stands rated 3-ton minimum
- Coolant drain pan, 4-gallon minimum
- Engine-oil drain pan, 10-quart minimum
- Plastic gasket scraper
- Seal-driver set, 30mm-80mm
- Two-jaw gear puller, 6-inch
- Trim-clip removal tool, 8-inch
- Plastic connector-pick set
- Paint marker, oil-resistant
- LED work light, rechargeable
- Nitrile gloves, chemical-resistant
- Safety glasses, ANSI Z87.1
🔩 Required Parts
HowToo sells all the parts you need for this repair:
- Complete engine timing chain kit - Qty: 1
- Timing cover gasket set - Qty: 1
- Front crankshaft seal - Qty: 1
- Crankshaft balancer bolt - Qty: 1
- Camshaft sprocket bolt, if specified as single-use - Qty: 1
- Oil-pump pickup tube seal - Qty: 1
- Water-pump gaskets - Qty: 2
- Engine oil meeting the oil-cap specification - Qty: Full refill
- Engine oil filter - Qty: 1
- GM-approved coolant premix - Qty: Full refill as needed
- GM-approved engine sealant - Qty: 1 tube
- Brake cleaner - Qty: 2 cans
The complete kit shown in the parts list is the better starting point than replacing only the chain. The timing-cover gasket set is also necessary because the front cover must be removed and resealed.
📋 Before You Begin
- Park your Silverado on solid, level ground. Shift into Park and apply the parking brake.
- Record radio presets and stored settings before disconnecting the battery.
- Use a paint marker and labeled bags to organize fasteners by component.
- Obtain the current GM timing-chain procedure, tightening sequence, torque values, and torque-angle stages before disassembly.
- Confirm that timing-chain replacement is supported by diagnostic evidence. Common evidence includes cam-to-crank correlation faults, abnormal chain movement, or timing deviation measured with a capable scan tool.
- Plan for the oil pan to be loosened or repositioned so the timing cover can be resealed correctly at its lower joint.
🔨 Step-by-Step Instructions
Follow these steps in order:
Step 1: Disconnect Electrical Power
- Use the appropriate metric socket and ratchet to disconnect the negative battery cable.
- Isolate the cable so it cannot spring back onto the battery terminal.
- Wait at least two minutes before disconnecting engine electrical connectors.
Step 2: Drain Engine Oil and Coolant
- Position the engine-oil drain pan beneath the oil pan.
- Use the correct metric socket to remove the drain plug, then drain the oil and remove the oil filter.
- Position the coolant drain pan beneath the radiator and drain the cooling system only after the engine is cold.
- Reinstall the drain plug using a new seal where required. Torque to the current GM specification for the installed oil pan.
Step 3: Remove Intake Ducting and Upper Components
- Use the metric socket set and plastic connector picks to remove the intake duct, airbox connections, engine cover, and interfering wiring retainers.
- Release electrical connectors by their locking tabs. Do not pull on the wires.
- Label every connector and hose before removal.
Step 4: Remove the Cooling Fan and Radiator Obstructions
- Use the metric socket set and trim-clip tool to remove the upper radiator covers and fan-shroud fasteners.
- Disconnect the electric fan connectors with the plastic connector picks.
- Lift the fan and shroud assembly out without contacting the radiator fins.
- Protect the radiator with clean cardboard.
Step 5: Remove the Accessory Drive
- Use the correct socket and breaker bar on the belt tensioner to release belt tension.
- Remove the serpentine belt and photograph its routing first.
- Use the metric socket set to remove the alternator, tensioner, idlers, and brackets obstructing the timing cover.
- Support the air-conditioning compressor without stressing its hoses if it must be unbolted.
Step 6: Remove the Water Pump
- Disconnect the coolant hoses using the appropriate hose-clamp tool or pliers.
- Use the metric socket set to remove the water-pump fasteners.
- Remove the pump and discard its old gaskets.
- Keep coolant away from electrical connectors and open oil passages.
Step 7: Remove the Crankshaft Balancer
- Install the GM-compatible flywheel holding tool to keep the crankshaft from turning.
- Use the 1/2-inch breaker bar and correct socket to remove the balancer bolt.
- Use the compatible harmonic-balancer puller to remove the balancer. Do not pry against the timing cover.
- Discard the balancer bolt if GM identifies it as single-use.
Step 8: Support the Engine and Gain Timing-Cover Clearance
- Use the 1,000-pound engine support fixture to support the engine at approved lifting points.
- Use the floor jack and jack stands to raise and support your Silverado if lower access is required.
- Remove only the mounts, crossmembers, steering components, or differential fasteners specified by the GM procedure.
- Do not support the engine by the oil pan.
Step 9: Release the Oil Pan From the Timing Cover
- Use the metric and E-Torx socket sets to remove the front oil-pan fasteners and any components preventing pan movement.
- Lower or loosen the oil pan only as directed by the factory procedure.
- Do not bend the sealing rail. The timing cover and oil pan share critical sealing joints.
Step 10: Remove the Timing Cover
- Use the metric socket set to remove the timing-cover fasteners in an organized pattern.
- Note every fastener's original location because lengths may differ.
- Use a plastic scraper to separate the cover. Do not drive a metal screwdriver between aluminum sealing surfaces.
- Remove the front crankshaft seal from the cover with the seal-driver set.
Step 11: Position the Engine at Its Timing Reference
- Temporarily install the crankshaft bolt and use the breaker bar to rotate the engine clockwise.
- Align the crankshaft and camshaft timing marks exactly as shown in the GM service procedure.
- Do not rely only on piston position. The sprocket marks must be correctly aligned.
- Use the paint marker to add reference marks only after confirming factory alignment.
Step 12: Remove the Original Timing Components
- Use the flywheel holding tool to prevent unintended crankshaft movement.
- Use the correct socket and breaker bar to remove the camshaft sprocket fastener.
- Use the metric socket set to remove the timing-chain tensioner.
- Remove the chain and sprockets together where required.
- Do not rotate either shaft with the chain removed.
Step 13: Inspect Related Components
- Inspect the camshaft sprocket, crankshaft sprocket, tensioner mounting surface, oil-pump drive, and timing cover.
- Check the old oil and filter for metal particles.
- Stop the repair if teeth are damaged, metal is present, or either shaft binds during controlled rotation.
Step 14: Install the New Timing Set
- Position the new crankshaft sprocket using the appropriate installer if replacement is included.
- Install the timing chain and sprockets with their timing marks aligned exactly to the GM diagram.
- Install and release the new tensioner according to its supplied directions.
- Use the torque wrench and torque-angle gauge for the camshaft sprocket bolt. Tighten to the exact GM torque and angle stages for this engine build.
- Replace the camshaft bolt if the procedure marks it single-use.
Step 15: Verify Mechanical Timing
- Use the breaker bar to rotate the crankshaft clockwise through two complete revolutions.
- Stop immediately if resistance suddenly increases.
- Return the crankshaft to the timing reference and verify that the factory marks align as specified.
- Do not use the starter motor for this check.
Step 16: Prepare and Install the Timing Cover
- Use the plastic gasket scraper and brake cleaner to clean the cover, block, and oil-pan sealing surfaces.
- Install the new front crankshaft seal with the correctly sized seal driver.
- Apply GM-approved sealant only at the locations and bead size shown by GM.
- Position the timing cover without smearing the sealant into the crankshaft seal or oil passages.
- Use the torque wrench to tighten the cover fasteners in the factory sequence. Torque each fastener by its listed diameter and position.
Step 17: Reseal and Reinstall the Oil Pan
- Replace the oil-pump pickup tube seal if the pickup tube was disturbed.
- Apply the specified sealant at the timing-cover-to-oil-pan joints.
- Use the torque wrench to tighten the oil-pan fasteners in the GM sequence. Observe the specified sealant assembly and cure times.
Step 18: Install the Crankshaft Balancer
- Use the harmonic-balancer installation tool to press the balancer fully onto the crankshaft.
- Never pull the balancer into place using only the final bolt.
- Install a new balancer bolt and hold the flywheel with the specialty tool.
- Use the torque wrench and torque-angle gauge. Follow every GM torque and angle stage exactly.
Step 19: Reassemble the Engine Compartment
- Use the metric socket set to reinstall the water pump with new gaskets.
- Reinstall the brackets, accessories, tensioner, serpentine belt, fan assembly, wiring, hoses, and intake ducting.
- Use the torque wrench for every structural, mount, water-pump, and accessory fastener. Use the GM specification assigned to each fastener.
- Verify that wiring and hoses are clear of belts, pulleys, and exhaust components.
Step 20: Refill Fluids and Reconnect Power
- Install a new oil filter and fill the engine with the oil grade shown on the oil-fill cap.
- Fill the cooling system with the correct GM-approved coolant mixture.
- Use the appropriate metric socket to reconnect the negative battery cable. Torque the terminal to the GM battery-terminal specification.
✅ After Repair
- Disable fuel or ignition and crank the engine in short intervals to build oil pressure before the first start.
- Restore fuel and ignition, then start the engine without pressing the accelerator.
- Shut the engine off immediately if the oil-pressure warning remains on, the chain rattles continuously, or a heavy mechanical knock develops.
- Inspect the timing cover, water pump, oil pan, oil filter, and drain plug for leaks.
- Bleed the cooling system and monitor coolant temperature.
- Use a capable scan tool to check camshaft-to-crankshaft correlation and clear codes only after recording them.
- Recheck oil and coolant levels after the engine cools completely.
- Complete a short road test, then perform a second leak inspection.
💰 DIY vs Shop Cost
Shop Cost: $2,500-$5,000 (parts + labor)
DIY Cost: $300-$1,200 (parts and required consumables)
You Save: Approximately $1,300-$4,000 by doing it yourself, excluding specialty-tool purchases!
Shop labor rates and regional pricing vary widely. This repair commonly occupies a professional technician for approximately 12-18 hours.
🎯 Ready to get started?
HowToo makes it easy: same-day/2-day shipping on every part, plus all the tools and specialty tools you need! Check out the parts and tools sections below to add everything to your cart.