


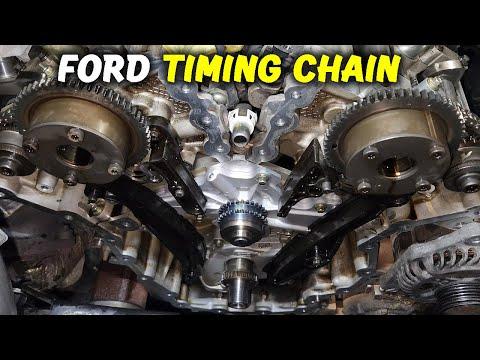







How to Replace the Timing Chain on a 2013-2019 Ford Explorer 3.5L EcoBoost (Trim: Platinum | Engine: V6 3.5L)
Advanced step-by-step guide covering diagnosis, specialty tools, parts, timing, and safety for 2013, 2014, 2015, 2016, 2017, 2018, 2019
How to Replace the Timing Chain on a 2013-2019 Ford Explorer 3.5L EcoBoost (Trim: Platinum | Engine: V6 3.5L)
Advanced step-by-step guide covering diagnosis, specialty tools, parts, timing, and safety for 2013, 2014, 2015, 2016, 2017, 2018, 2019


🔧 Explorer - Timing Chain Replacement
Your Explorer doesn't have a replaceable timing belt. It uses internal timing chains. Ford identifies the Platinum powertrain as the 365-hp twin-turbocharged 3.5L EcoBoost V6. The visible rubber belts outside the engine are accessory drive belts, not timing belts. media.ford.com
Replacing the timing chains requires opening the engine, supporting or removing major powertrain components, and precisely locking the crankshaft and camshafts. This isn't a sensible first-time DIY repair. One timing mistake can cause severe internal engine damage.
Difficulty Level: Advanced professional | Estimated Time: 16-25 hours
⚠️ Safety & Precautions
- ⚠️ Do not run or rotate the engine with timing components removed.
- ⚠️ Never use the camshaft or crankshaft timing tools to loosen fasteners.
- ⚠️ Support the engine and transmission with rated equipment before removing mounts or lowering the powertrain.
- ⚠️ Disconnect the negative battery terminal before removing electrical, fuel, starter, or alternator connections.
- ⚠️ Allow the engine to cool completely before opening the pressurized cooling system.
- ⚠️ Work in a well-ventilated area and keep ignition sources away from gasoline.
- ⚠️ Do not substitute generic torque values. Several fasteners are torque-to-yield and must be replaced and tightened using Ford's exact sequence.
🔧 Required Tools
You'll need the following tools for this repair:
- Ford 3.5L EcoBoost camshaft alignment tool set (specialty)
- Ford 3.5L EcoBoost crankshaft timing pin (specialty)
- Ford 3.5L EcoBoost crankshaft holding tool (specialty)
- Engine support fixture rated 1,000-pound minimum (specialty)
- Vehicle lift rated 8,000-pound minimum
- Transmission jack rated 1,000-pound minimum
- Floor jack rated 3-ton minimum
- Jack stands rated 3-ton minimum
- Engine hoist rated 2-ton minimum
- Metric socket set from 7mm through 24mm
- Metric wrench set from 8mm through 24mm
- Torx socket set from T20 through T55
- E-Torx socket set from E6 through E18
- 3/8-inch drive torque wrench rated 10-100 Nm
- 1/2-inch drive torque wrench rated 40-250 Nm
- Torque-angle gauge rated 360 degrees
- 1/2-inch drive breaker bar rated 24-inch minimum
- Three-jaw crankshaft pulley puller (specialty)
- Harmonic-balancer installation tool (specialty)
- Fuel-line disconnect tool set (specialty)
- Cooling-system vacuum filling tool (specialty)
- Automotive scan tool with Ford powertrain coverage (specialty)
- Plastic gasket scraper set
- Engine oil drain pan rated 10-quart minimum
- Coolant drain pan rated 15-quart minimum
- Safety glasses rated ANSI Z87.1
- Nitrile mechanic gloves
🔩 Required Parts
HowToo sells all the parts you need for this repair:
- Complete primary timing chain kit - Qty: 1
- Secondary timing chains - Qty: 2
- Timing chain guides - Replace as a complete set
- Timing chain tensioners - Replace as a complete set
- Variable camshaft timing units - Qty: As indicated by diagnosis
- Internal engine water pump - Qty: 1
- Water pump gasket and seal set - Qty: 1
- Front crankshaft oil seal - Qty: 1
- Valve cover gasket set - Qty: 1
- Front cover sealant specified for Ford engines - Qty: 1
- Torque-to-yield crankshaft and camshaft fasteners - Replace as specified
- Engine mount fasteners - Replace where specified
- Engine oil meeting Ford's specified viscosity and approval - Qty: Full refill
- Engine oil filter - Qty: 1
- Coolant meeting Ford's current compatibility specification - Qty: Full refill
The internal water pump is accessible only after substantial timing-system disassembly. Reusing an old pump here is false economy. Nobody wants to pay this labor twice.
📋 Before You Begin
- 📋 Confirm the problem with a full scan, oil-pressure check, and mechanical timing inspection before buying parts.
- 📋 Record all diagnostic trouble codes and freeze-frame data before disconnecting the battery.
- 📋 Obtain the current Ford Workshop Manual procedure for the exact engine build. It contains the required sealant locations, tightening sequences, torque values, and one-time-use fastener list.
- 📋 Park on level concrete, select Park, engage the parking brake, and chock the wheels.
- 📋 Let the engine become completely cold, then disconnect the negative battery terminal.
- 📋 Label every connector, ground cable, hose, and removed fastener.
- 📋 Photograph the original routing before disconnecting wiring, coolant hoses, vacuum lines, and turbo plumbing.
🔨 Step-by-Step Instructions
Follow these steps in order:
Step 1: Verify That the Timing System Is Faulty
- Use the Ford-capable automotive scan tool to check camshaft and crankshaft correlation codes, variable-timing faults, misfires, and commanded versus actual camshaft angles.
- Check the engine oil level and condition. Low pressure or dirty oil can disrupt the hydraulic chain tensioners and camshaft timing controls.
- Do not replace the chains based only on a brief startup rattle. Ford notes that chain wear may produce excessive noise or a check-engine light, but diagnosis is still required. ford.com
Step 2: Prepare and Drain the Vehicle
- Use the 10mm socket to disconnect and isolate the negative battery terminal.
- Use the floor jack and jack stands, or a rated vehicle lift, to secure the Explorer.
- Use the 10-quart drain pan to drain the engine oil.
- Use the 15-quart drain pan to drain the cooling system only after the engine is cold.
Step 3: Remove Obstructing Components
- Use the appropriate metric sockets and Torx sockets to remove the intake ducting, air cleaner assembly, upper intake components, accessory drive belts, wiring brackets, cooling connections, and related obstructions.
- Relieve fuel pressure using the Ford Workshop Manual procedure before opening any fuel connection.
- Cap every open fuel, oil, coolant, turbo, and intake connection immediately.
- Label first. Memory gets expensive during reassembly.
Step 4: Support and Lower the Powertrain
- Use the engine support fixture, engine hoist, and transmission jack to support the powertrain at the factory lifting and support points.
- Use the specified metric sockets to remove the required mounts, exhaust connections, driveline components, wiring, hoses, and subframe hardware.
- Lower or remove the powertrain only as directed by the Ford Workshop Manual.
- Marking bolt positions isn't a substitute for an alignment after subframe removal.
Step 5: Remove the Valve Covers and Front Cover
- Use the appropriate metric sockets to remove the ignition coils, valve covers, crankshaft pulley, and front engine cover.
- Use the three-jaw crankshaft pulley puller only where its contact points cannot damage the pulley or crankshaft.
- Use the plastic gasket scraper to remove sealant. Do not gouge the aluminum sealing surfaces.
Step 6: Set and Lock Mechanical Timing
- Use the crankshaft holding tool to rotate the engine by hand in its normal direction until it reaches the Ford-specified timing position.
- Install the crankshaft timing pin and camshaft alignment tools exactly as the workshop procedure specifies.
- Confirm every timing mark and tool position before loosening a sprocket or tensioner.
- Never rotate the crankshaft and camshafts independently once the chains are removed.
Step 7: Remove the Timing Components
- Use the appropriate metric sockets to release and remove the chain tensioners, guides, chains, and specified sprockets.
- Keep removed components organized by bank and position for diagnostic inspection.
- Inspect the oil pickup and oil pan for guide fragments, metal, and bearing material.
- Replace worn variable-camshaft timing units rather than installing new chains around damaged components.
Step 8: Replace the Internal Water Pump
- Use the appropriate metric sockets to remove the water pump while the timing assembly is accessible.
- Clean and inspect the pump sealing surfaces with the plastic gasket scraper.
- Install the new pump and seals using the exact Ford Workshop Manual tightening sequence.
- Torque all water-pump fasteners to the current Ford Workshop Manual specification.
Step 9: Install and Time the New Chains
- Install the chains, guides, tensioners, and sprockets in the exact Ford sequence.
- Align every colored chain link with its designated crankshaft or camshaft timing mark.
- Prime or release each hydraulic tensioner exactly as its installation instructions specify.
- Use the torque wrenches and torque-angle gauge for every staged tightening operation.
- Use Ford's exact torque and angle values. Do not reuse fasteners identified as one-time-use.
Step 10: Verify Timing by Hand
- Remove the timing tools, then use the crankshaft holding tool to rotate the crankshaft slowly through at least two complete revolutions in the normal direction.
- Stop immediately if the crankshaft binds. Do not force it past possible piston-to-valve contact.
- Return the engine to the specified timing position and confirm that all timing tools reinstall without forcing them.
Step 11: Seal and Reassemble the Engine
- Use the plastic gasket scraper to prepare the front cover and engine sealing surfaces.
- Apply the specified sealant in the correct bead size and locations. Install the cover within the sealant's working-time limit.
- Use the harmonic-balancer installation tool to install the crankshaft pulley without hammering it.
- Install new valve-cover gaskets, seals, and required one-time-use bolts.
- Tighten every fastener using Ford's current torque sequence and specifications.
Step 12: Reinstall the Powertrain
- Use the engine hoist and transmission jack to position the powertrain without pinching wiring or hoses.
- Reconnect all mounts, drivetrain components, grounds, fuel connections, coolant hoses, turbo plumbing, exhaust connections, and electrical connectors.
- Use the torque wrenches and replace all specified torque-to-yield mount and subframe fasteners.
Step 13: Refill and Prime
- Install a new oil filter and refill the engine with oil meeting Ford's specification.
- Use the cooling-system vacuum filling tool to refill the cooling system and reduce trapped air.
- Disable fuel or ignition using the approved scan-tool procedure, then crank the engine in short intervals to establish oil pressure before the first start.
- Reconnect normal engine controls only after oil pressure is established.
✅ After Repair
- ✅ Start the engine and shut it off immediately if there is heavy knocking, persistent chain noise, an oil-pressure warning, or a major leak.
- ✅ Use the Ford-capable scan tool to monitor camshaft positions, misfires, coolant temperature, fuel trims, and diagnostic trouble codes.
- ✅ Pressure-test the cooling system and inspect the front cover, valve covers, water pump area, oil pan, and coolant connections.
- ✅ Bring the engine to operating temperature, allow it to cool fully, and recheck oil and coolant levels.
- ✅ Perform a wheel alignment if the subframe position was disturbed.
- ✅ Change the engine oil and inspect the filter promptly if the old guides shed debris into the engine.
💰 DIY vs Shop Cost
Shop Cost: Approximately $3,500-$7,500, depending on damage and parts replaced
DIY Cost: Approximately $900-$2,500 for parts, fluids, sealants, and required fasteners
You Save: Approximately $2,000-$5,000 if you already own professional lifting and timing equipment
Specialty tools and lifting equipment can erase much of the apparent DIY saving. This repair commonly consumes multiple full working days.
🎯 Best recommendation:
For a beginner, have an experienced Ford or EcoBoost technician diagnose and perform the internal timing-chain repair. If you meant one of the visible accessory drive belts instead, that's a completely different and much more approachable repair.
HowToo has opened the timing-chain parts aisle for your Explorer. Use a complete matched kit rather than mixing individual chains, guides, and tensioners, and verify the exact kit contents against the Ford Workshop Manual before ordering.
