

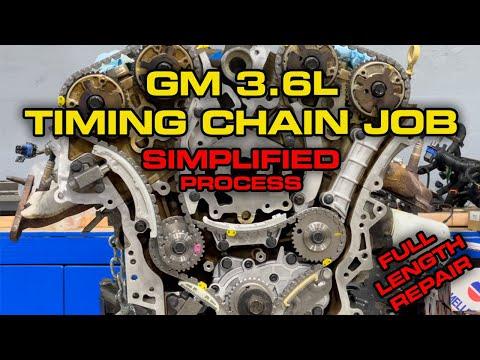






How to Replace the Timing Chain on a 2011-2019 Chevrolet Traverse 3.6L V6 (Trim: L | Engine: V6 3.6L)
Advanced step-by-step guide covering diagnosis, tools, parts, timing alignment, and safety for 2011, 2012, 2013, 2014, 2015, 2016, 2017, 2018, 2019
How to Replace the Timing Chain on a 2011-2019 Chevrolet Traverse 3.6L V6 (Trim: L | Engine: V6 3.6L)
Advanced step-by-step guide covering diagnosis, tools, parts, timing alignment, and safety for 2011, 2012, 2013, 2014, 2015, 2016, 2017, 2018, 2019


🔧 Traverse - Timing Chain Replacement
Your Traverse doesn’t have a timing belt. It uses a multi-chain timing system. Chevrolet’s parts catalog confirms timing chains, guides, tensioners, and sprockets for this application. parts.chevrolet.com)
Replacing it requires opening the engine, locking multiple camshafts in position, and resealing the timing cover. This isn’t a sensible first repair for a beginner. One timing error can bend valves and ruin the engine.
Difficulty Level: Advanced | Estimated Time: 14-20 hours
⚠️ Safety & Precautions
- ⚠️ Disconnect the negative battery cable before removing engine components.
- ⚠️ Let the engine cool completely before draining coolant or opening the cooling system.
- ⚠️ Support the engine before removing any mount attached to the work area.
- ⚠️ Never support the vehicle with a floor jack alone. Use properly rated jack stands.
- ⚠️ Do not rotate the crankshaft or camshafts independently after removing the chains.
- ⚠️ Use the exact GM service procedure for timing marks, tightening sequences, torque values, and torque-angle fasteners.
- ⚠️ Stop if metal debris is present in the oil. Internal engine inspection may be necessary.
🔧 Required Tools
You'll need the following tools for this repair:
- Metric socket set, 7mm-24mm
- Metric wrench set, 8mm-24mm
- Torx socket set, T20-T55
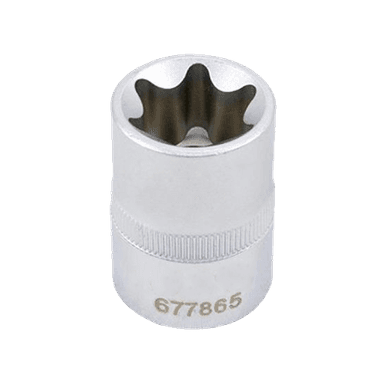
- External Torx socket set, E6-E20
- 3/8-inch drive ratchet
- 1/2-inch drive breaker bar
- 1/2-inch drive torque wrench, 20-250 Nm
- 3/8-inch drive torque wrench, 5-80 Nm
- Torque-angle gauge, 1/2-inch drive
- Three-jaw harmonic balancer puller (specialty)
- Harmonic balancer installation tool (specialty)
- GM-compatible camshaft holding tools (specialty)
- GM-compatible crankshaft positioning tool (specialty)
- Engine support bar, 500kg minimum
- Floor jack, rated 2-ton minimum
- Jack stands, rated 2-ton minimum
- Low-profile drain pan, 15-liter minimum
- Cooling-system vacuum fill tool (specialty)
- Plastic gasket scraper
- Engine cleaning brush set
- Compressed-air blow gun
- Plastic timing-chain retaining ties
- Safety glasses
- Nitrile mechanic gloves
A torque-angle gauge measures the additional bolt rotation required after an initial torque setting.
🔩 Required Parts
HowToo sells all the parts you need for this repair:
- Complete engine timing chain kit - Qty: 1
- Timing cover gasket set - Qty: 1
- Front crankshaft oil seal - Qty: 1
- Valve cover gasket sets - Qty: 2
- Single-use crankshaft balancer bolt - Qty: 1
- Single-use timing-system bolts - Qty: As specified by GM
- GM-approved engine sealing compound - Qty: 1 tube
- Engine oil of specified grade - Qty: 6 quarts
- Engine oil filter - Qty: 1
- Dex-Cool-compatible coolant - Qty: As needed
- Brake cleaner - Qty: 2 cans
Replace the chains, guides, and tensioners as a complete matched system. Replacing one noisy piece is false economy. Nobody wants to open this engine twice.
📋 Before You Begin
- 📋 Park your Traverse on level, solid ground and apply the parking brake.
- 📋 Record all diagnostic trouble codes before disconnecting the battery.
- 📋 Confirm that chain replacement is justified through scan data and mechanical testing. Camshaft correlation codes alone don’t automatically prove stretched chains.
- 📋 Photograph hose, harness, ground-wire, and bracket routing before disassembly.
- 📋 Label every electrical connector and place fasteners in separate marked containers.
- 📋 Obtain the current GM service procedure using the vehicle identification already stored with the vehicle.
🔨 Step-by-Step Instructions
Follow these steps in order:
Step 1: Verify the fault
- Use a GM-capable scan tool to record trouble codes, freeze-frame data, and commanded versus actual camshaft angles.
- Check the engine-oil level and condition before disassembly.
- Do not replace the chain system until oil-pressure, actuator, solenoid, wiring, and camshaft-correlation faults have been separated.
Step 2: Isolate electrical power
- Switch the ignition off and keep the key away from the vehicle.
- Use a metric socket to disconnect the negative battery terminal.
- Secure the cable so it cannot spring back onto the terminal.
Step 3: Drain the fluids
- Raise your Traverse with the floor jack and place it securely on jack stands.
- Remove the lower splash shield with the appropriate metric and Torx sockets.
- Position the 15-liter drain pan and drain the engine coolant.
- Drain the engine oil and remove the oil filter.
Step 4: Clear access to the engine
- Use metric sockets and pliers to remove the intake duct, air-cleaner housing, upper covers, and obstructing hoses.
- Disconnect and label the ignition, camshaft-control, sensor, and ground connections.
- Remove the ignition coils, intake manifold, and valve covers using the applicable metric sockets.
- Seal exposed intake ports immediately with clean lint-free covers.
Step 5: Support the powertrain
- Install the 500kg engine support bar and take the engine's weight without lifting it.
- Remove only the mount and brackets identified in the GM service procedure.
- Never place a jack directly beneath an unsupported aluminum oil pan.
Step 6: Remove accessory-drive components
- Release the serpentine-belt tensioner with the correct metric socket and remove the belt.
- Remove obstructing pulleys, brackets, and accessories with metric sockets.
- Support moved accessories without hanging them from hoses or wiring.
Step 7: Position the engine for disassembly
- Use a breaker bar and the correct crankshaft socket to rotate the engine clockwise to the GM-specified service position.
- Install the GM-compatible crankshaft and camshaft holding tools.
- Do not rely only on painted marks. The locking tools establish the mechanical reference.
Step 8: Remove the crankshaft balancer
- Hold the crankshaft using the approved holding method.
- Use the breaker bar to remove the crankshaft balancer bolt.
- Use the three-jaw harmonic balancer puller to remove the balancer without prying against the timing cover.
- Discard the bolt if GM identifies it as single-use.
Step 9: Remove the timing cover
- Use metric sockets to remove the required oil-pan-to-cover and timing-cover fasteners.
- Record every bolt location because lengths may differ.
- Separate the cover with a plastic tool only. Do not gouge its sealing surfaces.
- Remove the front crankshaft seal from the cover.
Step 10: Inspect the timing system
- Confirm the crankshaft and camshaft timing references before releasing a tensioner.
- Use plastic retaining ties to control loose chains during removal.
- Inspect every guide, tensioner, sprocket, oil passage, and actuator for scoring or debris.
- Check the oil pickup and accessible oil passages if guide material has broken apart.
Step 11: Remove the chains and guides
- Use metric sockets to remove tensioners, tensioner guides, fixed guides, and chains in the exact GM sequence.
- Keep the camshaft holding tools installed.
- Do not allow a camshaft to snap under valve-spring pressure.
Step 12: Install the new timing system
- Lubricate the new chains, guides, and sprocket contact points with clean engine oil.
- Install the chains by matching each colored link to its specified crankshaft, idler, and camshaft timing mark.
- Install guides and tensioners in the exact bank-specific order.
- Release tensioner retaining pins only after all timing marks and fasteners are verified.
- Torque every fastener to the current GM service value and apply the specified torque angle.
- Check every mark twice before releasing tensioners.
Step 13: Verify mechanical timing
- Remove the locking tools as directed by the service procedure.
- Use the breaker bar and crankshaft socket to rotate the crankshaft clockwise through two complete revolutions.
- Stop immediately if hard resistance is felt. Never force the crankshaft past possible valve contact.
- Return the engine to its service position and reinstall the locking tools to verify alignment.
- The colored chain links won’t necessarily realign after only two revolutions. Verify the mechanical reference marks instead.
Step 14: Reseal the engine
- Use the plastic gasket scraper and cleaning brush to remove old sealant without damaging aluminum surfaces.
- Clean and dry all bolt holes and sealing surfaces.
- Install the new front crankshaft seal using the appropriate seal driver.
- Apply GM-approved sealing compound only in the specified bead diameter and locations.
- Install the timing cover before the sealant's working time expires.
- Tighten the cover and oil-pan fasteners in GM's specified sequence and to the exact published torque.
Step 15: Reassemble the engine bay
- Use the harmonic balancer installation tool to press the balancer fully into position.
- Install a new crankshaft balancer bolt.
- Tighten it using the GM torque-plus-angle specification. Do not reuse an angle-tightened bolt.
- Reinstall the valve covers, intake manifold, brackets, accessories, belt, wiring, grounds, and hoses.
- Use the torque wrenches to tighten each fastener to its component-specific GM value.
Step 16: Refill and prime
- Install a new oil filter and refill the crankcase with the specified engine oil.
- Refill the cooling system with Dex-Cool-compatible coolant using the vacuum fill tool.
- Disable fuel or ignition using the GM service method and crank the engine in short intervals to build oil pressure.
- Reconnect the disabled system only after oil pressure is established.
✅ After Repair
- ✅ Start the engine and shut it off immediately if the oil-pressure warning remains on or abnormal mechanical noise occurs.
- ✅ Inspect the timing cover, valve covers, cooling connections, oil filter, and drain plug for leaks.
- ✅ Use a GM-capable scan tool to clear codes and monitor actual camshaft positions.
- ✅ Allow the engine to reach operating temperature and confirm normal cooling-fan operation.
- ✅ Let the engine cool, then recheck oil and coolant levels.
- ✅ Road-test gently and rescan for pending camshaft-correlation or actuator codes.
💰 DIY vs Shop Cost
Shop Cost: $2,500-$4,500 (parts + labor)
DIY Cost: $450-$1,200 (parts, fluids, and seals only)
You Save: $1,300-$3,500 by doing it yourself!
Shop rates and local pricing vary substantially. This repair takes a professional approximately 14-20 labor hours.
My verdict: If this is your first major engine repair, have an experienced technician perform it or work beside you. Start-to-finish timing-chain replacement on your Traverse is several levels beyond an ordinary timing-belt job.
🎯 Ready to get started?
HowToo offers same-day/2-day shipping on every part, plus all the tools and specialty tools you need! Check out the parts and tools sections below to add everything to your cart.