








How to Replace the Timing Chain on a 2010-2017 Ford Escape 2.5L (Trim: S | Engine: Inline 4 2.5L)
Advanced step-by-step guide covering tools, parts, alignment, torque specs, and safety for 2010, 2011, 2012
How to Replace the Timing Chain on a 2010-2017 Ford Escape 2.5L (Trim: S | Engine: Inline 4 2.5L)
Advanced step-by-step guide covering tools, parts, alignment, torque specs, and safety for 2010, 2011, 2012


🔧 Escape - Timing Chain Replacement
Don’t buy a timing belt for your Escape. Its 2.5L engine uses an internal timing chain. Ford’s maintenance schedule calls for timing-belt replacement only on the 1.6L engine, while Ford’s parts catalog lists a timing chain for the Escape. fordservicecontent.com
The chain normally isn’t replaced at a scheduled mileage. Replace it only after confirming chain stretch, tensioner trouble, guide damage, incorrect cam timing, or timing-related fault codes. The matched timing-chain components are now displayed in the parts sidebar.
Difficulty Level: Advanced | Estimated Time: 10-14 hours
⚠️ Safety & Precautions
- ⚠️ Incorrect camshaft timing can cause severe internal engine damage.
- ⚠️ Support the engine before removing any engine mount.
- ⚠️ Never support the vehicle using only a floor jack.
- ⚠️ Disconnect the negative battery terminal before opening the timing area.
- ⚠️ Do not rotate the crankshaft or camshafts independently with the chain removed.
- ⚠️ Several fasteners may be torque-to-yield, meaning they stretch when tightened and must be replaced.
- ⚠️ Obtain the current Ford workshop torque chart before beginning. Exact staged torques and angle-tightening values must not be guessed.
🔧 Required Tools
You'll need the following tools for this repair:
- Metric socket set, 8mm-21mm
- Metric combination wrench set, 8mm-21mm
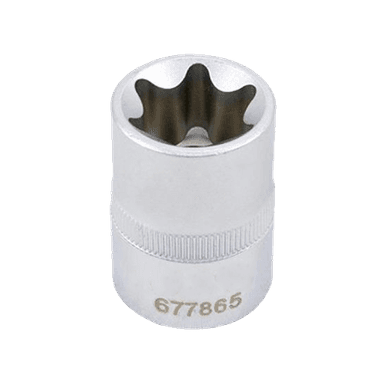
- Torx bit socket set, T20-T55
- E-Torx socket set, E6-E18
- 3/8-inch drive ratchet
- 1/2-inch drive breaker bar
- 1/2-inch drive torque wrench, 20-250 Nm
- Torque-angle gauge, 1/2-inch drive
- Ford-compatible camshaft alignment tool set (specialty)
- Crankshaft timing pin (specialty)
- Crankshaft pulley holding tool (specialty)
- Two-jaw harmonic balancer puller (specialty)
- Low-profile floor jack, rated 2-ton minimum
- Jack stands, rated 2-ton minimum
- Engine support bar, rated 500kg minimum (specialty)
- Plastic gasket scraper
- Drain pan, 10-liter minimum
- Oil-filter wrench, 64mm minimum range
- Caulking gun for sealant cartridge
- Digital multimeter, CAT III rated
- OBD-II scan tool with live data
- Nitrile gloves
- Safety glasses
🔩 Required Parts
HowToo sells all the parts you need for this repair:
- Complete engine timing-chain kit - Qty: 1
- Timing-chain tensioner - Qty: 1 if not included in kit
- Timing-chain guides - Qty: 1 complete set if not included
- Crankshaft pulley bolt - Qty: 1 if specified as single-use
- Engine-mount fasteners - Qty: As required if specified as single-use
- Front crankshaft seal - Qty: 1
- Valve-cover gasket set - Qty: 1
- Timing-cover RTV sealant - Qty: 1 cartridge
- Engine oil meeting Ford specification - Qty: Required refill amount
- Engine oil filter - Qty: 1
- Engine coolant meeting Ford specification - Qty: Required refill amount
📋 Before You Begin
- Park your Escape on level ground, select Park, and apply the parking brake.
- Read all timing-tool instructions before disassembly.
- Use an OBD-II scan tool to record stored fault codes and cam/crank synchronization data.
- Allow the engine to become completely cold.
- Disconnect the negative battery cable using the specified metric socket.
- Photograph every wiring-harness route and sealant joint before removing components.
- Keep bolts organized by component and location.
- Have the exact Ford service procedure, tightening sequence, torque values, and angle specifications available.
🔨 Step-by-Step Instructions
Follow these steps in order:
Step 1: Confirm That Timing Service Is Necessary
- Use the OBD-II scan tool to check for camshaft-to-crankshaft correlation faults.
- Listen for persistent rattling from the timing-cover area, especially during a cold start.
- Check oil level and oil pressure concerns first because low oil pressure can affect the chain tensioner.
- Do not dismantle the engine based on noise alone.
Step 2: Raise and Secure the Vehicle
- Use the low-profile floor jack at the approved front lifting point.
- Lower your Escape onto the 2-ton jack stands at the approved support points.
- Remove the necessary splash shields using the appropriate 8mm-10mm socket or Torx bit.
Step 3: Drain the Fluids
- Place the 10-liter drain pan beneath the engine.
- Drain the engine oil using the correctly sized metric socket.
- Drain enough coolant to prevent spills when timing-area components are removed.
- Store coolant safely. It’s poisonous to people and animals.
Step 4: Remove Obstructing Components
- Use the metric socket set to remove the intake ducting and necessary brackets.
- Release electrical connectors by their locking tabs instead of pulling the wires.
- Relieve accessory-belt tension with the correct socket and breaker bar, then remove the belt.
- Follow Ford’s official 2.5L accessory-belt routing diagram during reassembly. fordservicecontent.com
- Take a belt-routing photo first.
Step 5: Support the Engine
- Install the 500kg engine support bar across the approved body support areas.
- Attach it securely to the engine lifting point before loosening an engine mount.
- Use the metric socket and E-Torx socket sets to remove only the mount components identified by Ford’s procedure.
- Do not place the engine’s weight on the oil pan.
Step 6: Position the Engine at the Timing Reference
- Use the crankshaft pulley holding tool and correct metric socket to rotate the engine only in its normal direction.
- Position the engine at the specified timing reference.
- Install the crankshaft timing pin and Ford-compatible camshaft alignment tools.
- Never use the alignment tools to hold the shafts while loosening tightly torqued bolts.
Step 7: Remove the Crankshaft Pulley
- Use the crankshaft pulley holding tool, 1/2-inch breaker bar, and correct socket to loosen the pulley bolt.
- Use the two-jaw harmonic balancer puller if the pulley cannot be removed by hand.
- Do not pry against the aluminum timing cover.
Step 8: Remove the Valve and Timing Covers
- Use the metric socket and Torx bit sets to remove the valve-cover fasteners in the specified sequence.
- Remove the timing-cover fasteners while recording every bolt location and length.
- Separate the cover using only designated pry points and a plastic scraper.
- Do not drive a screwdriver between aluminum sealing surfaces.
Step 9: Inspect the Existing Timing System
- Check the chain for excessive slack and inspect each guide for cracks or missing material.
- Inspect the tensioner, sprocket teeth, oil passages, and timing-cover surfaces.
- Verify that the crankshaft and camshaft alignment tools remain correctly seated.
- If the timing marks are already incorrect, stop and check for internal engine damage.
Step 10: Remove the Chain and Guides
- Use the correct metric or Torx socket to remove the tensioner and guide fasteners.
- Remove the chain without turning either camshaft or the crankshaft.
- Do not release the camshaft alignment tools until the new chain is installed and verified.
Step 11: Install the New Timing Components
- Install the new guides using the correct metric or Torx socket.
- Align the marked chain links with the specified crankshaft and camshaft sprocket timing marks.
- Install and correctly activate the new tensioner according to its supplied instructions.
- Tighten every timing fastener to Ford’s specified torque and angle for its exact location.
- Do not substitute generic torque values. Several fasteners have different sizes and tightening stages.
Step 12: Verify Timing Manually
- Remove the crankshaft timing pin and camshaft alignment tools.
- Use the crankshaft pulley holding tool and socket to rotate the crankshaft slowly through two complete revolutions.
- Never use the starter motor for this check.
- Return the engine to the timing reference and reinstall the tools.
- The tools must enter without forcing. If they don’t, correct the timing before continuing.
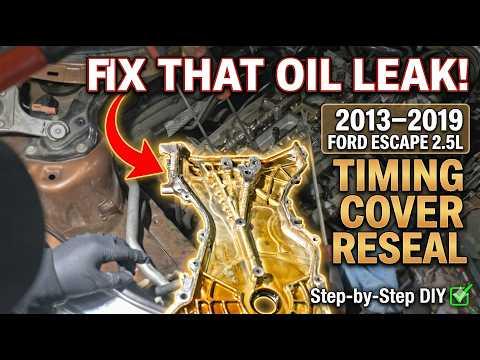
Step 13: Reseal the Timing Cover
- Use the plastic gasket scraper to remove old RTV without gouging the aluminum.
- Clean and dry the sealing surfaces completely.
- Use the caulking gun to apply the specified Ford-approved RTV bead in the exact pattern and diameter.
- Install the timing cover within the sealant manufacturer’s working time.
- Tighten the timing-cover bolts in Ford’s specified sequence and to their position-specific torques.
Step 14: Reassemble the Engine
- Use the appropriate metric sockets to install the valve cover with a new gasket.
- Install the crankshaft pulley and a new pulley bolt when Ford identifies it as single-use.
- Use the torque wrench and torque-angle gauge for every staged fastener.
- Reinstall the engine mount, brackets, accessory belt, wiring, and intake components.
- Remove the engine support bar only after the mount is fully secured.
Step 15: Refill and Inspect
- Install a new oil filter using the oil-filter wrench as needed.
- Refill the engine with the correct oil and refill the cooling system with compatible coolant.
- Reconnect the negative battery terminal using the correct metric socket.
- Inspect the engine bay for tools, loose connectors, and trapped wiring.
✅ After Repair
- Disable fuel or ignition and crank briefly to build oil pressure before the first start if directed by Ford’s procedure.
- Start the engine and shut it off immediately if it rattles continuously or the oil-pressure warning remains illuminated.
- Use the OBD-II scan tool to check cam/crank synchronization and clear resolved fault codes.
- Inspect the timing-cover, valve-cover, crank-seal, oil-filter, and coolant joints for leaks.
- Allow the engine to reach operating temperature while monitoring coolant temperature.
- After cooling completely, recheck oil and coolant levels.
- Never assume a brief test drive proves the sealant joints are leak-free.
💰 DIY vs Shop Cost
Shop Cost: $1,800-$3,200 equivalent, depending on local labor and engine condition
DIY Cost: $350-$900 for parts, fluids, sealant, and specialty-tool access
You Save: Approximately $900-$2,400 by doing it yourself
Timing-chain labor varies widely. This repair takes a shop approximately 10-14 hours, and rates around Sonīpat may differ substantially from U.S. pricing.
🎯 Ready to get started?
This isn’t a beginner-friendly first engine repair. The alignment tools and exact Ford torque data are non-negotiable. One tooth wrong can turn a timing job into an engine job, and nobody wants that invoice. HowToo has opened the correct timing-chain aisles with matched chains, kits, and tensioners for your Escape.
