

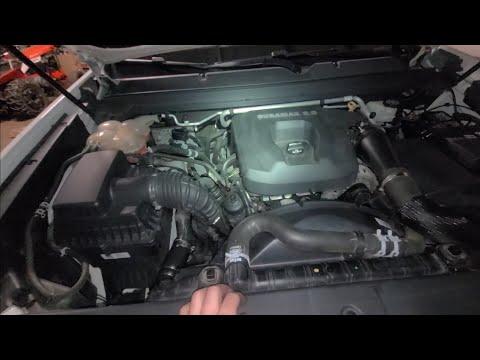






How to Replace the Timing Belt on a 2016-2022 GMC Canyon 2.8L Diesel (Trim: Denali | Engine: Inline 4 2.8L)
Step-by-step instructions covering tools, parts, engine timing, torque specs, and safety for 2016, 2017, 2018, 2019, 2020
How to Replace the Timing Belt on a 2016-2022 GMC Canyon 2.8L Diesel (Trim: Denali | Engine: Inline 4 2.8L)
Step-by-step instructions covering tools, parts, engine timing, torque specs, and safety for 2016, 2017, 2018, 2019, 2020


🔧 Canyon - Timing Belt Replacement
This is an advanced repair, and I wouldn’t recommend it as a first timing job without experienced help. The camshaft and crankshaft must remain perfectly synchronized. If either moves out of position, the pistons can contact the valves and cause major engine damage.
Difficulty Level: Advanced | Estimated Time: 7-10 hours
Important assumption: This procedure is a safe workflow overview. Exact fastener torques and locking-tool positions must come from current GM service information for your Canyon before disassembly.
⚠️ Safety & Precautions
- ⚠️ Disconnect both battery cables before working around the starter, fan, or accessory drive.
- ⚠️ Let the engine cool completely before opening the cooling system.
- ⚠️ Never rotate the crankshaft or camshafts independently after removing the belt.
- ⚠️ Use the correct crankshaft and camshaft locking tools. Paint marks alone aren’t reliable.
- ⚠️ Support the engine before removing any mount or bracket that carries engine weight.
- ⚠️ Never place any part of your body beneath an engine supported only by a jack.
- ⚠️ Don’t use the starter motor to loosen or tighten the crankshaft bolt.
- ⚠️ Turn the completed engine clockwise by hand before attempting to start it.
🔧 Required Tools
You'll need the following tools for this repair:
- Metric socket set, 8mm-24mm
- Metric wrench set, 8mm-24mm
- Torx bit socket set, T20-T55
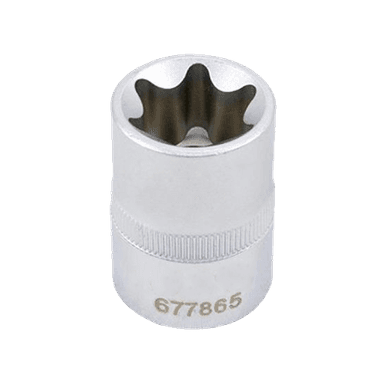
- External Torx socket set, E8-E18
- 1/4-inch drive ratchet
- 3/8-inch drive ratchet
- 1/2-inch drive breaker bar, 24-inch minimum
- 1/2-inch drive torque wrench, 20-250 Nm range
- 3/8-inch drive torque wrench, 5-80 Nm range
- Crankshaft pulley holding tool (specialty)
- Crankshaft locking tool for 2.8L diesel (specialty)
- Camshaft locking tool for 2.8L diesel (specialty)
- Timing-belt tensioner adjustment tool (specialty)
- Serpentine-belt tensioner tool (specialty)
- Harmonic-balancer puller (specialty)
- Engine support fixture or engine hoist, 500kg minimum
- Floor jack, rated 3-ton minimum
- Jack stands, rated 3-ton minimum
- Wheel chocks
- Trim-clip removal tool
- Flat-blade screwdriver, 6mm tip
- Hose-clamp pliers
- Drain pan, 15-liter minimum
- Cooling-system vacuum filler (specialty)
- Paint marker
- Inspection mirror
- LED work light
- Nitrile gloves
- Safety glasses
🔩 Required Parts
HowToo sells all the parts you need for this repair:
- Gates T349 engine timing belt - Qty: 1
- Gates T43264 timing-belt tensioner - Qty: 1
- Timing-belt idler pulley - Qty: 1 or as equipped
- Crankshaft pulley bolt - Qty: 1 if specified as single-use
- Accessory drive belt - Qty: 1 if worn or contaminated
- Timing-cover seals and gaskets - Qty: 1 set
- Engine coolant meeting the GM specification - Qty: As required
- Water pump and gasket - Qty: 1 if driven by the timing belt or showing leakage
Replace the belt, tensioner, and worn idlers together. Saving one old bearing during a job this deep is false economy. Buy once, cry once.
📋 Before You Begin
- Park your Canyon on level ground, select Park, apply the parking brake, and chock the rear wheels.
- Record radio settings and stored preferences before disconnecting the batteries.
- Obtain the GM timing diagrams, locking-tool installation instructions, and exact torque table for the 2.8L diesel.
- Photograph each bracket, wiring clip, hose, and fastener location before removing it.
- Arrange bolts in labeled containers because several timing-cover fasteners may have different lengths.
- Check the front crankshaft and camshaft areas for oil leakage. Oil contamination can quickly ruin the new belt.
🔨 Step-by-Step Instructions
Follow these steps in order:
Step 1: Disconnect Electrical Power
- Use the appropriate metric socket to disconnect the negative cable from each battery.
- Isolate the cables so they cannot spring back against the terminals.
- Wait at least two minutes before working near powered components.
Step 2: Raise and Secure the Vehicle
- Use the floor jack at an approved front lifting point.
- Lower your Canyon onto 3-ton jack stands at the approved support points.
- Remove any lower splash shields with the appropriate metric socket and trim-clip removal tool.
Step 3: Drain the Cooling System
- Place the 15-liter drain pan beneath the radiator drain area.
- Open the cooling system only when the engine is completely cold.
- Use hose-clamp pliers where hose removal is necessary.
- Store drained coolant in a sealed container. It’s poisonous to people and animals.
Step 4: Create Front-Engine Working Clearance
- Use the metric socket set and trim-clip removal tool to remove the intake ducting, fan shroud, and obstructing covers.
- Disconnect electrical connectors by releasing their locks rather than pulling on the wires.
- Label every hose and connector with a paint marker.
- Remove the cooling fan assembly only as directed by the GM procedure for the diesel fan arrangement.
Step 5: Remove the Accessory Drive Belt
- Photograph or draw the belt-routing path.
- Use the serpentine-belt tensioner tool to rotate the tensioner away from the belt.
- Slide the belt off one pulley and slowly release the tensioner.
- Inspect the belt for cracks, glazing, frayed ribs, and coolant or oil contamination.
Step 6: Support the Engine
- Position the engine support fixture or engine hoist according to its instructions.
- Apply only enough upward force to carry the engine’s weight.
- Use the required metric sockets to remove any engine-mount bracket that blocks the timing cover.
- Do not support the engine by the oil pan unless the GM procedure specifically permits it.
Step 7: Remove the Crankshaft Pulley
- Use the crankshaft pulley holding tool to prevent rotation.
- Use the 1/2-inch breaker bar and correct socket to remove the pulley bolt.
- Use the harmonic-balancer puller if the pulley doesn’t slide off by hand.
- Never pry against the timing cover or strike the pulley’s outer ring.
Step 8: Remove the Timing Covers
- Use the correct metric or external Torx sockets to remove the timing-cover fasteners.
- Record each fastener’s position and length.
- Use the trim tool carefully at designated release points. Don’t drive a screwdriver between sealing surfaces.
- Inspect the exposed belt area for oil, coolant, rubber dust, or damaged pulley flanges.
Step 9: Set the Engine at Its Timing Position
- Install the crankshaft pulley bolt temporarily if needed for controlled engine rotation.
- Use the breaker bar and correct socket to rotate the crankshaft clockwise by hand.
- Align the crankshaft and camshaft timing references exactly as shown in GM service information.
- Do not use approximate paint marks as substitutes for the factory reference positions.
Step 10: Install the Locking Tools
- Install the crankshaft locking tool in its specified position.
- Install the camshaft locking tool without forcing it.
- If either tool won’t seat fully, remove it and carefully rotate the engine until the factory timing position is exact.
- The locking tools hold the timed position. They aren’t designed to resist crank-bolt tightening force.
Step 11: Remove the Old Timing Belt
- Use the correct socket or timing-belt tensioner adjustment tool to release belt tension.
- Remove the belt without turning the crankshaft or camshaft.
- Use the metric socket set to remove the tensioner and idler pulley.
- Inspect every pulley for roughness, play, leakage, or noise.
- Check the water pump and shaft seals before installing new parts.
Step 12: Install the New Tensioner and Idler
- Fit the new tensioner and idler pulley using clean mounting surfaces.
- Start all bolts by hand to avoid cross-threading.
- Use the torque wrench to tighten each fastener to the exact GM service specification.
- Do not guess these torque values or copy values from the gasoline engine.
Step 13: Install the New Timing Belt
- Verify the directional arrows on the new belt if arrows are printed on it.
- Route the belt in the exact GM-specified order.
- Keep the belt tight on the non-tensioned side while routing it around each sprocket.
- Do not bend, twist, oil, or force the belt over a sprocket flange.
- Clean hands protect the new belt.
Step 14: Set Timing-Belt Tension
- Use the tensioner adjustment tool to move the indicator into its specified window.
- Hold the adjustment position while tightening the tensioner fastener with the torque wrench.
- Torque to the current GM service specification.
- Verify that the indicator remains correctly aligned after tightening.
Step 15: Verify Timing by Hand
- Remove the camshaft and crankshaft locking tools.
- Use the breaker bar and correct socket to rotate the crankshaft clockwise through two complete revolutions.
- Stop immediately if the engine binds. Don’t force it through resistance.
- Return the engine to the factory timing position and reinstall the locking tools.
- Confirm both tools seat correctly and the tensioner indicator remains in specification.
Step 16: Reinstall the Timing Covers and Pulley
- Clean the timing-cover sealing surfaces without scratching them.
- Install new seals or gaskets where required.
- Use the metric and external Torx sockets to install each fastener in its original location.
- Use the torque wrench and tighten the cover bolts in the GM-specified sequence.
- Install the crankshaft pulley and a new pulley bolt if GM identifies it as single-use.
- Hold the pulley with the pulley holding tool and apply the exact GM torque-plus-angle specification.
Step 17: Reassemble the Front of the Engine
- Reinstall the engine-mount bracket using the engine support fixture and metric socket set.
- Tighten mount and bracket fasteners with the torque wrench to current GM specifications.
- Reinstall the accessory belt using the belt-routing diagram and serpentine-belt tensioner tool.
- Reinstall the fan, shroud, ducting, splash shields, hoses, and electrical connectors.
Step 18: Refill and Bleed the Cooling System
- Close the drain and reconnect all cooling hoses with hose-clamp pliers.
- Use a cooling-system vacuum filler to refill the system with coolant meeting the required GM specification.
- If vacuum filling isn’t available, follow the GM manual-fill and air-bleeding procedure exactly.
- Inspect every disturbed connection before reconnecting the batteries.
Step 19: Reconnect the Batteries
- Use the appropriate metric socket to reconnect the positive connections first if removed.
- Reconnect both negative battery cables last.
- Tighten the terminals securely without overtightening them.
✅ After Repair
- Disable fueling or starting as directed by GM information and crank briefly to establish oil pressure if the procedure requires it.
- Start the engine and shut it off immediately if you hear knocking, scraping, slapping, or belt-whine noises.
- Allow the engine to idle while watching the belt-cover area and cooling connections for leaks.
- Monitor coolant temperature and heater output as the engine warms.
- Let the engine cool completely, then recheck the coolant level.
- Scan for diagnostic trouble codes and clear only codes caused by disconnected components.
- Road-test gently, then inspect again for coolant or oil leakage.
💰 DIY vs Shop Cost
Shop Cost: $1,200-$2,200 equivalent, depending on local labor and additional parts
DIY Cost: $350-$900 equivalent for parts, coolant, locking tools, and equipment
You Save: Approximately $500-$1,300 by doing it yourself
Labor prices in Haryana vary widely. This repair generally occupies a professional technician for approximately 7-10 hours.
🎯 Ready to get started?
HowToo has placed the correct 2.8L diesel timing-belt aisle beside this guide. I’d use the listed belt and tensioner together, but I wouldn’t begin disassembly until the proper locking tools and verified GM torque specifications are physically in front of you.