

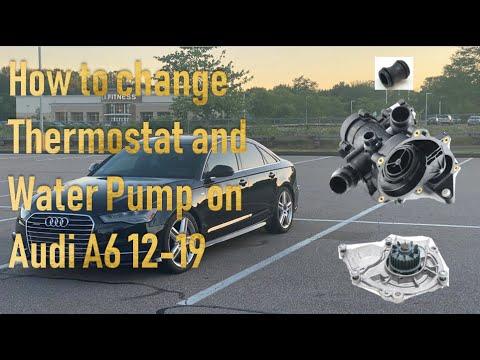







How to Replace the Thermostat/Water Pump Module on a 2016 Audi A6
Step-by-step DIY guide with required tools, parts list, coolant refill/bleed tips, and torque specs for 2016, 2017, 2018
How to Replace the Thermostat/Water Pump Module on a 2016 Audi A6
Step-by-step DIY guide with required tools, parts list, coolant refill/bleed tips, and torque specs for 2016, 2017, 2018


🔧 A6 - Thermostat Replacement
On your A6, the thermostat is part of the coolant control assembly and helps the engine warm up quickly and then hold a steady operating temperature. If it sticks open you’ll get slow warm-up/poor heat; if it sticks closed you can overheat—either way, replacement is the correct fix.
Difficulty Level: Advanced | Estimated Time: 4-6 hours
Assumption: This procedure matches the common 2.0T EA888 longitudinal layout where the thermostat is integrated with the water pump/thermostat module at the front of the engine; torque specs can vary by fastener—verify with OEM manual for your exact fasteners.
⚠️ Safety & Precautions
- ⚠️ Never open the coolant cap hot; let the engine cool fully.
- ⚠️ Support the car with jack stands; never rely on a floor jack.
- ⚠️ Coolant is toxic—catch it in a drain pan and keep away from kids/pets.
- ⚠️ Expect tight access near the radiator fans and belt drive; keep fingers/tools clear.
- ⚠️ Battery disconnect is not usually required, but keep the key away from the car so the cooling fans can’t run unexpectedly.
🔧 Required Tools
You'll need the following tools for this repair:
- Floor jack (rated 3-ton minimum)
- Jack stands (rated 3-ton minimum)
- Wheel chocks
- Safety glasses
- Nitrile gloves
- Catch pan (10-quart minimum)
- Funnel
- Trim clip remover
- Flat-blade screwdriver
- Pick tool
- Hose clamp pliers
- 1/4" drive ratchet
- 3/8" drive ratchet
- Socket set 8mm-18mm
- Torx bit set T20-T45
- Triple-square bit set M8-M10
- Torque wrench 5-60 Nm (4-44 ft-lbs)
- Torque wrench 40-200 Nm (30-148 ft-lbs)
- Cooling system vacuum fill tool (specialty)
- OBD2 scan tool with live data (specialty)
- Work light
- Shop rags
🔩 Required Parts
HowToo sells all the parts you need for this repair:
- Thermostat assembly (water pump/thermostat module) - Qty: 1
- Thermostat/water pump sealing gasket set - Qty: 1
- Coolant (Audi/VW G13 or superseding OEM-approved coolant) - Qty: 2-3 gallons premix equivalent
- Hose clamp set - Qty: 1
- Serpentine belt - Qty: 1 Optional if belt is worn/cracked
📋 Before You Begin
- Park on level ground, set the parking brake, and chock the rear wheels.
- Let the engine cool completely (coolant hoses should feel cool to the touch).
- Set the cabin heat to maximum temperature before shutdown (helps coolant flow during bleeding later).
- Plan for coolant cleanup: lay cardboard and keep rags ready.
- If using a vacuum fill tool, have an air compressor available and set up before refilling.
🔨 Step-by-Step Instructions
Follow these steps in order:
Step 1: Lift the front and remove the lower splash shield
- Use a floor jack to lift the front, then support with jack stands under the correct jack points.
- Use a Torx T25/T30 bit and trim clip remover to remove the lower engine splash shield (belly pan).
Step 2: Drain the coolant
- Place a catch pan under the radiator lower area.
- Slowly loosen the coolant reservoir cap using your hand (only when cold) to release any residual pressure.
- Use hose clamp pliers to release the lower radiator hose clamp, then carefully pull the hose off and let coolant drain into the pan.
- Tip: Twist the hose to break it loose.
Step 3: Move the front end into “service position” (access step)
- “Service position” means sliding the radiator support forward to create working room without fully disconnecting A/C lines.
- Use Torx T25/T30 and socket set 10mm-13mm to remove the upper cover panels and fasteners at the radiator support.
- Use triple-square bits (M8/M10) as needed for bumper/radiator support hardware.
- Carefully pull the lock carrier/radiator support forward and support it (do not strain hoses/wiring).
Step 4: Remove the intake ducting as needed for access
- Use a flat-blade screwdriver and 7mm/8mm socket (depending on clamp style) to loosen intake hose clamps.
- Unclip/remove any intake snorkel pieces using a trim clip remover.
Step 5: Remove the serpentine belt
- Use the correct size from your socket set on the belt tensioner and rotate to relieve tension.
- Slip the belt off the pulleys and note the routing (take a picture).
Step 6: Disconnect coolant hoses and electrical connectors at the module
- Use hose clamp pliers to open spring clamps and slide them back.
- Remove hoses by twisting gently; use a pick tool carefully if a hose is stuck (do not gouge the plastic fittings).
- Unplug any electrical connector(s) on the assembly by depressing the lock tab using a pick tool.
Step 7: Remove the thermostat/water pump module
- Place rags under the module to catch remaining coolant.
- Use a Torx bit set (commonly T30/T40) and/or 10mm socket to remove the mounting bolts.
- Remove the module straight off; do not pry aggressively on sealing surfaces.
Step 8: Clean the sealing surfaces
- Use shop rags to clean the engine mating surface.
- Use a pick tool only to lift old gasket material if present; do not scratch aluminum.
Step 9: Install the new module and torque fasteners
- Install new seals/gaskets onto the new assembly (match orientation exactly).
- Position the module and hand-start all bolts to prevent cross-threading.
- Tighten evenly in a crisscross pattern using a torque wrench 5-60 Nm.
- Torque to 10 Nm (7 ft-lbs) for typical M6 housing bolts, and 20 Nm (15 ft-lbs) for typical M8 bolts where used. Verify your fastener size before final torque.
Step 10: Reconnect hoses, clamps, and connectors
- Reinstall hoses fully seated, then position clamps back in their original locations using hose clamp pliers.
- Reconnect electrical connectors until they click.
Step 11: Reinstall the serpentine belt and restore the front end
- Route the belt exactly as photographed and release the tensioner using your socket set.
- Slide the lock carrier back from service position and reinstall fasteners using triple-square bits, Torx bits, and a torque wrench.
- Torque to OEM spec for lock carrier/bumper fasteners (fastener types vary by location).
- Reinstall intake ducting using a flat-blade screwdriver and 7mm/8mm socket for clamps.
Step 12: Refill and bleed the cooling system
- Best method: Use a cooling system vacuum fill tool (specialty) to pull vacuum, then fill with Audi/VW-approved coolant.
- Manual method: Use a funnel to fill the reservoir to the MAX line.
- Start the engine and let it idle; keep the heater set to hot.
- Watch the coolant level and top off as needed.
- Use an OBD2 scan tool with live data (specialty) to monitor coolant temperature and confirm it warms up smoothly without overheating.
- Tip: Stop if the temp climbs abnormally fast.
Step 13: Reinstall the belly pan and lower the car
- Reinstall the splash shield using a Torx T25/T30 bit.
- Lower the car using the floor jack and remove jack stands.
✅ After Repair
- With the engine at operating temperature, check for leaks around the module and hoses using a work light.
- After a full cool-down, recheck the reservoir level and top off to the MAX line using a funnel.
- Clear any stored coolant-related faults and re-scan using an OBD2 scan tool with live data (specialty).
- Test drive 10-15 minutes, then recheck for leaks and verify stable cabin heat.
💰 DIY vs Shop Cost
Shop Cost: $900-$1,600 (parts + labor)
DIY Cost: $220-$550 (parts only)
You Save: $680-$1,050 by doing it yourself!
Shop labor rates vary but typically run $100-$150/hour. This repair takes a shop approximately 4-6 hours.
🎯 Ready to get started?
HowToo makes it easy: same-day/2-day shipping on every part, plus all the tools and specialty tools you need! Check out the parts and tools sections below to add everything to your cart.