

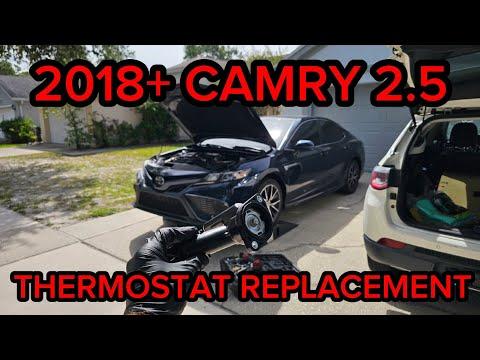






How to Replace the Thermostat on a 2018-2020 Toyota Camry 2.5L (Engine: Inline 4 2.5L)
Step-by-step instructions with tools, parts, torque specs, coolant bleeding, and safety tips for 2018, 2019, 2020
How to Replace the Thermostat on a 2018-2020 Toyota Camry 2.5L (Engine: Inline 4 2.5L)
Step-by-step instructions with tools, parts, torque specs, coolant bleeding, and safety tips for 2018, 2019, 2020


🔧 Camry - Engine Coolant Thermostat Replacement
Your Camry uses a thermostat assembly at the engine’s coolant inlet, near the lower radiator hose. Replacement requires draining the coolant, removing the inlet assembly, installing a new seal, and carefully bleeding air from the cooling system.
Assumption: This procedure is for the original U.S.-market A25A-FKS cooling system.
Difficulty Level: Intermediate | Estimated Time: 2-3 hours
⚠️ Safety & Precautions
- 🔥 Let the engine become completely cold before opening the cooling system. Hot coolant can cause severe burns.
- 🛑 Support your Camry with jack stands. Never work beneath a vehicle supported only by a floor jack.
- ☠️ Toyota coolant is poisonous. Keep it away from children and animals, and collect every spill immediately.
- 🔋 Disconnect the negative battery terminal before unplugging cooling-system electrical connectors.
- ⚡ Do not place your hands near the electric cooling fans when the battery is connected. They can start without warning.
- 🧤 Wear gloves and safety glasses throughout the repair.
- ♻️ Do not pour used coolant onto the ground or into a drain. Take it to an approved recycling facility.
🔧 Required Tools
You'll need the following tools for this repair:
- 10mm socket
- 12mm socket
- 3/8-inch drive ratchet
- 3/8-inch drive 6-inch extension
- 3/8-inch drive torque wrench rated 5-60 Nm
- Hose-clamp pliers
- 90-degree hose-pick tool
- Trim-clip removal tool
- Plastic gasket scraper
- Cooling-system vacuum fill tool (specialty)
- Air compressor rated 90 psi minimum
- Coolant drain pan rated 15 litres minimum
- Floor jack rated 2-ton minimum
- Jack stands rated 2-ton minimum
- Wheel chocks
- Fender cover
- Shop towels
- ANSI Z87.1 safety glasses
- Chemical-resistant mechanic’s gloves
🔩 Required Parts
HowToo sells all the parts you need for this repair:
- Engine coolant thermostat assembly - Qty: 1
- Thermostat assembly seal - Qty: 1
- Toyota Super Long Life Coolant or exact pink phosphate-OAT equivalent, premixed 50/50 - Qty: 8 litres
📋 Before You Begin
- 🅿️ Park your Camry on level ground, select Park, apply the parking brake, and allow the engine to cool fully.
- 🚫 Do not use the red Toyota Long Life Coolant or mix universal green coolant with Toyota pink Super Long Life Coolant.
- 🧊 The coolant must meet Toyota’s specification and contain no silicate, amine, nitrite, or borate.
- 🔧 A vacuum fill tool uses compressed air to draw a vacuum and pull coolant into the system without trapping large air pockets.
- 📱 No infotainment service mode or scan-tool command is required for this repair.
- 🚘 Place wheel chocks behind both rear wheels before raising the front.
🔨 Step-by-Step Instructions
Follow these steps in order:
Step 1: Disconnect the Battery
- Open the hood and install the fender cover.
- Use a 10mm socket and 3/8-inch drive ratchet to loosen the negative battery-terminal clamp.
- Lift the clamp from the battery post and position it where it cannot spring back into contact.
Step 2: Raise and Support the Front
- Position the floor jack rated 2-ton minimum beneath the front-center jacking point and raise your Camry.
- Place the jack stands rated 2-ton minimum beneath both reinforced front-side support points.
- Lower the vehicle gently onto the stands and verify that it is stable before going underneath.
Step 3: Remove the Lower Engine Cover
- Use the 10mm socket, 3/8-inch drive ratchet, and trim-clip removal tool to remove the lower engine-cover fasteners and clips.
- Support the cover while removing its final fastener, then lower it from your Camry.
- Keep the fasteners arranged by position for reinstallation.
Step 4: Drain the Engine Coolant
- Place the coolant drain pan rated 15 litres minimum beneath the radiator drain.
- Remove the cooling-system pressure cap only after confirming the radiator and hoses are completely cold.
- Open the plastic radiator drain cock by hand. Do not use pliers because the plastic can crack.
- Allow the coolant to drain completely, then close the drain cock gently by hand until seated.
- Never force the plastic drain cock.
Step 5: Gain Access to the Thermostat Assembly
- Use the 10mm socket, 3/8-inch drive ratchet, and 3/8-inch drive 6-inch extension to remove any intake duct or retaining bracket obstructing the coolant inlet.
- Use the hose-clamp pliers to compress each spring clamp and slide it back along the hose.
- Use the 90-degree hose-pick tool carefully between each hose and fitting to break the seal. Do not puncture the hose or scratch the sealing surface.
- Twist and pull the hoses from the thermostat assembly, catching residual coolant with the drain pan and shop towels.
Step 6: Disconnect the Thermostat Assembly
- Release the electrical-connector lock by hand and unplug the connector from the thermostat assembly.
- Inspect the connector for coolant, corrosion, damaged terminals, or a broken lock.
- Do not pull on the wires.
Step 7: Remove the Thermostat Assembly
- Use the 10mm socket, 3/8-inch drive ratchet, and 3/8-inch drive 6-inch extension to loosen the thermostat assembly mounting bolts evenly.
- Support the assembly as the final bolt is removed, then pull it straight away from the engine.
- Remove the old thermostat seal. Do not reuse it.
- Keep coolant away from electrical connectors and the accessory-drive belt.
Step 8: Clean and Inspect the Mounting Surface
- Use the plastic gasket scraper and shop towels to clean the mating surface.
- Do not use a metal scraper, abrasive disc, or power tool. Scratches can cause a coolant leak.
- Inspect the hoses and plastic fittings for swelling, cracks, distortion, or damaged sealing areas.
Step 9: Install the New Thermostat Assembly
- Install the new thermostat assembly seal in its proper groove. Do not add sealant unless supplied with the replacement part.
- Position the thermostat assembly against the engine without pinching or rolling the seal.
- Start every mounting bolt by hand to avoid cross-threading.
- Use the 3/8-inch drive torque wrench rated 5-60 Nm, 10mm socket, and 3/8-inch drive 6-inch extension to tighten the bolts evenly to 10 Nm (7 ft-lbs).
- Reconnect the electrical connector by hand until its lock clicks.
Step 10: Reconnect the Coolant Hoses
- Push each hose fully onto its fitting by hand.
- Use the hose-clamp pliers to return each spring clamp to its original position behind the fitting’s raised bead.
- Confirm that no clamp is crooked and no hose is twisted.
Step 11: Reinstall Removed Components
- Reinstall the removed intake duct and brackets using the 10mm socket, 12mm socket, 3/8-inch drive ratchet, and original fasteners as applicable.
- Use the 3/8-inch drive torque wrench rated 5-60 Nm to tighten any removed M6 bracket bolts to 10 Nm (7 ft-lbs).
- Leave the lower engine cover off until the leak inspection is complete.
Step 12: Vacuum-Fill the Cooling System
- Connect the cooling-system vacuum fill tool to the filler neck and connect it to the air compressor rated 90 psi minimum.
- Follow the fill tool’s instructions to draw approximately 25-27 inHg of vacuum.
- Close the tool valve and watch the gauge for at least two minutes. A falling reading indicates a leak that must be corrected before filling.
- Place the tool’s pickup hose in fresh premixed Toyota-specification coolant and open the fill valve.
- Allow the vacuum to pull coolant into the system. Do not let the pickup hose draw air.
- Remove the tool and adjust the coolant to the proper cold level.
Step 13: Reconnect the Battery
- Place the negative battery clamp fully onto its post by hand.
- Use the 3/8-inch drive torque wrench rated 5-60 Nm and 10mm socket to tighten the terminal nut to 5.4 Nm (48 in-lbs).
Step 14: Bleed and Check the Cooling System
- Start the engine and set the climate control to maximum heat with a low blower speed.
- Allow the engine to warm while watching the coolant temperature warning and checking for leaks.
- Do not reach near the electric fans, belts, or pulleys while the engine runs.
- Confirm that cabin heat becomes steady and the radiator fan cycles normally.
- Switch off the engine immediately if it overheats, the heater suddenly blows cold, or coolant begins overflowing.
Step 15: Install the Lower Engine Cover
- Switch off the engine and allow it to cool completely.
- Use the LED inspection light and shop towels to check the thermostat, hose connections, and radiator drain for leaks.
- Reinstall the lower engine cover with the 10mm socket, 3/8-inch drive ratchet, and trim-clip removal tool.
- Raise your Camry with the floor jack rated 2-ton minimum, remove the jack stands, and lower it carefully.
✅ After Repair
- ✅ Once the engine is completely cold, verify the coolant level and top it up with the same premixed Toyota-specification coolant.
- 🌡️ Confirm that the temperature remains normal during a 15-20 minute road test and that cabin heat stays consistent.
- 🔍 Recheck the thermostat area, hose joints, radiator drain, and ground beneath your Camry for leaks.
- 🧊 Check the cold coolant level again the following morning. A small initial adjustment can be normal; repeated coolant loss is not.
- ⚠️ If a temperature warning appears, stop immediately and shut off the engine. Do not continue driving an overheating engine.
- 🪟 Battery disconnection may reset automatic window operation. Fully lower and then fully raise each affected window while holding its switch briefly at each end.
💰 DIY vs Shop Cost
Shop Cost: ₹18,000-₹35,000 (parts + labor)
DIY Cost: ₹7,000-₹16,000 (parts and coolant only)
You Save: ₹11,000-₹19,000 by doing it yourself!
Panipat labor rates and imported U.S.-specification parts prices vary. This repair takes a shop approximately 2-3 hours.
🎯 Ready to get started?
HowToo makes it easy: same-day/2-day shipping on every part, plus all the tools and specialty tools you need! Check out the parts and tools sections below to add everything to your cart.