

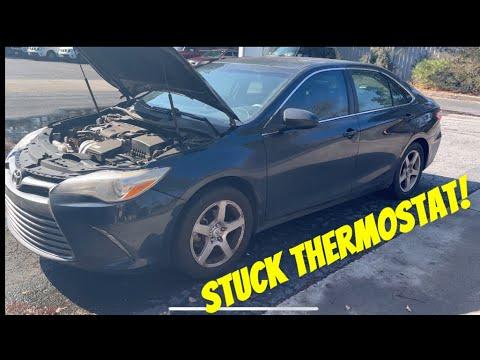




How to Replace the Thermostat on a 2014-2019 Toyota Highlander 2.7L (Trim: LE | Engine: Inline 4 2.7L)
Step-by-step DIY instructions with tools, parts, torque specs, and coolant bleeding tips for 2014, 2015, 2016, 2017, 2018, 2019
How to Replace the Thermostat on a 2014-2019 Toyota Highlander 2.7L (Trim: LE | Engine: Inline 4 2.7L)
Step-by-step DIY instructions with tools, parts, torque specs, and coolant bleeding tips for 2014, 2015, 2016, 2017, 2018, 2019


🔧 Highlander - Thermostat Replacement
The thermostat on your Highlander is installed inside the engine’s lower water inlet housing, near the alternator. Replacement requires draining the engine coolant, removing the drive belt and alternator for access, then refilling and bleeding the cooling system.
Difficulty Level: Intermediate | Estimated Time: 2-3 hours
Assumption: This procedure is for the stock 2.7L four-cylinder engine.
⚠️ Safety & Precautions
- ⚠️ Let the engine become completely cold before opening the cooling system. Hot coolant can cause severe burns.
- ⚠️ Disconnect the negative battery terminal before removing the alternator.
- ⚠️ Support your Highlander with jack stands. Never work beneath a vehicle supported only by a floor jack.
- ⚠️ Keep coolant away from children and animals. Its sweet taste makes it especially hazardous.
- ⚠️ Use only Toyota Super Long Life Coolant or an exact pink, phosphate-based equivalent formulated for Toyota vehicles.
- ⚠️ Do not allow coolant to contact the alternator or drive belt.
🔧 Required Tools
You'll need the following tools for this repair:
- 10mm socket
- 12mm socket
- 14mm socket
- 19mm six-point socket
- 3/8-inch drive ratchet
- 1/2-inch drive breaker bar
- 3-inch socket extension
- 6-inch socket extension
- 10mm combination wrench
- Hose-clamp pliers
- Plastic gasket scraper
- Torque wrench rated 5-60 Nm
- Coolant funnel with Toyota radiator adapter
- Drain pan with 10-litre minimum capacity
- Floor jack rated 2-ton minimum
- Jack stands rated 2-ton minimum
- Wheel chocks
- Nitrile gloves
- Safety glasses
- Shop towels
🔩 Required Parts
HowToo sells all the parts you need for this repair:
- Engine coolant thermostat - Qty: 1
- Thermostat rubber gasket - Qty: 1
- Toyota Super Long Life Coolant or exact pink equivalent - Qty: 8 litres
📋 Before You Begin
- 📍 Park your Highlander on level ground, select Park, apply the parking brake, and let the engine cool completely.
- 🛞 Place wheel chocks behind the rear wheels.
- 🔋 Make sure the ignition and all electrical accessories are switched off.
- 🧊 Set the replacement thermostat beside the old one after removal so you can compare orientation.
- 🧴 Have a sealed container ready for used coolant. Do not pour coolant onto the ground or into a drain.
🔨 Step-by-Step Instructions
Follow these steps in order:
Step 1: Disconnect the Battery
- Open the hood and use a 10mm wrench to loosen the negative battery-terminal nut.
- Lift the negative cable from the battery and position it where it cannot spring back onto the terminal.
- Wait at least 90 seconds before working near electrical connections.
Step 2: Raise and Support the Front
- Use the floor jack at the front center jacking point to raise your Highlander.
- Place the jack stands beneath the reinforced front side support points, then lower the vehicle onto them.
- Gently push the vehicle to verify that it is stable before going underneath.
Step 3: Remove the Lower Engine Cover
- Put on safety glasses and nitrile gloves.
- Use a 10mm socket and ratchet to remove the lower engine-cover fasteners.
- Support the cover with one hand while removing its final fastener, then lower it out of the way.
Step 4: Drain the Coolant
- Confirm that the radiator is cold. Slowly remove the radiator cap by hand.
- Position the 10-litre drain pan beneath the radiator drain valve.
- Open the plastic drain valve by hand. Do not force it with pliers because it can break.
- Allow the coolant to drain fully, then close the valve by hand until snug.
- Opening the cap helps coolant drain smoothly.
Step 5: Remove the Drive Belt
- Photograph the belt routing before removal.
- A belt tensioner is a spring-loaded pulley that keeps the drive belt tight.
- Place a 19mm six-point socket and breaker bar on the tensioner’s hex-shaped boss.
- Rotate the tensioner slowly to release belt tension, then slide the belt off the alternator pulley.
- Slowly return the tensioner to its resting position. Do not let it snap back.
- Move the belt aside without bending it sharply or contaminating it with coolant.
Step 6: Disconnect the Alternator
- Press the locking tab and unplug the alternator electrical connector by hand.
- Lift the protective cap from the charging terminal.
- Use a 10mm socket and ratchet to remove the charging-cable nut, then move the cable aside.
- Protect the terminal and cable from coolant with a clean shop towel.
Step 7: Remove the Alternator
- Support the alternator with one hand.
- Use the appropriate 12mm or 14mm socket, extension, and ratchet to remove the upper and lower alternator mounting bolts.
- Rock the alternator gently to free it from its mounting bracket, then lift it from the engine compartment.
- Do not pry against the alternator’s aluminum housing.
Step 8: Disconnect the Lower Radiator Hose
- Reposition the drain pan beneath the thermostat housing.
- Use hose-clamp pliers to compress the spring clamp and slide it back along the lower radiator hose.
- Twist the hose gently by hand to release it, then pull it from the water inlet.
- Expect additional coolant to drain from the hose and engine.
- Do not insert a screwdriver deeply between the hose and housing because it can damage the sealing surface.
Step 9: Remove the Water Inlet and Thermostat
- Use a 10mm socket, extension, and ratchet to remove the two water-inlet retaining nuts.
- Pull the housing straight away from the engine. Do not force a metal screwdriver between the sealing surfaces.
- Remove the thermostat and its rubber gasket by hand.
- Note the thermostat’s orientation before removing it completely.
Step 10: Clean and Inspect the Housing
- Use a plastic gasket scraper and shop towels to clean the housing and engine sealing surfaces.
- Keep debris out of the open coolant passage.
- Inspect the housing for cracks, deep corrosion, or a damaged hose connection.
- Do not apply RTV silicone or gasket sealer. The rubber thermostat gasket provides the seal.
Step 11: Install the New Thermostat
- Fit the new rubber gasket evenly around the replacement thermostat.
- Install the thermostat with its jiggle valve at the top. The jiggle valve is the small loose pin in the thermostat flange that releases trapped air.
- Keep the jiggle valve within approximately 10 degrees of the 12-o’clock position.
- Hold the thermostat in place and install the water inlet without pinching or dislodging the gasket.
Step 12: Tighten the Water Inlet
- Start both retaining nuts by hand to prevent cross-threading.
- Use the 10mm socket and torque wrench to tighten the nuts evenly.
- Torque to 10 Nm (89 in-lbs).
- Do not overtighten the housing; it can crack or distort.
Step 13: Reconnect the Lower Radiator Hose
- Push the hose fully onto the water inlet by hand.
- Use hose-clamp pliers to return the spring clamp to its original position behind the raised bead.
- Confirm that the hose is not twisted and the clamp sits squarely around it.
Step 14: Reinstall the Alternator
- Position the alternator on its bracket and start both mounting bolts by hand.
- Use the 12mm or 14mm socket and torque wrench to tighten the upper alternator bolt to 21 Nm (15 ft-lbs).
- Use the 14mm socket and torque wrench to tighten the lower alternator bolt to 43 Nm (32 ft-lbs).
- Install the charging cable with the 10mm socket and tighten its nut to 9.8 Nm (87 in-lbs).
- Close the terminal cap and reconnect the electrical connector until it clicks.
Step 15: Reinstall the Drive Belt
- Route the belt around the pulleys using the photograph taken earlier.
- Leave the belt off the easiest upper pulley until last.
- Use the 19mm socket and breaker bar to rotate the tensioner, slip the belt onto the final pulley, then release the tensioner slowly.
- Check by sight and touch that every belt rib is seated correctly in every grooved pulley.
Step 16: Refill the Cooling System
- Install the coolant funnel with Toyota radiator adapter at the radiator filler neck.
- Slowly add Toyota Super Long Life Coolant until the radiator remains full.
- Fill the coolant reservoir to the “FULL” line.
- Squeeze the upper radiator hose several times by hand to help release trapped air.
- Do not mix Toyota pink coolant with conventional green coolant.
Step 17: Reconnect the Battery and Bleed Air
- Use a 10mm wrench to reconnect and snug the negative battery terminal.
- Leave the coolant funnel installed and start the engine.
- Set the cabin heater to its hottest setting and the blower to low.
- Allow the engine to warm up while watching the coolant level. Add coolant whenever the level drops.
- Briefly hold the engine at approximately 2,000 rpm several times after it begins warming.
- Continue until the upper radiator hose becomes hot, cabin heat remains steady, and air bubbles stop appearing.
- Switch the engine off and allow it to cool completely before removing the funnel and installing the radiator cap.
Step 18: Reinstall the Lower Engine Cover
- Inspect the thermostat housing, lower hose, and radiator drain valve for leaks using a shop towel.
- Use the 10mm socket and ratchet to reinstall the lower engine cover. Tighten its small fasteners only until snug.
- Use the floor jack to lift your Highlander slightly, remove the jack stands, and lower it to the ground.
✅ After Repair
- ✅ Start the engine and confirm that the temperature gauge rises normally and remains stable.
- ✅ Verify that the cabin heater produces steady hot air. Heat that turns cold intermittently can indicate trapped air.
- ✅ Inspect the thermostat housing, radiator hose, drain valve, and radiator cap for leaks.
- ✅ After the engine becomes completely cold, recheck the radiator and reservoir levels. Top up with the same coolant if needed.
- ✅ Recheck the coolant level over the next two or three cold-start cycles.
- ✅ Stop driving immediately if the temperature warning appears, the gauge rises abnormally, or coolant begins overflowing.
- ✅ Dispose of used coolant through an authorized automotive-fluid recycler in Panipat.
💰 DIY vs Shop Cost
Shop Cost: ₹8,000-₹16,000 (parts + labor)
DIY Cost: ₹2,500-₹6,000 (parts and coolant only)
You Save: ₹5,500-₹10,000 by doing it yourself!
Local labor rates vary. This repair takes a shop approximately 1.5-2.5 hours.
🎯 Ready to get started?
HowToo makes it easy: same-day/2-day shipping on every part, plus all the tools and specialty tools you need! Check out the parts and tools sections below to add everything to your cart.