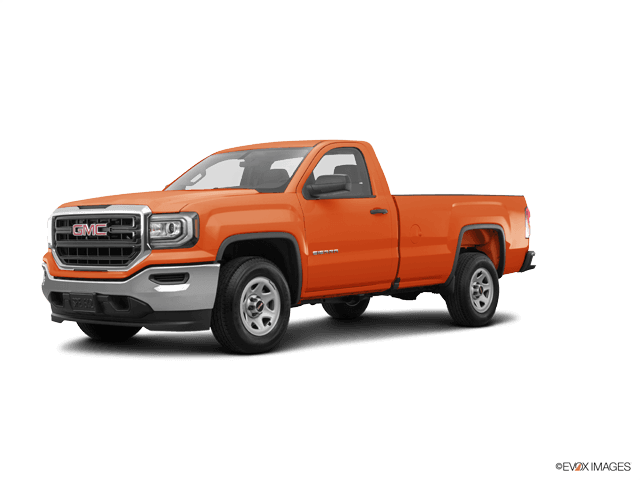

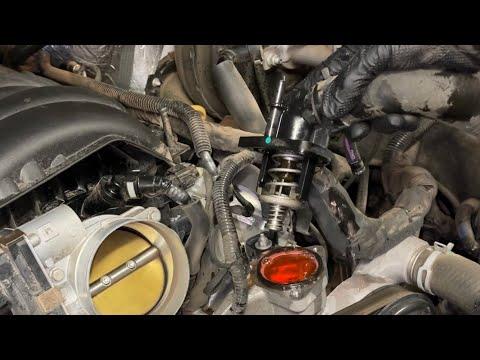






How to Replace the Thermostat on a 2014-2018 GMC Sierra 1500 (Engine: V6 4.3L)
Step-by-step cooling system repair guide with tools, parts, torque specs, and safety tips for 2014, 2015, 2016, 2017, 2018
How to Replace the Thermostat on a 2014-2018 GMC Sierra 1500 (Engine: V6 4.3L)
Step-by-step cooling system repair guide with tools, parts, torque specs, and safety tips for 2014, 2015, 2016, 2017, 2018


🔧 Sierra 1500 - Thermostat Replacement
Replacing the thermostat on your Sierra 1500 involves draining some coolant, removing the thermostat housing, installing a new thermostat and seal, then refilling and bleeding the cooling system. The thermostat controls engine warm-up and coolant flow, so a sticking thermostat can cause overheating, slow warm-up, poor heater performance, or a check engine light.
Difficulty Level: Beginner/Intermediate | Estimated Time: 1.5-2.5 hours
⚠️ Safety & Precautions
- ⚠️ Only work on the cooling system when the engine is completely cold. Hot coolant can spray out and cause serious burns.
- 🧤 Wear safety glasses and gloves. Coolant is slippery, toxic, and harmful to pets.
- 🔋 Battery disconnect is not normally required for this thermostat replacement.
- 🌡️ Do not open the coolant surge tank cap while the engine is hot.
- ♻️ Capture old coolant in a drain pan and dispose of it properly according to local rules.
🔧 Required Tools
You'll need the following tools for this repair:
- 3/8-inch drive ratchet
- 10mm socket
- 13mm socket
- 3/8-inch drive extension set
- Flat-blade screwdriver
- Hose clamp pliers
- Plastic trim clip remover
- Drain pan 2-gallon minimum
- Coolant funnel kit spill-free
- Torque wrench 3/8-inch drive inch-pound
- Torque wrench 3/8-inch drive foot-pound
- Clean shop towels
- Plastic gasket scraper
- Safety glasses
- Nitrile gloves
🔩 Required Parts
HowToo sells all the parts you need for this repair:
- Engine coolant thermostat - Qty: 1
- Thermostat housing seal - Qty: 1
- DEX-COOL 50/50 premixed coolant - Qty: 1-2 gallons
📋 Before You Begin
- 🅿️ Park your Sierra 1500 on level ground and set the parking brake.
- ❄️ Let the engine cool fully, preferably overnight.
- 🧰 Keep coolant away from children and animals. Even a small amount can be dangerous.
- 📱 Take a quick photo of hose routing before removing anything. This helps during reassembly.
- 🧼 A thermostat housing is the metal outlet where the radiator hose connects to the engine and holds the thermostat in place.
🔨 Step-by-Step Instructions
Follow these steps in order:
Step 1: Open the Hood and Verify the Engine Is Cold
- Use your hand carefully near the upper radiator hose and coolant surge tank to confirm they are cool to the touch.
- Use safety glasses and nitrile gloves before touching any cooling system parts.
- Slowly loosen the coolant surge tank cap by hand only if the system is cold. This releases any leftover pressure.
- Cold engine only.
Step 2: Remove Any Intake Ducting Blocking Access
- Use a flat-blade screwdriver to loosen the clamps on the air intake duct if it blocks access to the thermostat housing area.
- Use a 10mm socket and 3/8-inch drive ratchet to remove any intake resonator or duct fasteners if equipped.
- Move the duct aside carefully. Do not pull hard on wiring or vacuum hoses.
Step 3: Drain Some Coolant
- Place a drain pan 2-gallon minimum under the radiator drain area.
- Use a flat-blade screwdriver or your hand, depending on the drain plug style, to open the radiator drain petcock.
- Drain about 1 gallon of coolant. You only need the coolant level below the thermostat housing.
- Close the radiator drain petcock snugly by hand or with the flat-blade screwdriver. Do not overtighten plastic parts.
- Less mess is the goal.
Step 4: Remove the Upper Radiator Hose from the Thermostat Housing
- Use hose clamp pliers to squeeze the spring clamp on the upper radiator hose at the thermostat housing.
- Slide the clamp back along the hose.
- Twist the hose gently by hand to break it loose, then pull it off the thermostat housing.
- If it is stuck, use a plastic trim clip remover carefully around the hose end. Do not cut or puncture the hose.
- A spring clamp is the metal clamp that squeezes the hose tight using spring tension.
Step 5: Remove the Thermostat Housing
- Use a 10mm socket, 3/8-inch drive extension, and 3/8-inch drive ratchet to remove the thermostat housing bolts.
- Support the housing with your hand as the last bolt comes out.
- Pull the housing straight away from the engine.
- Note the thermostat direction before removal. The spring side normally faces into the engine.
Step 6: Remove the Old Thermostat and Seal
- Remove the thermostat by hand from the housing or engine opening.
- Remove the old thermostat housing seal by hand.
- Use a plastic gasket scraper to gently clean the sealing surfaces.
- Use clean shop towels to wipe the area dry.
- Do not use a metal scraper. It can gouge the aluminum sealing surface and cause leaks.
Step 7: Install the New Thermostat and Seal
- Install the new thermostat in the same direction as the old one.
- Make sure the spring side faces into the engine.
- Install the new thermostat housing seal into position.
- Use clean shop towels to keep dirt out of the housing and engine opening.
- Match the old part orientation.
Step 8: Reinstall the Thermostat Housing
- Position the thermostat housing squarely against the engine.
- Start all bolts by hand first to avoid cross-threading.
- Use a 10mm socket and 3/8-inch drive ratchet to snug the bolts evenly.
- Use a 3/8-inch drive torque wrench to tighten the thermostat housing bolts to Torque to 10 Nm (89 in-lbs).
- Do not overtighten. Small bolts can strip or break.
Step 9: Reinstall the Radiator Hose
- Push the upper radiator hose fully onto the thermostat housing by hand.
- Use hose clamp pliers to move the spring clamp back to its original position.
- Make sure the clamp sits behind the raised bead on the housing neck.
- Wipe the area with clean shop towels so leaks are easy to spot later.
Step 10: Reinstall the Intake Ducting
- Reinstall any intake ducting you removed.
- Use a 10mm socket and 3/8-inch drive ratchet to reinstall any intake fasteners.
- Use a flat-blade screwdriver to tighten the duct clamps until snug.
- If any fasteners are structural brackets, tighten typical small intake bracket bolts to Torque to 9 Nm (80 in-lbs).
Step 11: Refill the Cooling System
- Install the coolant funnel kit spill-free into the coolant surge tank opening.
- Pour DEX-COOL 50/50 premixed coolant into the surge tank until the level reaches the cold fill mark.
- Leave the funnel attached with some coolant in it while you bleed air from the system.
- Do not mix green universal coolant unless it specifically states it is compatible with DEX-COOL.
Step 12: Bleed Air from the Cooling System
- Start the engine and let it idle with the coolant funnel kit spill-free installed.
- Set the heater controls to full hot and low fan speed using the dashboard controls.
- Watch the coolant level in the funnel. Add DEX-COOL 50/50 premixed coolant as bubbles come out.
- Let the engine warm up until the upper radiator hose gets hot, which means the thermostat has opened.
- Use safety glasses and gloves. Keep hands, clothing, and tools away from the fan and belts.
- When bubbling slows and the heater blows warm air, shut the engine off.
Step 13: Set Final Coolant Level
- Let the engine cool until the coolant is safe to touch.
- Remove the coolant funnel kit spill-free carefully.
- Adjust the coolant level in the surge tank to the cold fill mark.
- Install the coolant surge tank cap by hand until fully seated.
✅ After Repair
- ✅ Start your Sierra 1500 and let it idle while watching the thermostat housing and hose connection for leaks.
- 🌡️ Watch the temperature gauge during the first drive. It should rise normally and stay steady.
- 🔥 Confirm the cabin heater blows warm air after the engine warms up.
- 🧊 After the next full cool-down, recheck the coolant level and top off with DEX-COOL 50/50 premixed coolant if needed.
- 🔍 If the temperature rises quickly, the heater stays cold, or you hear gurgling, air may still be trapped and the system should be bled again.
💰 DIY vs Shop Cost
Shop Cost: $250-$450 (parts + labor)
DIY Cost: $35-$100 (parts only)
You Save: $150-$350 by doing it yourself!
Shop labor rates vary but typically run $100-$150/hour. This repair takes a shop approximately 1.0-1.5 hours.
🎯 Ready to get started?
HowToo makes it easy: same-day/2-day shipping on every part, plus all the tools and specialty tools you need! Check out the parts and tools sections below to add everything to your cart.