

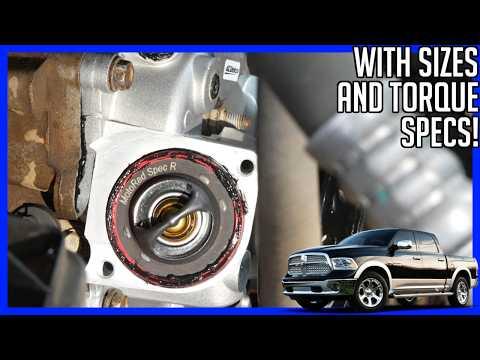





How to Replace the Thermostat on a 2013-2022 Ram 1500 3.6L (Engine: V8 5.7L)
Step-by-step cooling system repair with tools, parts, torque specs, and safety tips for 2013, 2014, 2015, 2016, 2017, 2018, 2019, 2020, 2021, 2022
How to Replace the Thermostat on a 2013-2022 Ram 1500 3.6L (Engine: V8 5.7L)
Step-by-step cooling system repair with tools, parts, torque specs, and safety tips for 2013, 2014, 2015, 2016, 2017, 2018, 2019, 2020, 2021, 2022


🔧 1500 - Thermostat Replacement
This repair replaces the engine coolant thermostat on your 1500. The thermostat controls coolant flow through the engine; if it sticks open or closed, your truck may run too cool, overheat, or set temperature-related fault codes.
Difficulty Level: Intermediate | Estimated Time: 1.5-2.5 hours
⚠️ Safety & Precautions
- ⚠️ Work only on a completely cold engine. Hot coolant can cause serious burns.
- ⚠️ The cooling system is pressurized when hot. Do not remove the coolant pressure cap until the engine is cold.
- ⚠️ Your 1500 uses an eTorque mild-hybrid system, but this thermostat repair does not require high-voltage service. Do not touch orange high-voltage cables or components.
- ⚠️ Disconnecting the 12V battery is recommended before working around engine wiring. Use a 10mm socket on the negative battery terminal.
- ⚠️ Coolant is toxic to people and pets. Catch all drained coolant and dispose of it properly.
🔧 Required Tools
You'll need the following tools for this repair:
- 10mm socket
- 13mm socket
- 1/4-inch drive ratchet
- 3/8-inch drive ratchet
- 6-inch extension
- Hose clamp pliers
- Flat-blade screwdriver
- Plastic trim tool
- Drain pan 2-gallon minimum
- Funnel
- Torque wrench inch-pound range
- Cooling system spill-free funnel kit (specialty)
- Shop towels
- Nitrile gloves
- Safety glasses
🔩 Required Parts
HowToo sells all the parts you need for this repair:
- Engine coolant thermostat assembly - Qty: 1
- Thermostat housing seal - Qty: 1
- Mopar-compatible OAT coolant concentrate or premix - Qty: 1 gallon
- Distilled water - Qty: 1 gallon if using concentrate
📋 Before You Begin
- Park your 1500 on level ground and let the engine cool completely, ideally overnight.
- Set the parking brake and shift the transmission to Park.
- Open the hood and remove the coolant pressure cap only after the engine is cold.
- Disconnect the negative 12V battery cable with a 10mm socket. The negative cable is the black cable marked with a minus sign.
- Use only OAT coolant approved for Ram cooling systems. Do not mix coolant types.
- A spill-free funnel is a funnel that seals to the coolant tank and helps remove trapped air while refilling.
🔨 Step-by-Step Instructions
Follow these steps in order:
Step 1: Remove the Engine Cover
- Put on safety glasses and nitrile gloves.
- Lift the plastic engine cover straight upward by hand to release its rubber mounting grommets.
- Set the cover aside where it will not get stepped on.
- Pull upward evenly.
Step 2: Disconnect the 12V Battery
- Use a 10mm socket and 1/4-inch drive ratchet to loosen the negative battery terminal nut.
- Remove the negative cable from the battery post and position it so it cannot spring back onto the post.
- This helps prevent accidental electrical shorts while your hands are near engine wiring.
Step 3: Drain Some Coolant
- Place a 2-gallon drain pan under the radiator drain area.
- Use a flat-blade screwdriver if needed to open the radiator drain cock slowly.
- Drain about 1 gallon of coolant, then close the drain cock by hand or with the flat-blade screwdriver.
- Do not overtighten the plastic drain cock.
- Drain only what you need.
Step 4: Locate the Thermostat Housing
- Find the upper radiator hose where it connects to the engine-side thermostat housing on the front/top area of the 3.6L engine.
- The thermostat housing is the small coolant outlet that the radiator hose attaches to.
- Use shop towels around the area to catch leftover coolant.
Step 5: Remove the Radiator Hose from the Thermostat Housing
- Use hose clamp pliers to squeeze the spring clamp tabs together.
- Slide the clamp back along the hose, away from the thermostat housing.
- Twist the hose gently by hand to break it loose.
- If stuck, use a plastic trim tool to carefully loosen the hose edge. Do not cut or pry hard against the plastic housing.
- Pull the hose off the thermostat housing and aim it upward to reduce coolant loss.
- Twist first, then pull.
Step 6: Remove the Thermostat Housing Bolts
- Use a 10mm socket, 6-inch extension, and ratchet to remove the thermostat housing bolts.
- Support the housing with your free hand as the last bolt comes out.
- Remove the thermostat housing and thermostat assembly from the engine.
- Some coolant may spill. Use shop towels and keep the drain pan underneath.
Step 7: Clean the Sealing Surface
- Use shop towels to wipe the engine sealing surface clean.
- Use a plastic trim tool only if old seal material is stuck.
- Do not gouge or scratch the aluminum surface.
- Make sure no debris falls into the coolant passage.
- Clean surface prevents leaks.
Step 8: Install the New Thermostat Assembly
- Install the new thermostat housing seal onto the new thermostat assembly if it is not already installed.
- Position the new thermostat assembly on the engine exactly like the old one.
- Start all bolts by hand first to avoid cross-threading. Cross-threading means the bolt starts crooked and damages the threads.
- Use a 10mm socket and ratchet to snug the bolts evenly.
- Use an inch-pound torque wrench and 10mm socket to tighten the thermostat housing bolts to 12 Nm (106 in-lbs).
Step 9: Reinstall the Radiator Hose
- Push the radiator hose fully onto the thermostat housing neck by hand.
- Use hose clamp pliers to move the spring clamp back to its original position.
- Make sure the clamp sits behind the raised bead on the housing neck.
- Wipe the area dry with shop towels so leaks are easier to spot later.
Step 10: Refill the Cooling System
- Install the cooling system spill-free funnel kit onto the coolant pressure bottle.
- Use a funnel to add the correct Mopar-compatible OAT coolant mixture.
- If using concentrate, mix coolant with distilled water at a 50/50 ratio before filling.
- Fill until the coolant level stays near the proper mark on the bottle.
Step 11: Bleed Air from the Cooling System
- Reconnect the negative battery cable and tighten the terminal with a 10mm socket. Do not overtighten.
- Leave the spill-free funnel installed.
- Start the engine and set the cabin heater to the hottest setting with the blower on low.
- Let the engine idle while watching the coolant level in the funnel.
- Add coolant as the level drops.
- Watch for air bubbles. When bubbles slow down and the upper radiator hose gets warm, the thermostat has opened.
- Shut the engine off before it gets too hot or if coolant begins to rise rapidly.
- Remove the spill-free funnel kit carefully and install the pressure cap.
Step 12: Reinstall the Engine Cover
- Align the engine cover with its mounting posts.
- Press down firmly by hand until the cover seats into the rubber grommets.
- Check that no tools or towels are left in the engine bay.
✅ After Repair
- Start your 1500 and let it idle until it reaches normal operating temperature.
- Look around the thermostat housing and radiator hose for leaks.
- Take a short test drive while watching the temperature gauge.
- After the engine cools completely, recheck the coolant level and top off if needed.
- If the temperature gauge rises above normal, stop driving and let the engine cool before checking coolant level.
- Dispose of old coolant at a recycling center or repair facility. Do not pour it on the ground or into a drain.
💰 DIY vs Shop Cost
Shop Cost: $250-$450 (parts + labor)
DIY Cost: $55-$140 (parts only)
You Save: $195-$310 by doing it yourself!
Shop labor rates vary but typically run $100-$150/hour. This repair takes a shop approximately 1.0-1.5 hours.
🎯 Ready to get started?
HowToo makes it easy: same-day/2-day shipping on every part, plus all the tools and specialty tools you need! Check out the parts and tools sections below to add everything to your cart.