

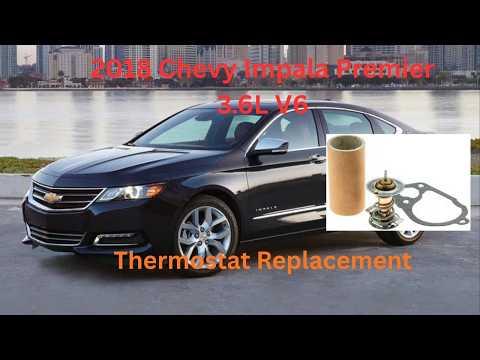




How to Replace the Thermostat on a 2012-2020 Chevrolet Impala 3.6L V6 (Trim: LT | Engine: V6 3.6L)
Step-by-step DIY instructions with required tools, parts, torque specs, and safety tips for 2012, 2013, 2015, 2016, 2017, 2018, 2019
How to Replace the Thermostat on a 2012-2020 Chevrolet Impala 3.6L V6 (Trim: LT | Engine: V6 3.6L)
Step-by-step DIY instructions with required tools, parts, torque specs, and safety tips for 2012, 2013, 2015, 2016, 2017, 2018, 2019


🔧 Impala - Thermostat Replacement
The thermostat on your Impala regulates coolant flow between the engine and radiator. Replacement requires draining some coolant, removing the air-intake duct and lower radiator hose from the thermostat housing, then installing a new thermostat and seal.
Difficulty Level: Intermediate | Estimated Time: 2-3 hours
Assumption: These instructions cover the stock 3.6L V6 cooling system and factory-style thermostat housing.
⚠️ Safety & Precautions
- ⚠️ Let the engine become completely cold before opening the coolant reservoir. Hot coolant can cause severe burns.
- 🧤 Wear safety glasses and chemical-resistant gloves. DEX-COOL coolant is poisonous.
- 🐾 Collect every spill immediately. Coolant is especially dangerous to children and animals.
- 🚗 Support your Impala with jack stands. Never work beneath a vehicle supported only by a floor jack.
- 🔋 Battery disconnection is not normally required for this repair.
- 🧹 Keep dirt and old gasket material out of the open cooling passages.
🔧 Required Tools
You'll need the following tools for this repair:
- 1/4-inch drive ratchet
- 3/8-inch drive ratchet
- 7mm socket
- 8mm socket
- 10mm socket
- 13mm socket
- 6-inch socket extension
- 10-50 Nm torque wrench
- Flat-blade screwdriver
- Hose-clamp pliers
- Plastic gasket scraper
- Coolant drain pan with 10-liter capacity
- Spill-free coolant funnel kit
- Floor jack rated 2-ton minimum
- Jack stands rated 2-ton minimum
- Wheel chocks
- Safety glasses
- Chemical-resistant gloves
- Shop towels
🔩 Required Parts
HowToo sells all the parts you need for this repair:
- 195°F thermostat - Qty: 1
- Thermostat housing seal - Qty: 1
- DEX-COOL 50/50 premixed coolant - Qty: 2 gallons
If the replacement thermostat is supplied only as a complete housing assembly, install that assembly and its included seal. Do not reuse the old seal.
📋 Before You Begin
- 🅿️ Park your Impala on level, solid ground. Select Park, apply the parking brake and switch the ignition off.
- 🧊 Allow the engine to cool for several hours. The upper radiator hose should feel cool and soft.
- 🚧 Place wheel chocks behind both rear wheels.
- ♻️ Have a sealed container ready for used coolant. Do not pour coolant onto the ground or into a drain.
- 📱 No infotainment setting, scan-tool command, battery registration or electronic calibration is required.
🔨 Step-by-Step Instructions
Follow these steps in order:
Step 1: Relieve residual cooling-system pressure
- Put on the chemical-resistant gloves and safety glasses.
- Cover the coolant reservoir cap with a shop towel.
- Slowly turn the cap counterclockwise. Stop if you hear pressure escaping, then wait until it stops before removing the cap.
Step 2: Raise and secure the front of the vehicle
- Use the floor jack at the front-center lifting point to raise your Impala.
- Place the jack stands beneath the reinforced front side support points, then lower the vehicle onto them.
- Gently push the vehicle to confirm that it is stable before reaching underneath.
Step 3: Remove the lower splash shield
- Position the coolant drain pan beneath the radiator area.
- Use the 7mm socket, 10mm socket and 1/4-inch drive ratchet to remove the splash-shield fasteners, as equipped.
- Support the shield with one hand while removing its final fastener.
- Set the shield and fasteners aside in installation order.
Step 4: Drain enough coolant
- Place the coolant drain pan beneath the lower radiator hose connection.
- Use the hose-clamp pliers to compress the lower hose clamp. A spring clamp is the metal band that maintains constant pressure around the hose.
- Slide the clamp several centimeters back along the hose.
- Carefully twist and pull the hose loose. Use the flat-blade screwdriver only to gently release the hose edge; do not damage the plastic fitting.
- Drain approximately 4-6 liters, then reinstall the hose and clamp temporarily to stop the flow.
- Twist the hose before pulling it.
Step 5: Remove the engine cover and air-intake duct
- Pull the decorative engine cover straight upward by hand to release its rubber retainers.
- Disconnect the mass-airflow sensor electrical connector by hand. First slide or lift its locking tab, then press the release.
- Use the flat-blade screwdriver or 8mm socket and 1/4-inch drive ratchet to loosen both air-intake duct clamps.
- Release the breather-hose connection by hand, then remove the duct between the air-filter housing and throttle body.
- Cover the throttle-body opening with a clean shop towel so nothing can fall inside.
Step 6: Disconnect the thermostat-housing hose
- Follow the lower radiator hose upward to the thermostat housing on the engine.
- Move the drain pan directly beneath the housing.
- Use the hose-clamp pliers to compress and move the clamp away from the housing neck.
- Twist the hose gently, then pull it off the housing. Allow the remaining coolant to drain.
- Do not pry hard against the housing neck because it can crack.
Step 7: Remove the thermostat housing
- Move any small wiring retainer obstructing the housing by releasing it with the flat-blade screwdriver.
- Use the 10mm socket, 6-inch socket extension and 1/4-inch drive ratchet to remove the thermostat-housing bolts evenly.
- Note each bolt’s location if their lengths differ.
- Pull the housing straight away from the engine. Catch the remaining coolant in the drain pan.
- Remove the thermostat and old seal. Note the thermostat’s installed direction before removal.
Step 8: Clean and inspect the sealing surfaces
- Use the plastic gasket scraper and shop towels to clean the mating surfaces.
- Do not use a metal scraper, abrasive disc or power tool on the aluminum surface.
- Inspect the housing for cracks, corrosion or a distorted sealing surface. Replace the complete housing if damaged.
- Keep coolant and debris out of the open passage.
Step 9: Install the new thermostat and seal
- Lightly wet the new thermostat seal with fresh DEX-COOL coolant using a clean gloved finger.
- Fit the seal completely into its groove. Do not apply RTV silicone or gasket sealer.
- Install the thermostat in the same direction as the original, with the temperature-sensing element facing the engine.
- Position the housing squarely and start every bolt by hand to prevent cross-threading.
- Use the 10mm socket, 6-inch socket extension and 10-50 Nm torque wrench to tighten the housing bolts evenly to 10 Nm (89 in-lbs).
- Stop if the housing will not sit flat.
Step 10: Reconnect the coolant hose
- Push the hose fully over the thermostat-housing neck by hand.
- Use the hose-clamp pliers to return the spring clamp to its original position behind the raised bead.
- Confirm that the clamp is straight and the hose cannot be pulled off by hand.
- Reconnect any wiring retainer removed earlier.
Step 11: Reinstall the air-intake duct
- Remove the shop towel from the throttle body and verify the opening is clean.
- Install the air-intake duct fully onto the throttle body and air-filter housing.
- Reconnect the breather hose by hand.
- Use the 8mm socket and 1/4-inch drive ratchet to snug both duct clamps. Do not overtighten the plastic duct.
- Reconnect the mass-airflow sensor connector and engage its locking tab.
- Press the engine cover onto its rubber retainers by hand.
Step 12: Refill the cooling system
- Confirm that the lower radiator hose is fully installed and its clamp is correctly positioned.
- Fit the spill-free coolant funnel kit to the coolant reservoir.
- Slowly add DEX-COOL 50/50 premixed coolant until the reservoir reaches the cold-fill mark.
- Pause several times so trapped air can rise through the funnel.
- Do not mix DEX-COOL with conventional green coolant.
Step 13: Bleed air from the cooling system
- Leave your Impala securely supported and keep hands, clothing and tools away from belts and cooling fans.
- Start the engine with the spill-free coolant funnel installed.
- Set the heater to maximum temperature and the blower to low.
- Allow the engine to idle while watching the coolant level. Add premixed DEX-COOL when the level drops.
- Briefly raise engine speed to approximately 2,000 rpm several times. Use the accelerator pedal and return to idle between each cycle.
- Continue until the upper radiator hose becomes warm, cabin heat is steady and large air bubbles stop appearing.
- Switch the engine off and let it cool completely before removing the funnel and installing the reservoir cap.
Step 14: Inspect and reinstall the splash shield
- Use the safety glasses and inspect the thermostat housing and hose connections for coolant leakage.
- Use the 7mm socket, 10mm socket and 1/4-inch drive ratchet to reinstall the lower splash shield and its original fasteners.
- Raise the vehicle slightly with the floor jack, remove the jack stands and lower your Impala to the ground.
✅ After Repair
- 🌡️ Start the engine and confirm that the temperature gauge rises normally and remains near its usual operating position.
- 🔥 Verify that the cabin heater produces steady warm air. Intermittent heat can indicate trapped air.
- 🔍 Inspect the thermostat housing and all disturbed hose connections for leaks.
- 🧊 After the engine becomes completely cold, recheck the reservoir and adjust it to the cold-fill mark with DEX-COOL 50/50 premixed coolant.
- 🚨 Stop the engine immediately if the temperature warning appears, the gauge climbs abnormally, or the heater suddenly blows cold air.
- ♻️ Transfer used coolant into a sealed container and take it to an authorized recycling or hazardous-waste facility.
💰 DIY vs Shop Cost
Shop Cost: ₹18,000-₹35,000 (parts + labor)
DIY Cost: ₹6,000-₹14,000 (parts only)
You Save: ₹12,000-₹21,000 by doing it yourself!
Local labor and imported-part prices vary. This repair takes a shop approximately 1.5-2.5 hours.
🎯 Ready to get started?
HowToo makes it easy: same-day/2-day shipping on every part, plus all the tools and specialty tools you need! Check out the parts and tools sections below to add everything to your cart.