


How to Replace the Thermostat on a 2012-2018 Ford Focus (Engine: Inline 4 2.0L)
Step-by-step coolant system repair guide with tools, parts, torque specs, and safety tips for 2012, 2013, 2014, 2015, 2016, 2017, 2018
How to Replace the Thermostat on a 2012-2018 Ford Focus (Engine: Inline 4 2.0L)
Step-by-step coolant system repair guide with tools, parts, torque specs, and safety tips for 2012, 2013, 2014, 2015, 2016, 2017, 2018
🔧 Focus - Thermostat Replacement
Replacing the thermostat on your Focus involves draining some coolant, removing the thermostat housing, installing a new thermostat assembly/seal, and refilling the cooling system. The thermostat controls engine temperature, so a stuck-open or stuck-closed thermostat can cause overheating, poor heater performance, or a check-engine light.
Difficulty Level: Intermediate | Estimated Time: 2-3 hours
⚠️ Safety & Precautions
- ⚠️ Only work on a completely cool engine. Hot coolant can cause serious burns.
- ⚠️ Never open the coolant reservoir cap while the engine is hot or pressurized.
- ⚠️ Coolant is poisonous to people and animals. Catch it in a drain pan and dispose of it properly.
- ⚠️ Disconnect the negative battery cable before working near wiring connectors and the cooling fan area.
- ⚠️ Use jack stands if raising the front of your Focus. Never rely on a floor jack alone.
🔧 Required Tools
You'll need the following tools for this repair:
- 8mm socket
- 10mm socket
- 13mm socket
- 1/4-inch drive ratchet
- 3/8-inch drive ratchet
- 6-inch extension
- Flat-blade screwdriver
- Hose clamp pliers
- Pick tool
- Torque wrench inch-pound
- Drain pan 2-gallon minimum
- Funnel
- Floor jack rated 2-ton minimum
- Jack stands rated 2-ton minimum
- Wheel chocks
- Nitrile gloves
- Safety glasses
🔩 Required Parts
HowToo sells all the parts you need for this repair:
- Thermostat assembly with seal - Qty: 1
- Engine coolant compatible with Ford orange coolant specification - Qty: 1 gallon concentrate or 2 gallons premixed
- Distilled water - Qty: 1 gallon if using concentrate
- Radiator drain plug seal - Qty: 1 if damaged or leaking
- Cooling system hose clamps - Qty: As needed if originals are weak or damaged
📋 Before You Begin
- 🅿️ Park your Focus on level ground, set the parking brake, and let the engine cool fully.
- 🧊 Wait until the upper radiator hose feels cool and soft before opening the coolant reservoir cap.
- 🔋 Use a 10mm socket to disconnect the negative battery cable. Move it aside so it cannot spring back onto the terminal.
- 🚗 Place wheel chocks behind the rear wheels before lifting the front of the car.
- 📘 A thermostat is a temperature-controlled valve. It opens to let coolant flow through the radiator when the engine warms up.
- 🧰 A torque wrench tightens bolts to an exact tightness. This helps prevent leaks and cracked plastic housings.
🔨 Step-by-Step Instructions
Follow these steps in order:
Step 1: Raise and Secure the Front
- Use wheel chocks behind the rear wheels.
- Use a floor jack rated 2-ton minimum to lift the front of your Focus at the front jacking point.
- Place jack stands rated 2-ton minimum under the approved front support points.
- Gently lower the car onto the stands and lightly shake the car to confirm it is stable.
- Never work under a jack-only vehicle.
Step 2: Remove the Lower Splash Shield
- Put on safety glasses and nitrile gloves.
- Use an 8mm socket and 1/4-inch drive ratchet to remove the lower splash shield fasteners.
- Use a flat-blade screwdriver to gently release any plastic push clips.
- Set the shield and fasteners aside in order.
- A small tray prevents lost bolts.
Step 3: Relieve Cooling System Pressure
- Confirm the engine is completely cool.
- Slowly loosen the coolant reservoir cap by hand.
- If you hear pressure escaping, stop and wait until the sound ends before removing the cap fully.
Step 4: Drain the Coolant
- Place a drain pan 2-gallon minimum under the radiator drain area.
- Use a flat-blade screwdriver if needed to open the radiator drain petcock carefully.
- Drain enough coolant so the level is below the thermostat housing. Usually 1-1.5 gallons is enough.
- Close the radiator drain petcock by hand once coolant flow slows.
- Do not overtighten the plastic drain plug.
Step 5: Remove Intake Ducting for Access
- Use an 8mm socket or flat-blade screwdriver to loosen the air intake hose clamp.
- Disconnect the intake duct from the air box and throttle body area as needed.
- Move the duct out of the way to access the thermostat housing on the engine side of the upper/lower coolant hose area.
Step 6: Disconnect the Thermostat Area Hoses
- Place the drain pan 2-gallon minimum under the thermostat housing area.
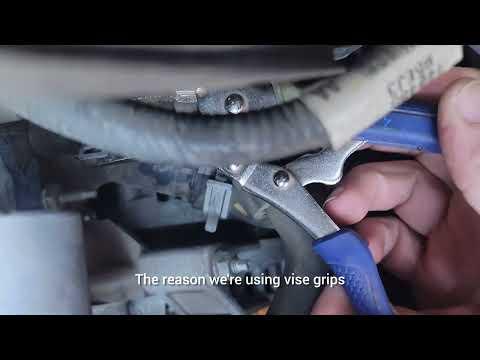
- Use hose clamp pliers to compress the spring hose clamp. A spring clamp is the factory metal clamp that squeezes the hose tight.
- Slide the clamp back on the hose.
- Twist the hose gently by hand to break it loose.
- If stuck, use a pick tool carefully between the hose and fitting to loosen the seal. Do not gouge the plastic fitting.
- Pull the hose off and let remaining coolant drain into the pan.
Step 7: Disconnect the Thermostat Electrical Connector
- If your thermostat assembly has an electrical connector, press the connector lock by hand.
- Use a pick tool gently if the lock tab is hard to release.
- Pull the connector straight off. Do not pull on the wires.
Step 8: Remove the Thermostat Housing
- Use a 10mm socket, 6-inch extension, and 1/4-inch drive ratchet to remove the thermostat housing bolts.
- Support the housing with your hand as the last bolt comes out.
- Pull the thermostat assembly straight away from the engine.
- Expect more coolant to spill. Keep the drain pan 2-gallon minimum underneath.
Step 9: Clean the Sealing Surface
- Use a clean shop towel by hand to wipe the engine sealing surface.
- Use a pick tool only to remove stuck seal pieces, and be gentle.
- Do not scratch the aluminum sealing surface.
- Make sure the old thermostat seal is removed before installing the new part.
Step 10: Install the New Thermostat Assembly
- Install the new thermostat assembly with seal into position by hand.
- Start all bolts by hand first to avoid cross-threading.
- Use a 10mm socket, 6-inch extension, and 1/4-inch drive ratchet to snug the bolts evenly.
- Use an inch-pound torque wrench with the 10mm socket to tighten the thermostat housing bolts to Torque to 10 Nm (89 in-lbs).
- Plastic housings crack if overtightened.
Step 11: Reconnect Hoses and Connector
- Push the coolant hose fully onto the thermostat housing fitting by hand.
- Use hose clamp pliers to move the spring clamp back to its original position.
- Make sure the clamp sits behind the raised bead on the fitting.
- Reconnect the thermostat electrical connector by hand until it clicks.
Step 12: Reinstall Intake Ducting
- Place the intake duct back into position by hand.
- Use an 8mm socket or flat-blade screwdriver to tighten the intake hose clamp until snug.
- Make sure no hoses or wiring are pinched.
Step 13: Refill the Cooling System
- Use a funnel at the coolant reservoir.
- Add engine coolant compatible with Ford orange coolant specification.
- If using concentrate, mix it 50/50 with distilled water before filling.
- Fill the reservoir to the MAX line.
- Leave the reservoir cap off for the initial air bleed.
Step 14: Reconnect the Battery
- Use a 10mm socket and 1/4-inch drive ratchet to reconnect the negative battery cable.
- Tighten the terminal nut snugly. Do not overtighten.
Step 15: Bleed Air from the Cooling System
- Start the engine and let it idle with the reservoir cap off.
- Set the cabin heater to full hot and the fan to low.
- Watch the coolant level in the reservoir. Add coolant with the funnel as the level drops.
- Let the engine warm up until the upper radiator hose becomes hot, which means the thermostat has opened.
- Once bubbles mostly stop and the level stabilizes, install the coolant reservoir cap by hand.
- Check the temperature gauge. Shut the engine off immediately if it begins to overheat.
Step 16: Check for Leaks and Reinstall Splash Shield
- With the engine running, inspect the thermostat housing and hose connections using a flashlight if available.
- If no leaks are found, shut the engine off.
- Use an 8mm socket and 1/4-inch drive ratchet to reinstall the lower splash shield fasteners.
- Use the floor jack rated 2-ton minimum to lift slightly, remove the jack stands rated 2-ton minimum, and lower your Focus carefully.
✅ After Repair
- ✅ Test drive your Focus for 10-15 minutes while watching the temperature gauge.
- ✅ Let the engine cool completely, then recheck the coolant reservoir level and top off to the MAX line if needed.
- ✅ Recheck the thermostat housing, hose ends, and radiator drain area for leaks.
- ✅ If a coolant-temperature fault code was present, it may need to be cleared with a scan tool after repair.
- ✅ Dispose of old coolant at a proper recycling or hazardous-waste facility.
💰 DIY vs Shop Cost
Shop Cost: $300-$550 (parts + labor)
DIY Cost: $60-$160 (parts only)
You Save: $240-$390 by doing it yourself!
Shop labor rates vary but typically run $100-$150/hour. This repair takes a shop approximately 1.5-2.5 hours.
🎯 Ready to get started?
HowToo makes it easy: same-day/2-day shipping on every part, plus all the tools and specialty tools you need! Check out the parts and tools sections below to add everything to your cart.
