

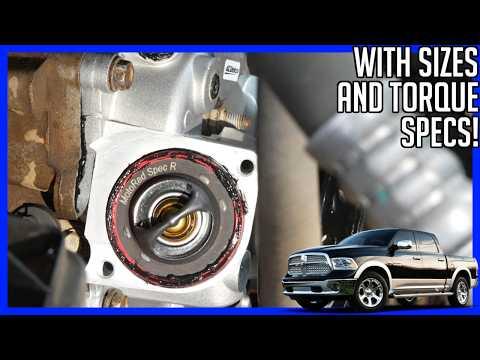





How to Replace the Thermostat on a 2011-2021 Ram 1500 5.7L HEMI (Engine: V8 5.7L)
Step-by-step cooling system guide with tools, parts, torque specs, and safety tips for 2011, 2012, 2013, 2014, 2015, 2016, 2017, 2018, 2019, 2020, 2021
How to Replace the Thermostat on a 2011-2021 Ram 1500 5.7L HEMI (Engine: V8 5.7L)
Step-by-step cooling system guide with tools, parts, torque specs, and safety tips for 2011, 2012, 2013, 2014, 2015, 2016, 2017, 2018, 2019, 2020, 2021


🔧 1500 - Thermostat Replacement
Replacing the thermostat on your 1500 helps restore proper engine temperature control. The thermostat sits at the front of the 5.7L HEMI engine where the upper radiator hose connects to the thermostat housing.
Difficulty Level: Beginner | Estimated Time: 1.5-2.5 hours
⚠️ Safety & Precautions
- ⚠️ Only work on the cooling system when the engine is completely cold. Hot coolant can cause severe burns.
- ⚠️ Do not remove the radiator cap or coolant reservoir cap while the engine is hot.
- ⚠️ Coolant is toxic to pets and people. Catch all drained coolant and clean spills right away.
- ⚠️ Disconnecting the battery is not normally required for this repair, but keep tools away from the positive battery terminal.
- ⚠️ Dispose of old coolant according to local rules in Panipat, Haryana.
🔧 Required Tools
You'll need the following tools for this repair:
- 8mm socket
- 10mm socket
- 13mm socket
- 3/8-inch drive ratchet
- 3/8-inch drive extension 6-inch
- Flat-blade screwdriver 1/4-inch
- Hose clamp pliers
- Torque wrench 3/8-inch drive inch-pound range
- Drain pan 2-gallon minimum
- Funnel long-neck
- Plastic trim clip tool
- Shop towels
- Nitrile gloves
- Safety glasses
🔩 Required Parts
HowToo sells all the parts you need for this repair:
- Engine thermostat - Qty: 1
- Thermostat housing seal - Qty: 1
- Mopar-compatible OAT coolant, 50/50 premixed - Qty: 1-2 gallons
- Distilled water - Qty: 1 gallon
📋 Before You Begin
- Park your 1500 on level ground and let the engine cool fully, preferably overnight.
- Set the parking brake and place the transmission in Park.
- Open the hood and remove the coolant reservoir cap only after the engine is cold.
- Use only OAT coolant compatible with Ram 5.7L cooling systems. Do not mix coolant types.
- A thermostat is a temperature-controlled valve that opens to let coolant flow through the radiator.
- A torque wrench tightens bolts to an exact tightness so small aluminum parts are not damaged.
🔨 Step-by-Step Instructions
Follow these steps in order:
Step 1: Remove the Engine Cover
- Put on safety glasses and nitrile gloves.
- Lift the plastic engine cover straight upward by hand to release it from its rubber mounts.
- Set the cover aside where it will not get stepped on.
- Pull evenly, not sideways.
Step 2: Drain Some Coolant
- Place a drain pan 2-gallon minimum under the radiator drain area.
- Use a flat-blade screwdriver 1/4-inch if needed to open the radiator drain petcock carefully.
- Drain about 1 gallon of coolant, or enough to lower the coolant level below the thermostat housing.
- Close the radiator drain petcock snugly by hand or with the flat-blade screwdriver 1/4-inch. Do not overtighten plastic parts.
Step 3: Locate the Thermostat Housing
- Find the upper radiator hose at the front of the engine.
- Follow the hose to the metal thermostat housing on the front of the 5.7L HEMI engine.
- Use shop towels around the area to catch small coolant spills.
Step 4: Remove the Upper Radiator Hose from the Housing
- Use hose clamp pliers to squeeze the spring clamp on the upper radiator hose.
- Slide the clamp back along the hose.
- Twist the hose gently by hand to break it loose, then pull it off the thermostat housing.
- If stuck, use a plastic trim clip tool to gently work around the hose edge. Do not cut or pry hard on the hose.
- Twist first, then pull.
Step 5: Remove the Thermostat Housing Bolts
- Use a 13mm socket, 3/8-inch drive ratchet, and 3/8-inch drive extension 6-inch to remove the thermostat housing bolts.
- Lift the thermostat housing away from the engine.
- Note the thermostat position before removal. The spring side faces into the engine.
Step 6: Remove the Old Thermostat and Seal
- Pull the old thermostat out by hand.
- Remove the old thermostat housing seal by hand or with the plastic trim clip tool.
- Use shop towels to clean the sealing surfaces on the housing and engine.
- Do not scrape aluminum sealing surfaces with metal tools.
Step 7: Install the New Thermostat
- Install the new engine thermostat with the spring side facing into the engine.
- Install the new thermostat housing seal in the correct groove.
- Make sure the thermostat sits flat and does not pinch the seal.
- A pinched seal will leak.
Step 8: Reinstall the Thermostat Housing
- Set the thermostat housing in place by hand.
- Start both bolts by hand first to avoid cross-threading.
- Use the 13mm socket, 3/8-inch drive ratchet, and 3/8-inch drive extension 6-inch to snug the bolts evenly.
- Use the torque wrench 3/8-inch drive inch-pound range to tighten the housing bolts to Torque to 14 Nm (124 in-lbs).
Step 9: Reconnect the Upper Radiator Hose
- Push the upper radiator hose fully onto the thermostat housing by hand.
- Use hose clamp pliers to move the spring clamp back to its original position.
- Make sure the clamp sits behind the raised lip on the housing.
Step 10: Refill the Cooling System
- Use a funnel long-neck to add Mopar-compatible OAT coolant, 50/50 premixed into the coolant reservoir.
- Fill to the COLD FULL mark on the reservoir.
- If concentrate coolant is used instead of premix, mix it only with distilled water before filling.
- Install the coolant reservoir cap by hand.
Step 11: Bleed Air from the Cooling System
- Start the engine and let it idle with the heater set to full hot and blower on low.
- Watch the temperature gauge. It should rise normally and stay near the middle.
- Let the engine idle until the upper radiator hose gets warm, which means the thermostat has opened.
- Shut the engine off and let it cool completely.
- Use a funnel long-neck to top off the coolant reservoir to the COLD FULL mark if needed.
Step 12: Reinstall the Engine Cover
- Line up the engine cover with its rubber mounting points.
- Press down by hand until it snaps into place.
- Use shop towels to wipe away any spilled coolant.
✅ After Repair
- Check around the thermostat housing and upper radiator hose for leaks while the engine is idling.
- Take a short test drive and watch the temperature gauge closely.
- After the engine cools completely, recheck the coolant level and top off if needed.
- If the temperature rises above normal, stop driving and recheck coolant level, trapped air, or leaks.
- Dispose of old coolant safely. Do not pour it onto the ground or into drains.
💰 DIY vs Shop Cost
Shop Cost: $220-$420 USD equivalent (parts + labor)
DIY Cost: $45-$120 USD equivalent (parts only)
You Save: $175-$300 by doing it yourself!
Shop labor rates vary but typically run $100-$150/hour. This repair takes a shop approximately 1.0-1.5 hours.
🎯 Ready to get started?
HowToo makes it easy: same-day/2-day shipping on every part, plus all the tools and specialty tools you need! Check out the parts and tools sections below to add everything to your cart.