

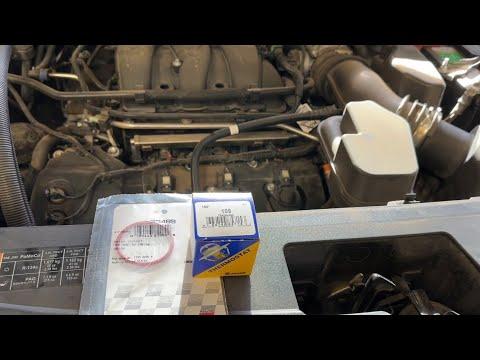






How to Replace the Thermostat on a 2011-2019 Ford Explorer 3.5L V6 (Engine: V6 3.5L)
Step-by-step instructions with required tools, coolant bleeding, torque specs, and safety tips for 2011, 2012, 2013, 2014, 2015, 2016, 2017, 2018, 2019
How to Replace the Thermostat on a 2011-2019 Ford Explorer 3.5L V6 (Engine: V6 3.5L)
Step-by-step instructions with required tools, coolant bleeding, torque specs, and safety tips for 2011, 2012, 2013, 2014, 2015, 2016, 2017, 2018, 2019


🔧 Explorer - Thermostat Replacement
The thermostat controls coolant flow through your Explorer’s engine. Replacement involves draining some coolant, removing the air-intake duct and thermostat housing, then refilling and bleeding the cooling system.
Difficulty Level: Intermediate | Estimated Time: 1.5-2.5 hours
Assumption: These instructions apply to the stock U.S.-market 3.5L naturally aspirated engine.
⚠️ Safety & Precautions
- ⚠️ Work only when the engine is completely cold; hot coolant can cause severe burns.
- 🧤 Wear gloves and safety glasses because coolant is poisonous and irritating.
- 🚫 Never open the coolant reservoir cap while the cooling system is hot or pressurized.
- 🐾 Keep drained coolant away from children and animals; its sweet taste makes it especially dangerous.
- ♻️ Collect and recycle used coolant according to local Haryana disposal requirements.
- 🔋 Battery disconnection is not normally required for this repair.
🔧 Required Tools
You'll need the following tools for this repair:
- 8mm socket
- 10mm socket
- 1/4-inch-drive ratchet
- 1/4-inch-drive 150mm extension
- 7-80 Nm inch-pound torque wrench
- Flat-tip screwdriver
- Hose-clamp pliers
- Plastic gasket scraper
- 90-degree pick
- 10-litre coolant drain pan
- Long-neck coolant funnel
- Clean shop towels
- Nitrile mechanic gloves
- Safety glasses
🔩 Required Parts
HowToo sells all the parts you need for this repair:
- Engine coolant thermostat - Qty: 1
- Thermostat housing O-ring seal - Qty: 1
- Ford-approved premixed engine coolant matching the coolant currently installed - Qty: 4-8 litres
Do not mix coolant colors or chemistries. The original factory fill is typically orange, but use the specification shown on the coolant reservoir or owner’s manual if the system has previously been serviced.
📋 Before You Begin
- 🅿️ Park your Explorer on level ground, shift into Park, engage the parking brake, and let the engine cool completely.
- 🌡️ Verify that the upper radiator hose and coolant reservoir are cold before loosening the cap.
- 📷 Photograph the air duct, electrical connectors, and hose routing before disassembly.
- 🧹 Clean loose dirt from around the thermostat housing so debris cannot enter the cooling system.
- 💧 Have the drain pan positioned before opening any hose or drain fitting.
🔨 Step-by-Step Instructions
Follow these steps in order:
Step 1: Release Cooling-System Pressure
- Put on nitrile mechanic gloves and safety glasses.
- Cover the coolant reservoir cap with a clean shop towel.
- Slowly turn the cap counterclockwise by hand. Stop if you hear pressure escaping, then wait until it stops.
- Remove the cap only after confirming that no pressure remains.
Step 2: Drain Enough Coolant
- Place the 10-litre coolant drain pan beneath the radiator drain area.
- Open the radiator drain valve carefully by hand or with a flat-tip screwdriver, depending on the valve head.
- Drain approximately 4 litres, or until the coolant level is below the thermostat housing.
- Close the drain valve gently by hand. Do not overtighten the plastic valve.
- If the drain valve is inaccessible, place the drain pan beneath the thermostat housing and expect coolant to spill when its hose is removed.
Step 3: Remove the Air-Intake Duct
- Use an 8mm socket and 1/4-inch-drive ratchet to loosen the clamps at the air-cleaner housing and throttle body.
- Release any breather-hose fitting by hand. Press its locking tabs rather than pulling on the hose.
- Lift out the air-intake duct and place it somewhere clean.
- Cover the exposed throttle-body opening with a clean shop towel.
Step 4: Locate the Thermostat Housing
- Follow the large radiator hose toward the engine. It connects to the thermostat housing near the front of the 3.5L engine.
- Use clean shop towels to remove dirt around the housing and hose connection.
- Move nearby wiring retainers aside by hand without pulling on their wires.
Step 5: Disconnect the Coolant Hose
- Position the 10-litre coolant drain pan directly below the housing.
- Use hose-clamp pliers to compress the spring clamp, then slide the clamp several centimetres back along the hose.
- Twist the hose gently by hand to break its seal, then pull it straight off the housing.
- Use a 90-degree pick only between the hose and fitting if the hose is stuck. Do not puncture the hose or pry against a plastic neck.
- Allow the remaining coolant to drain into the pan.
Step 6: Remove the Thermostat Housing
- Use a 10mm socket, 150mm extension, and 1/4-inch-drive ratchet to remove the thermostat housing bolts.
- Note each bolt’s position during removal in case the lengths differ.
- Pull the housing straight away from the engine. Do not force a screwdriver between the sealing surfaces.
- Remove the thermostat and its O-ring seal by hand. Use the 90-degree pick carefully if the seal remains in its groove.
- Observe the old thermostat’s direction before removing it completely.
Step 7: Clean and Inspect the Housing
- Use a plastic gasket scraper and clean shop towels to clean the thermostat sealing surface and O-ring groove.
- Inspect the housing for cracks, distortion, damaged hose fittings, or heavy corrosion.
- Replace the housing before continuing if any damage is present.
- Do not use abrasive discs or metal scrapers because they can damage the sealing surface.
Step 8: Install the New Thermostat
- Compare the new thermostat with the removed thermostat to verify matching diameter and overall shape.
- Install the new thermostat in the same direction as the original, with its spring and temperature-sensing element facing the engine.
- Install the new O-ring seal in its groove. Lightly wet it with fresh approved coolant; do not use petroleum grease or RTV silicone.
- Keep the thermostat and seal fully seated while positioning the housing.
- A twisted O-ring will cause a coolant leak.
Step 9: Reinstall the Thermostat Housing
- Start every housing bolt by hand to prevent cross-threading.
- Use a 10mm socket, 150mm extension, and 1/4-inch-drive ratchet to seat the bolts evenly.
- Use the 7-80 Nm inch-pound torque wrench and 10mm socket to tighten the bolts evenly to 10 Nm (89 in-lbs).
- Do not overtighten the housing bolts; the housing and aluminum threads can be damaged.
Step 10: Reconnect the Coolant Hose
- Push the hose fully onto the thermostat housing by hand until it reaches its original seated position.
- Use hose-clamp pliers to move the spring clamp back over the housing fitting.
- Position the clamp in its original hose marks and confirm it sits squarely.
Step 11: Reinstall the Air-Intake Duct
- Remove the clean shop towel from the throttle body.
- Place the air-intake duct fully over the throttle body and air-cleaner housing connections.
- Reconnect the breather hose by hand until its fitting locks.
- Use an 8mm socket and 1/4-inch-drive ratchet to tighten both duct clamps until snug. Do not crush the plastic duct.
Step 12: Refill the Cooling System
- Insert the long-neck coolant funnel into the coolant reservoir.
- Slowly add Ford-approved premixed coolant matching the existing coolant until the level reaches the cold-fill mark.
- Pause several times so trapped air can rise through the reservoir.
- Check the thermostat housing, radiator drain valve, and hose connection for visible leaks.
Step 13: Bleed Trapped Air
- Leave the coolant reservoir cap off and start the engine.
- Set the cabin heater to maximum heat with a low blower setting.
- Let the engine idle while watching the coolant level and temperature gauge.
- Add premixed coolant with the long-neck funnel as the level drops. Keep the reservoir from running empty.
- Once the upper radiator hose becomes warm and cabin heat remains steady, switch off the engine.
- Allow the engine to cool completely, then adjust the coolant to the cold-fill mark and install the reservoir cap by hand.
✅ After Repair
- 🔍 Run the engine and inspect the thermostat housing, hose, and drain valve for leaks.
- 🌡️ Confirm the temperature gauge rises normally and remains stable.
- 🔥 Verify that the cabin heater produces steady warm air; fluctuating heat can indicate trapped air.
- 🚗 Take a short, gentle drive while monitoring the temperature gauge. Stop immediately if it approaches the hot zone.
- ❄️ Let the engine cool completely, then recheck the reservoir and adjust it to the cold-fill mark with matching premixed coolant.
- 📅 Recheck for leaks and verify the coolant level again after several driving cycles.
- ⚠️ Persistent overheating, bubbling, coolant loss, or no cabin heat requires further cooling-system diagnosis.
💰 DIY vs Shop Cost
Shop Cost: ₹12,000-₹25,000 (parts + labor)
DIY Cost: ₹3,500-₹9,000 (parts and coolant only)
You Save: ₹8,500-₹16,000 by doing it yourself!
Local labor rates vary. This repair takes a shop approximately 1.5-2.0 hours.
🎯 Ready to get started?
HowToo makes it easy: same-day/2-day shipping on every part, plus all the tools and specialty tools you need! Check out the parts and tools sections below to add everything to your cart.