


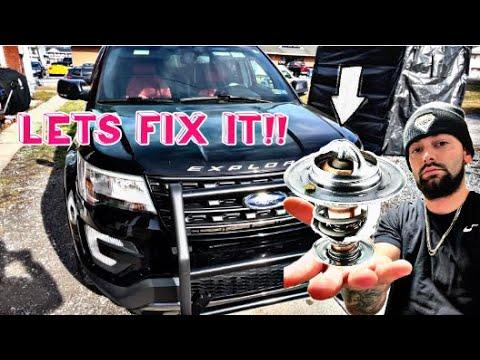





How to Replace the Thermostat on a 2011-2019 Ford Explorer 3.5L EcoBoost (Engine: V6 3.5L)
Step-by-step instructions with required tools, parts, torque specs, coolant bleeding, and safety tips for 2011, 2012, 2013, 2014, 2015, 2016, 2017, 2018, 2019
How to Replace the Thermostat on a 2011-2019 Ford Explorer 3.5L EcoBoost (Engine: V6 3.5L)
Step-by-step instructions with required tools, parts, torque specs, coolant bleeding, and safety tips for 2011, 2012, 2013, 2014, 2015, 2016, 2017, 2018, 2019


🔧 Explorer - Thermostat Replacement
This is an intermediate repair, but it’s manageable if you work slowly. You’ll drain some coolant, remove the intake duct and thermostat housing, install the new thermostat and seals, then refill and bleed the system.
Difficulty Level: Intermediate | Estimated Time: 2-3 hours
Assumption: These instructions apply to the stock 3.5L EcoBoost cooling-system layout.
⚠️ Safety & Precautions
- 🔥 Let the engine become completely cold before opening the coolant reservoir.
- 🧪 Coolant is poisonous. Keep it away from children, animals, drains and soil.
- 🛑 Never work beneath your Explorer unless it’s supported by jack stands.
- 🧤 Wear gloves and safety glasses when disconnecting coolant hoses.
- ⚡ Battery disconnection isn’t normally required, but keep the ignition switched off.
- 🌡️ Don’t continue driving if the temperature gauge rises after this repair.
🔧 Required Tools
You'll need the following tools for this repair:
- 8mm socket
- 10mm socket
- 1/4-inch ratchet
- 3/8-inch ratchet
- 6-inch socket extension
- 10-100 in-lb torque wrench
- Hose-clamp pliers
- Plastic trim tool
- Plastic gasket scraper
- Flat-blade screwdriver
- Coolant funnel
- 10-quart drain pan
- Floor jack rated 2 tons minimum
- Jack stands rated 2 tons minimum
- Wheel chocks
- Safety glasses
- Chemical-resistant gloves
- Shop towels
🔩 Required Parts
HowToo sells all the parts you need for this repair:
- Engine coolant thermostat - Qty: 1
- Thermostat seal or gasket - Qty: 1
- Coolant-outlet O-ring - Qty: 1 if the outlet tube is separated
- Prediluted coolant meeting Ford WSS-M97B44-D2 - Qty: 1-2 gallons
- Thermostat housing - Qty: 1 only if cracked, distorted or leaking
Use the same coolant chemistry already in the system. Ford originally specified orange prediluted coolant meeting WSS-M97B44-D2 for this Explorer. Don’t choose coolant by color alone, because colors aren’t standardized. fordservicecontent.com
📋 Before You Begin
- Park on level ground, apply the parking brake and chock the rear wheels.
- Let the engine sit until the upper radiator hose feels completely cold.
- Switch the climate control and ignition off.
- Photograph the hose and clamp positions before disassembly.
- Check the replacement thermostat against the old one before installing it.
- No infotainment service mode or scan-tool command is required.
🔨 Step-by-Step Instructions
Follow these steps in order:
Step 1: Relieve Cooling-System Pressure
- Place a shop towel over the coolant reservoir cap.
- With the engine completely cold, turn the cap slowly counterclockwise.
- Stop if you hear pressure escaping. Wait until it stops before removing the cap.
Step 2: Raise the Front if More Access Is Needed
- Use the floor jack at an approved front lifting point.
- Lower your Explorer securely onto both jack stands.
- Leave the wheel chocks behind the rear wheels.
- Never rely on the hydraulic jack by itself.
Step 3: Lower the Coolant Level
- Place the 10-quart drain pan beneath the lower radiator area.
- Open the radiator drain if accessible, or use hose-clamp pliers to release the lower-hose clamp.
- Drain enough coolant to lower the level beneath the thermostat housing.
- Close the drain or reconnect the hose before proceeding.
Step 4: Remove the Intake Duct
- Pull the decorative engine cover upward from its mounting points.
- Use the 8mm socket and ratchet to loosen the intake-hose clamps.
- Disconnect any breather connection from the duct by releasing its locking tab.
- Lift the intake duct out of the engine compartment.
- Cover open intake pipes immediately.
Step 5: Expose the Thermostat Housing
- Follow the lower radiator hose to the coolant outlet at the front of the engine.
- Use hose-clamp pliers to compress each spring clamp and slide it backward.
- Twist each hose gently before pulling it from the housing.
- Use a plastic trim tool to release any harness retainers blocking access.
- Catch the remaining coolant in the drain pan.
Step 6: Remove the Thermostat Housing
- Use the 10mm socket, extension and ratchet to loosen the housing bolts evenly.
- Remove the bolts and pull the housing straight away from its connection.
- Don’t pry aggressively against the plastic housing or aluminum sealing surface.
- Inspect the housing for cracks, distorted bolt holes and staining from old leaks.
- Plastic housings dislike heroic wrenching.
Step 7: Remove the Thermostat and Seals
- Photograph the thermostat’s installed direction before removing it.
- Pull the thermostat from its recess by hand.
- Use the plastic gasket scraper to remove the old seal or gasket.
- Remove the outlet-tube O-ring if that tube separated from the housing.
- Clean both sealing surfaces with shop towels. Don’t scratch them.
Step 8: Install the New Thermostat
- Compare the new thermostat’s diameter, depth and temperature marking with the old part.
- Lightly wet the new rubber seal and O-ring with clean coolant.
- Install the thermostat in the same direction as the original.
- Position any bleed hole or jiggle valve at the highest point.
- Seat the seal completely without stretching or twisting it.
- Don’t apply RTV silicone unless the replacement housing instructions specifically require it.
Step 9: Reinstall the Housing
- Position the housing without dislodging or pinching the seal.
- Start every housing bolt several turns by hand.
- Use the 10mm socket and ratchet to snug the bolts evenly.
- Use the in-lb torque wrench and tighten the housing bolts to 10 Nm (89 in-lbs).
- Don’t substitute 89 ft-lbs. That would destroy the housing.
Step 10: Reconnect the Hoses
- Push each hose fully over its housing connection.
- Use hose-clamp pliers to return each clamp to its original position.
- Reconnect every wiring connector and harness retainer removed for access.
- Verify that no hose is twisted, pinched or rubbing a pulley.
Step 11: Reinstall the Intake Duct
- Remove the protective covers from the intake openings.
- Fit the intake duct completely over both connections.
- Reconnect the breather fitting until its lock clicks.
- Use the 8mm socket and ratchet to tighten the intake clamps firmly without crushing the duct.
- Press the engine cover back onto its mounting points.
Step 12: Refill the Cooling System
- Confirm that the radiator drain and lower hose are closed and secure.
- Insert the coolant funnel into the reservoir.
- Add the correct prediluted coolant slowly to the cold-fill mark.
- Pause periodically so trapped air can rise through the reservoir.
Step 13: Bleed Trapped Air
- Start the engine and set the heater to maximum temperature with the fan on low.
- Let the engine idle while watching the coolant level and temperature gauge.
- Add coolant as the level drops, keeping the reservoir from running empty.
- Watch for steady cabin heat and a warming upper radiator hose.
- Install the reservoir cap once the coolant level stabilizes.
- Shut the engine off immediately if the temperature rises abnormally.
✅ After Repair
- 🔍 Inspect the thermostat housing, hose connections and radiator drain for leaks.
- 🌡️ Confirm the temperature gauge reaches normal and remains steady.
- 🔥 Verify that the cabin heater delivers consistent warm air.
- 🚗 Take a short drive while closely monitoring engine temperature.
- ❄️ Let the engine cool completely, then recheck the reservoir level.
- 🧪 Top up only with coolant meeting the same Ford specification.
- 📅 Recheck the housing and coolant level the following day.
💰 DIY vs Shop Cost
Shop Cost: $350-$650 equivalent, parts and labor
DIY Cost: $40-$120 equivalent, parts and coolant
You Save: Approximately $230-$610 by doing it yourself!
Labor rates vary by location. This repair usually takes a shop approximately 1.5-2.5 hours.
🎯 Ready to get started?
HowToo makes it easy: same-day/2-day shipping on every part, plus all the tools and specialty tools you need! Check out the parts and tools sections below to add everything to your cart.
