

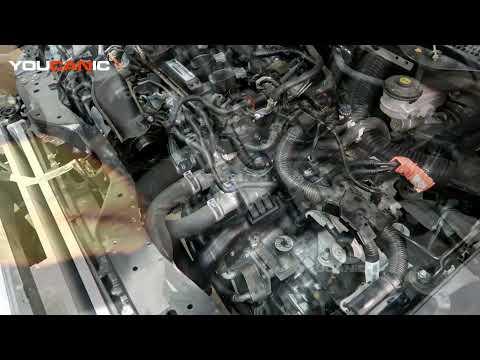





How to Replace the Thermostat on a 1995-2021 Honda Civic 1.5L Turbo (Trim: Si | Engine: Inline 4 1.5L | Body: Sedan)
Step-by-step cooling system repair with required tools, parts, torque specs, and safety tips for 1995
How to Replace the Thermostat on a 1995-2021 Honda Civic 1.5L Turbo (Trim: Si | Engine: Inline 4 1.5L | Body: Sedan)
Step-by-step cooling system repair with required tools, parts, torque specs, and safety tips for 1995


🔧 Civic - Thermostat Replacement
This is an intermediate cooling-system repair. On your Civic, the thermostat sits low on the transmission side of the engine, so removing the air intake duct and battery area creates the working room.
Difficulty Level: Intermediate | Estimated Time: 2-3 hours
Assumption: These steps cover the stock 1.5L turbo cooling system. Confirm the replacement part includes its new rubber seal.
⚠️ Safety & Precautions
- ⚠️ Work only with a completely cold engine. Hot coolant can spray under pressure and cause serious burns.
- 🧤 Coolant is poisonous. Keep it away from children and animals, and collect every spill immediately.
- 🔋 Disconnect the negative battery terminal before removing the battery and battery tray.
- 🚫 Never run the engine without coolant after installation.
- ♻️ Store drained coolant in a sealed container for proper recycling.
🔧 Required Tools
You'll need the following tools for this repair:
- 8mm socket
- 10mm socket
- 12mm socket
- 3/8-inch ratchet
- 3/8-inch extension set
- 3/8-inch torque wrench rated 5-60 Nm
- Phillips number 2 screwdriver
- Flat-blade screwdriver
- Hose-clamp pliers
- Plastic trim-clip tool
- Coolant drain pan rated 10 litres minimum
- Spill-free coolant funnel (specialty)
- Plastic gasket scraper
- Floor jack rated 2-ton minimum
- Jack stands rated 2-ton minimum
- Wheel chocks
- Nitrile gloves
- Safety glasses
🔩 Required Parts
HowToo sells all the parts you need for this repair:
- Engine coolant thermostat - Qty: 1
- Thermostat rubber seal - Qty: 1
- Honda Long Life Antifreeze/Coolant Type 2 or compatible premixed blue coolant - Qty: 4 litres minimum
Use a standard-temperature thermostat unless the Civic has a tune specifically requiring otherwise. The thermostat aisle is already open in the parts sidebar. Buy the seal with the thermostat. A reused flattened seal is a leak waiting for an audience.
📋 Before You Begin
- 🅿️ Park on level ground, select first gear, apply the parking brake, and chock the rear wheels.
- ❄️ Let the engine cool for several hours, preferably overnight.
- 📻 Switching off the ignition and keeping the key away from the car prevents accidental electrical operation.
- 🧴 Use premixed coolant. Do not dilute premixed coolant with tap water.
- 🔍 Photograph hose routing and electrical connectors before disassembly.
🔨 Step-by-Step Instructions
Follow these steps in order:
Step 1: Raise and secure the front
- Place the floor jack rated 2-ton minimum beneath the front center jacking point.
- Raise the Civic and support it at both front pinch welds using the jack stands rated 2-ton minimum.
- Use the plastic trim-clip tool and Phillips number 2 screwdriver to remove enough lower splash-shield fasteners to reach the radiator drain.
Step 2: Drain the coolant
- Put on the safety glasses and nitrile gloves.
- Slowly remove the radiator cap only after confirming the radiator is cold. Honda warns that opening a hot system can release scalding coolant. techinfo.honda.com
- Position the coolant drain pan rated 10 litres minimum under the radiator drain valve.
- Open the plastic drain valve by hand or very gently with the flat-blade screwdriver.
- Drain the coolant until the flow stops, close the valve by hand, and do not overtighten it.
Step 3: Remove the intake assembly
- Use the 8mm socket or Phillips number 2 screwdriver to loosen the intake-hose clamp.
- Release the airbox clips and disconnect any attached breather hose carefully.
- Use the 10mm socket to remove the airbox mounting bolts.
- Lift out the intake duct, airbox lid, filter, and lower airbox as needed for access.
- Cover the open intake tube with a clean lint-free cloth.
Step 4: Remove the battery and tray
- Use the 10mm socket to disconnect the negative battery terminal first.
- Disconnect the positive terminal second and cover it so it cannot touch metal.
- Use the 10mm socket to remove the battery hold-down bracket.
- Lift out the battery while keeping it upright. It is heavier than it looks.
- Use the 10mm socket and extension to remove the battery tray fasteners, then lift out the tray.
Step 5: Expose the thermostat housing
- Follow the lower radiator hose toward the engine. It connects to the thermostat housing low on the transmission side.
- Release any wiring-harness retainers using the plastic trim-clip tool. Do not pull directly on wires.
- Use the hose-clamp pliers to compress the lower hose clamp and slide it back from the housing.
- Twist the hose gently to break it free. Use the flat-blade screwdriver only to lift the hose edge slightly, without gouging the fitting.
- Expect more coolant to drain into the pan.
Step 6: Remove the thermostat housing
- Use the 10mm socket, extension, and ratchet to loosen the thermostat-housing bolts evenly.
- Support the housing while removing the final bolt so it does not drop or strain an attached hose.
- Remove the housing, thermostat, and old rubber seal.
- Note the thermostat's installed direction before removing it. Install the new unit in the same direction.
Step 7: Clean and install the thermostat
- Use the plastic gasket scraper to remove residue from the sealing surfaces.
- Do not use abrasive discs, metal scrapers, or silicone sealant. The thermostat uses a molded rubber seal.
- Lightly wet the new seal with fresh coolant and fit it squarely around the thermostat.
- Seat the thermostat fully in its locating recess. If it has a jiggle valve or bleed pin, position it at the top.
- Install the housing and start every bolt by hand.
- Use the 3/8-inch torque wrench rated 5-60 Nm with the 10mm socket to tighten the small housing bolts evenly to 12 Nm (9 ft-lbs).
- Small bolts need small torque.
Step 8: Reconnect the hose and components
- Push the lower radiator hose completely onto its fitting.
- Use the hose-clamp pliers to return the clamp to its original position behind the fitting ridge.
- Reattach all wiring retainers by hand.
- Install the battery tray using the 10mm socket and tighten its fasteners securely without forcing them.
- Install the battery and hold-down. Reconnect the positive terminal first and negative terminal last using the 10mm socket.
- Reinstall the intake assembly using the 10mm socket, 8mm socket, and Phillips number 2 screwdriver.
- Make sure the intake hose is fully seated and every breather hose is connected.
Step 9: Refill and bleed the cooling system
- Confirm the radiator drain valve is closed.
- Fit the spill-free coolant funnel to the radiator filler neck.
- Slowly add the specified premixed coolant until the radiator and funnel remain full. Honda specifies Long Life Antifreeze/Coolant Type 2 for the Civic. techinfo.honda.com
- Fill the reserve tank to the MAX mark.
- Set the cabin temperature to maximum heat and switch the blower off.
- Start the engine and let it idle with the funnel installed.
- Gently squeeze the upper radiator hose by hand several times as the engine warms. Keep hands and clothing away from fans and belts.
- Add coolant whenever the level drops. Bubbles should gradually stop as trapped air leaves.
- Wait until the radiator fan cycles at least twice and warm air comes steadily from the vents.
- Switch off the engine and let it cool completely.
- Remove the funnel, fill coolant to the base of the filler neck, and install the radiator cap fully.
Step 10: Reinstall the splash shield
- Use the plastic trim-clip tool and Phillips number 2 screwdriver to reinstall the lower shield and all its clips.
- Raise the Civic slightly with the floor jack rated 2-ton minimum, remove the jack stands, and lower it slowly.
✅ After Repair
- 🔍 Inspect the thermostat housing, hose connection, radiator drain, and radiator cap for leaks.
- 🌡️ Watch the temperature gauge during the first drive. Stop immediately if it climbs above normal.
- 🔥 Confirm the heater produces steady hot air. Intermittent heat often means trapped air remains.
- ❄️ Let the engine cool completely, then recheck the radiator and reserve-tank levels.
- 🧪 Recheck the coolant level and inspect for dried blue residue after two or three heat cycles.
- 🚫 Do not continue driving if the engine overheats, the heater suddenly goes cold, or coolant leaks appear.
💰 DIY vs Shop Cost
Shop Cost: ₹10,000-₹22,000 equivalent, depending on local parts access and labor
DIY Cost: ₹2,500-₹8,000 equivalent for the thermostat, seal, and coolant
You Save: Approximately ₹7,500-₹14,000 by doing it yourself!
Labor rates vary widely by region. This repair generally takes a shop approximately 1.5-2.5 hours.
🎯 Ready to get started?
HowToo makes it easy: same-day/2-day shipping on every part, plus all the tools and specialty tools you need! Check out the parts and tools sections below to add everything to your cart.