


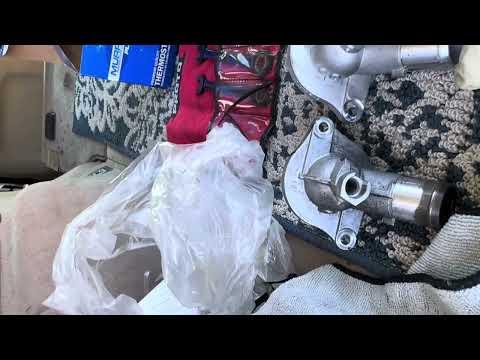





How to Replace the Thermostat Housing on a 2019 Cadillac XT4 (Engine: Inline 4 2.0L)
Advanced step-by-step guide covering tools, parts, coolant service, bleeding, and safety for 2019
How to Replace the Thermostat Housing on a 2019 Cadillac XT4 (Engine: Inline 4 2.0L)
Advanced step-by-step guide covering tools, parts, coolant service, bleeding, and safety for 2019


🔧 XT4 - Thermostat Housing Replacement
This is an advanced DIY repair on your XT4. The thermostat is serviced with its housing, and access requires removing intake plumbing, draining coolant, disconnecting hoses, and moving obstructing components before replacing the assembly.
Difficulty Level: Advanced | Estimated Time: 4-6 hours
Important: Exact fastener locations and torque values must come from current Cadillac service information. Don’t guess on aluminum engine threads.
⚠️ Safety & Precautions
- ⚠️ Work only with the engine completely cold. Hot coolant can cause severe burns.
- 🧤 Wear gloves and safety glasses whenever opening the cooling system.
- 🔋 Disconnect the negative battery cable before unplugging or moving electrical components.
- 🚫 Keep coolant away from children and animals. Its sweet smell makes spills especially dangerous.
- 🛑 Never run the engine if the coolant level drops or the temperature gauge climbs rapidly.
- ♻️ Collect all drained coolant and dispose of it through an approved recycling facility.
🔧 Required Tools
You'll need the following tools for this repair:
- 1/4-inch metric socket set, 7mm-13mm
- 3/8-inch metric socket set, 10mm-18mm
- 1/4-inch drive ratchet
- 3/8-inch drive ratchet
- 3-inch and 6-inch socket extensions
- Metric combination wrench set, 8mm-18mm
- Torx bit socket set, T20-T40
- Inch-pound torque wrench, 20-200 in-lbs
- Foot-pound torque wrench, 10-80 ft-lbs
- Hose-clamp pliers
- 90-degree pick tool
- Plastic trim-removal tool
- Plastic gasket scraper
- Cooling-system vacuum fill tool (specialty)
- Cooling-system pressure tester (specialty)
- Drain pan, 12-quart minimum
- Funnel with spill-free adapter
- Shop light
- Safety glasses
- Nitrile gloves
🔩 Required Parts
HowToo sells all the parts you need for this repair:
- Motorad integrated thermostat housing assembly - Qty: 1
- Thermostat housing seal - Qty: 1, included with the assembly
- GM-approved premixed coolant - Qty: As required
- Replacement hose clamps - Qty: As required after inspection
The Motorad assembly shown in the parts list contains the 182°F thermostat, aluminum housing, and seal. That’s the complete style I’d use rather than trying to service only the internal valve. Nobody wants to perform this job twice over a reused seal.
📋 Before You Begin
- 🅿️ Park your XT4 on level ground, select Park, and engage the parking brake.
- ❄️ Allow the engine to become completely cold, preferably overnight.
- 📸 Photograph every hose, connector, bracket, and wiring-clip location before removal.
- 🏷️ Label disconnected hoses and electrical connectors with masking tape.
- 🔑 Switch the ignition off, remove the key from the vehicle, and wait at least two minutes.
- 🔋 Use a metric wrench to disconnect the negative battery terminal and isolate it from the post.
- 🧼 Clean dirt from around the coolant reservoir cap and thermostat work area.
🔨 Step-by-Step Instructions
Follow these steps in order:
Step 1: Relieve cooling-system pressure
- Confirm the upper radiator hose is cold and soft before touching the reservoir cap.
- Cover the coolant reservoir cap with a thick shop towel.
- Turn the cap slowly by hand and stop if pressure escapes.
- Remove the cap only after all pressure has disappeared.
Step 2: Disconnect the battery
- Use the correctly fitting metric wrench to loosen the negative battery-terminal nut.
- Lift the negative terminal from the post and position it where it cannot spring back.
- Do not disconnect the positive terminal for this repair.
Step 3: Remove the upper engine cover
- Use your hands to lift the engine cover evenly from its rubber mounting points.
- Use a plastic trim-removal tool only if a mounting point needs gentle assistance.
- Check that every rubber grommet remains attached to either the cover or engine.
Step 4: Remove intake components blocking access
- Use the matching socket or screwdriver to loosen the air-intake hose clamps.
- Disconnect the intake sensor connector by releasing its lock before pulling the connector.
- Use hose-clamp pliers to release any small breather-hose clamps.
- Remove the intake duct and air-cleaner components necessary to expose the thermostat housing.
- Cover every open intake connection with a clean lint-free cloth.
- Never pry directly against a plastic connector.
Step 5: Drain the coolant
- Position the 12-quart drain pan beneath the radiator drain area.
- Remove the lower splash shield if needed, using the matching sockets and trim tool.
- Open the radiator drain carefully, or disconnect the lower radiator hose if no serviceable drain is accessible.
- Allow the coolant level to fall below the thermostat housing.
- Close the drain or reconnect the lower hose before continuing.
Step 6: Expose the thermostat housing
- Use the matching sockets to remove brackets or wiring retainers obstructing the housing.
- Move wiring harnesses aside without stretching them or hanging weight from connectors.
- Do not open fuel, air-conditioning, or turbocharger oil lines merely to gain room.
- Stop if the housing cannot be reached without removing a component not covered here. This repair requires the Cadillac service sequence at that point.
Step 7: Disconnect the thermostat hoses
- Place the drain pan directly beneath the housing.
- Use hose-clamp pliers to compress each spring clamp and slide it away from the hose end.
- Twist each hose gently by hand to break its seal before pulling it free.
- Use a 90-degree pick only between the hose and fitting, taking care not to puncture the hose.
- Plug or elevate the hoses to reduce coolant loss.
Step 8: Remove the old thermostat housing
- Disconnect any attached electrical connector by releasing its secondary lock first.
- Use the exact-fitting metric socket to loosen the housing bolts evenly.
- Record each bolt’s original position because lengths may differ.
- Remove the housing straight away from its mounting surface.
- Keep coolant out of exposed electrical connectors and intake openings.
Step 9: Clean and inspect the mounting surface
- Use a plastic gasket scraper to remove seal residue without gouging the aluminum.
- Wipe the surface with a lint-free cloth until it is clean and dry.
- Inspect the surrounding plastic fittings and hoses for cracks, swelling, or hardened ends.
- Do not use a powered abrasive disc. It can remove aluminum and contaminate the cooling system.
Step 10: Install the new thermostat housing
- Confirm the new housing matches the old housing’s ports, mounting ears, and connector arrangement.
- Install the supplied seal in its correct groove. Do not add RTV unless Cadillac specifically calls for it.
- Position the housing squarely and start every bolt by hand.
- Use a ratchet to bring the bolts down evenly, without fully tightening one bolt first.
- Use an inch-pound torque wrench and tighten to the current Cadillac service-manual specification.
- Do not substitute a generic torque value. These bolts thread into aluminum and are easy to strip.
Step 11: Reconnect hoses and wiring
- Push each hose fully over its fitting until it reaches its original seated position.
- Use hose-clamp pliers to return every spring clamp to its original location.
- Reconnect the thermostat electrical connector until its lock clicks.
- Reinstall all wiring retainers and brackets with the appropriate socket.
- Tighten bracket fasteners to the current Cadillac service-manual specification.
Step 12: Reinstall the intake system
- Remove the protective cloths from all intake openings.
- Install the air-cleaner and intake ducting in their original positions.
- Reconnect the intake sensor and breather hoses.
- Use the matching socket or screwdriver to tighten the intake clamps snugly.
- Check that no intake tube is folded, loose, or trapped beneath another component.
Step 13: Refill the cooling system
- Use a cooling-system vacuum fill tool if available. It pulls air from the system before drawing coolant in.
- Fill only with the GM-approved coolant type already used in the system.
- Do not mix unidentified coolant colors or chemistries.
- If filling conventionally, add premixed coolant slowly through a spill-free funnel.
- Squeeze accessible upper hoses gently by hand to help trapped air move toward the reservoir.
Step 14: Reconnect the battery
- Place the negative battery terminal fully onto its post.
- Use the metric wrench to tighten the terminal securely without crushing or twisting it.
- Install the engine cover by aligning its mounts and pressing downward evenly.
Step 15: Bleed and inspect the system
- Start the engine with the climate control set to maximum heat and a low blower speed.
- Watch the coolant level, temperature gauge, thermostat housing, and hose connections continuously.
- Add premixed coolant only when safe and necessary.
- Install the reservoir cap once the level stabilizes and the system begins warming normally.
- Shut the engine off immediately if temperature rises rapidly, coolant surges out, or the heater remains cold.
✅ After Repair
- 🔍 Use a cooling-system pressure tester on the cold engine and inspect every disturbed joint for leakage.
- 🌡️ Let the engine reach normal operating temperature while watching the temperature gauge.
- 🔥 Confirm the cabin heater delivers steady warm air. Intermittent heat often indicates trapped air.
- 🌀 Confirm the radiator fan cycles normally and no overheating warning appears.
- 🧾 Scan for trouble codes if the check-engine light remains on after the repair.
- ❄️ After complete overnight cooling, recheck the reservoir and adjust it to the cold-level mark.
- 🛣️ Take a short local test drive, then inspect the housing and hose connections again.
💰 DIY vs Shop Cost
Shop Cost: $650-$1,100 equivalent, depending on local labor and coolant charges
DIY Cost: $80-$180 equivalent for the housing, coolant, and consumables
You Save: Approximately $470-$920 by doing it yourself!
Labor rates vary considerably by location. This repair generally occupies a professional technician for approximately 3-5 hours.
🎯 Ready to get started?
HowToo makes it easy: same-day/2-day shipping on every part, plus all the tools and specialty tools you need! Check out the parts and tools sections below to add everything to your cart.
