

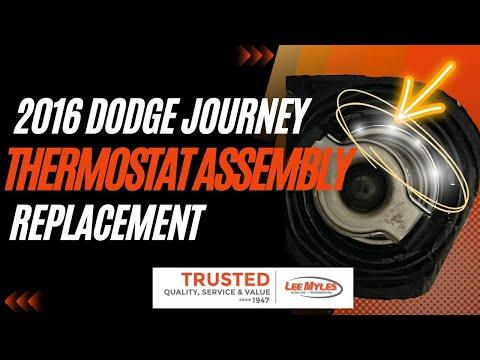







How to Replace the Thermostat Housing on a 2016 Dodge Journey
Step-by-step thermostat replacement with tools/parts list, coolant fill & bleed steps, and torque specs for 2009, 2010, 2011, 2012, 2013, 2014, 2015, 2016, 2017, 2018, 2019, 2020
How to Replace the Thermostat Housing on a 2016 Dodge Journey
Step-by-step thermostat replacement with tools/parts list, coolant fill & bleed steps, and torque specs for 2009, 2010, 2011, 2012, 2013, 2014, 2015, 2016, 2017, 2018, 2019, 2020


🔧 Journey - Thermostat Replacement
The thermostat controls coolant flow to keep your engine at the correct temperature. If it sticks closed you can overheat; if it sticks open the engine may run cold and set a check-engine light. On your Journey, the thermostat is part of a housing at the engine-side end of the lower radiator hose.
Difficulty Level: Intermediate | Estimated Time: 1.5-3.0 hours
Assumption: Thermostat is serviced as a thermostat housing assembly (common on the 2.4L).
⚠️ Safety & Precautions
- ⚠️ Never open the coolant cap on a hot engine; wait until fully cool.
- ⚠️ Coolant is toxic—keep it off skin/eyes and away from pets.
- ⚠️ Electric cooling fans can turn on by themselves; keep hands/tools clear.
- ⚠️ Support the vehicle with jack stands if you lift it—never rely on a jack.
- 🔋 Battery disconnect is not required, but it’s OK to disconnect the negative cable if you want extra safety around the fans.
🔧 Required Tools
You'll need the following tools for this repair:
- Safety glasses
- Nitrile gloves
- Wheel chocks
- Floor jack (rated 3-ton minimum)
- Jack stands (rated 3-ton minimum)
- Drain pan (at least 10-quart)
- Funnel
- Spill-free funnel kit (specialty)
- Shop rags
- 8mm socket
- 10mm socket
- 1/4" drive ratchet
- 3" and 6" 1/4" drive extensions
- Hose clamp pliers (specialty)
- Trim clip remover
- Torque wrench (inch-pound)
🔩 Required Parts
HowToo sells all the parts you need for this repair:
- Thermostat housing assembly (with thermostat) - Qty: 1
- Thermostat housing gasket / O-ring - Qty: 1
- Engine coolant (Mopar OAT 50/50 premix, purple) - Qty: 1-2 gallons
- Hose clamp (lower radiator hose) - Qty: 1 (replace if weak/damaged)
📋 Before You Begin
- Park on level ground, set the parking brake, and chock the rear wheels.
- Let the engine cool completely (radiator hose should feel cool).
- Set your heater to full HOT later during bleeding (this helps move coolant through the heater core).
- Place a drain pan under the radiator area before you open anything.
🔨 Step-by-Step Instructions
Follow these steps in order:
Step 1: Relieve pressure safely
- Put on safety glasses and nitrile gloves.
- Slowly loosen the coolant reservoir cap by hand to release any leftover pressure, then remove it.
Step 2: Raise the front (if you need more access)
- Place wheel chocks behind the rear tires.
- Use a floor jack (rated 3-ton minimum) to lift the front at the proper jacking point.
- Set the vehicle down onto jack stands (rated 3-ton minimum).
Step 3: Drain enough coolant to get below thermostat level
- Position a drain pan (at least 10-quart) under the radiator drain area.
- If equipped with an access shield, remove fasteners using a trim clip remover and/or 10mm socket.
- Drain coolant from the radiator drain cock (if accessible). If the drain cock isn’t accessible, you can drain by carefully removing the lower radiator hose in Step 5 (expect a faster gush).
Step 4: Locate the thermostat housing
- Follow the lower radiator hose to the engine. The hose connects to the thermostat housing.
- Use a shop rag to wipe the area clean so dirt can’t fall into the opening.
Step 5: Remove the lower radiator hose from the thermostat housing
- Use hose clamp pliers (specialty) (they lock onto spring clamps) to compress the clamp and slide it back on the hose.
- Twist the hose by hand to break it loose, then pull it off the housing.
- Let coolant drain into the drain pan.
- Tip: Twisting first prevents tearing the hose.
Step 6: Remove the thermostat housing
- Remove any obstructing components as needed using a 10mm socket and 1/4" drive ratchet.
- Remove thermostat housing bolts using an 8mm socket (some fasteners may be 10mm depending on housing design).
- Pull the thermostat housing straight off and keep the opening facing up to reduce spills.
Step 7: Clean the sealing surfaces
- Remove the old gasket / O-ring.
- Use a shop rag to clean the mating surfaces until dry and smooth.
- Do not gouge the aluminum surface.
Step 8: Install the new thermostat housing
- Install the new gasket / O-ring onto the new housing (make sure it sits flat and is not twisted).
- Position the new thermostat housing and start all bolts by hand to avoid cross-threading.
- Tighten bolts evenly using an 8mm socket and 1/4" drive ratchet.
- Final-tighten using a torque wrench (inch-pound): Torque to 12 N·m (106 in-lbs).
Step 9: Reinstall the lower radiator hose
- Slide the hose fully onto the thermostat housing.
- Use hose clamp pliers (specialty) to move the clamp back into its original position.
- If the clamp feels weak or won’t hold tension, replace it.
Step 10: Refill coolant and bleed air
- Install a spill-free funnel kit (specialty) onto the coolant reservoir opening, then add Mopar OAT 50/50 premix using a funnel as needed.
- Start the engine and set the HVAC to full HOT.
- Let the engine idle until it reaches normal operating temperature. Watch for heat from the vents.
- As the thermostat opens, the coolant level may drop—add coolant as needed.
- Gently squeeze the upper radiator hose a few times to help push trapped air out (use nitrile gloves).
- Once bubbles stop and heat is steady, shut the engine off and let it cool completely, then top off to the FULL COLD mark.
Step 11: Reinstall shields and lower the vehicle
- Reinstall any shields using a trim clip remover and 10mm socket.
- Raise slightly with the floor jack, remove jack stands, then lower the vehicle.
✅ After Repair
- Start the engine and check carefully for leaks around the thermostat housing and the lower hose connection.
- Confirm the heater blows hot and the temperature gauge stays normal.
- After your first drive and a full cool-down, recheck the coolant level and top off to FULL COLD.
- If the check-engine light was on, it may take a few drive cycles to clear; a scan tool can clear codes immediately.
💰 DIY vs Shop Cost
Shop Cost: $350-$650 (parts + labor)
DIY Cost: $60-$140 (parts only)
You Save: $210-$590 by doing it yourself!
Shop labor rates vary but typically run $100-$150/hour. This repair takes a shop approximately 1.5-3.0 hours.
🎯 Ready to get started?
HowToo makes it easy: same-day/2-day shipping on every part, plus all the tools and specialty tools you need! Check out the parts and tools sections below to add everything to your cart.